HANDCRAFTED HISTORY


5 Comments

Houppelande tutorial -part 1

Since I made my first houppelande (late medieval overdress) some years ago, I have been thinking about putting together a tutorial for you, to make it easier to understand the construction techniques behind the dress.

As it turned out, the houppelande dress is a bigger project than I thought at the beginning, so I’m doing the tutorials in different parts so it will be easier for you to find the model you are most interested in, and to get a nice overview of the whole dress style.

I start with my first woollen houppelande:

028.jpg

This was somewhat of an experiment trying out both pattern and what it would look like finished. I could not find my original sketch for the pattern layout, but it did look something like this:

20170912_111048

Some notes; this type of pattern layout work well in a tabby weave since it doesn’t matter if you turn your front and back pieces, but you can also use an even sided twill like I did. If doing this type of pattern on a patterned fabric, you can have the pattern one way on the front pieces and the opposite on the back pieces, which work really well I think, if you want to save on the fabric.

The amount of fabric needed for this layout, in size small, is 150 cm * 280 cm (I used 3 meters of fabric, so I had a slightly larger hem.

F=front, B=back and FM= front middle gore. S1 and S2 are the sleeves. I always recommend drawing out your pattern before you do it on your fabric, it gives you the opportunity to see if all the pieces have room and if you can add some extra circumference to the skirt. I also use to draw out how the garment will look finished, to give you an extra idea of the result. The small cut out pattern piece I use to draw the pieces faster by drawing around it on the paper.

medeltid 004

This is what it looked like once I had cut out all the pieces. After cutting, baste your pieces together to try them on, or sew them at once. I used running stitches and back stitches for parts where there was more stress on the seams (like around the body, the armholes, and the top of the front gore). I also pressed the seam allowances down and whip stitched them. You can of course sew your dress on a sewing machine if you would like, just be sure to pin or baste the skirt lengths first so they don’t stretch uneven.

DSCN0462

Always pin or baste your pieces together when they lay flat on a surface. After this is done, you can have the garment in your knee, sitting comfy on the sofa and sewing without having the seams getting all uneven. I started with the front gore, then sew the front and back pieces together. The sleeves were made after the “fitted sleeve” tutorial.

The hem is folded twice and whip stitched down, and the sleeves and front opening is lined with soft, cut sheepskin in a matching colour.

The dress is sold since some time back, and I moved on to make another kind of pattern construction (as I usually do). I liked this one because of its simplicity, it was very comfortable and not bulky around the upper body. Another pro was that it didn’t take a lot of fabric to make it. I really liked the fluffy lining since it gave a lot of extra warmth.

054a67573f8869e90732b57deb3ee42d

The style is somewhat unusual in art but can be seen at the start of the houppelande period in some regions, though with a tighter upper body, the sleeves were full length and often somewhat tighter. For paintings and art inspiration, check out my Pinterest board about Houppelande dresses

What I didn’t like was that I dragged the hem of the dress after me everywhere, without getting the comfort of a warm and thick enough fabric to protect me from rain and chilly winds. So the next one became a bit sturdier in fabric, and with more fabric…


1 Comment

Some of the clothes I’ve made this year

Sometimes I get the feeling that I never get anything done, or that I haven’t made a piece for sale in like, forever. So I made a list of some of the things I have done this year, both for customers and for myself and love, and then I felt that yes- maybe I have been quite productive after all!

In the beginning of the year, I think I accidentally started this Herjolfnes recreation, all hand stitched.

I made our wedding outfits for our Midsummer wedding:


Supporting linen dress, white silk dress, velvet over dress, purse, belts and for love; silk shirt, silk brocade doublet and under west, woolen hose, bag and belt. Also, I remember sewing some tunics and dresses for our families for the wedding.

Did I sew this houppelande also, or did I finish it the year before? It is also all hand stitched, on wool, silk and rabbit fur.

During autumn, I apparently needed to redo my apron dress, make a whole new viking coat by hand and put it all together to a new outfit, along with some tablet woven bands.

   Also, some commissions took place, like this coat…

… as well as a number of hoods, shirts and tunics (here’s some of them along with the silk cotehardie)

I also remember some viking hedeby trousers (baggy pants)- four of them i think.

InstagramCapture_38ac78d7-caef-4b53-b49a-c493692d90f5

As well as some hand sewn viking clothing…

20171120_104600

I updated my shop and market stall during the spring with cloths, small flags and my own logo hand painted on a linen fabric.

  Made a whole bunch of veils in linen and thin wool for different outfits;

I studied 16th century tailoring manuscripts and sewed two jackets for women, in wool fabric (one for my friend Linnea and one for myself)

Oh, and rosaries were totally a thing- I have read a lot about them, made a whole bunch of drawings, some pieces for sale and a folder about how to do them yourself, as well as holding some workshop on the subject.

This is far from everything I have made, and some pieces have not even made it to being properly photographed though I have been wearing them on several occasions.  Also, quite a few items and commissions also are just on fb or my Instagram accounts, otherwise this post would be far to long.

All in all, I think I have; 1. made quite some things and 2. need to be even better at documenting them and writing about them here on the blog.


Leave a comment

Lästips; handbok i 1400talsdräkt för män

Because the book is in Swedish; so will this blogpost be. It is about a new book about the late 15th century clothing for men.

Jag fick hem en helt ny bok, skriven på svenska, som handlar om den sena 1400talsdräkten för män. Det är så fantastiskt roligt att en sådan här bok görs, på svenska, av skickliga medeltidsmänniskor, med syfte att underlätta för andra att förstå och skapa 1400tal. Förutom att det är en lätt väg till kunskap så är det också ett tecken i tiden på att medeltida återskapande av olika slag blir större och större i Sverige!

Boken har en lättöverskådlig layout, enkel och tydlig text, och stycken som efter en snabb genomgång ger dig koll på dräkten. Det är den typen av bok jag skulle börja med att skaffa om jag ville göra 1400tal, eller ge till en nybörjare som vet *ingenting* men gärna vill vara med. Jag gillar att den tar upp en historisk överblick och talar om formspråk, för att därefter ge förslag på plagg som tillhör perioden. Det finns inga mönster eller steg för steg instruktioner för plaggen, sådana finns istället att köpa via reconstructing history eller görs själv med hjälp av en mönsterkonstruktionskurs eller Tailors assistant. Är du en sådan som vill forska vidare själv, så gräver du i referenslistorna som innehåller både bilder och litteratur. Det är helt enkelt en handbok riktad till återskapare som vill börja med perioden- så himla smart och häftigt!

Anna, som är en av två författare, har jag träffat flera gånger på event och hon är en skicklig hantverkare och återskapare, som också bloggar om mycket 1400tal (Willhelm känner jag inte än, men ring mig så tar vi en fika och nördar 1400tal!) Boken innehåller, förutom referenslistor, också massor av bilder från perioden. Bredvid varje avsnitt om plagg/material osv hittar du alltså både historiska referenser, bilder, skisser och materialförslag från ett modernt perspektiv. Mycket bekvämt med andra ord, eftersom mycket arbete som du behöver för att kunna återskapa dräkt redan är gjort i boken.

Rikard och Helena från Handelsgillet är också delägare i Chronocopia som ger ut boken, och arbetar (förutom att sälja material och produkter) med att sprida kunskap om återskapande. I boken finns det en del produkter från deras shop, vilket kanske kan ses som reklam- eller ett praktiskt sätt att få tag på bra material att fota för att belysa tygfärger, material och vad man kan hitta för att praktiskt återskapa perioden. Jag tycker att det är ett bra initiativ, jag vet att de gör mycket efterforskningar kring färger och val av material de köper in för att allt ska vara historiskt, och här är deras shop Handelsgillet för dig som vill hitta material från boken (den tunna kyperten som syns har jag använt till flera av mina dräkter).

Nästa bok behandlar kvinnodräkten- gissa vem som ska klicka hem den också…


2 Comments

Hur du använder ett modernt mönster

This post is in Swedish, since I made a sketch for it really long ago, but never came around to finish it. It is about how to use modern patterns in an easy way, and some good (swedish) clothing patterns that I like.

Har du precis köpt ett fint nytt mönster, kommer hem, packar upp det och inser att du nog är världens mest ointelligenta person? Jag tror vi alla varit där, men att tyda köpesmönster så som Burda behöver inte vara omöjligt svårt.

Tips:

  1. Bestäm dig för vilken modell du vill göra och vilken storlek du har. Kontrollmät på din egen kropp och anteckna om dina mått inte verkar stämma med mönstrets (mönstret är trots allt bara gjort för en modellkropp och sen beräknad i olika storlekar).
  2. Du får klippa, rita och kludda på ditt mönster. Jag lovar! Klipp ut de instruktioner du vill ha (om möjligt) så slipper du råka läsa spanska tips mitt i allt… Tejpa ihop viktiga texter med varandra. Markera med en penna de ord och ställen som du tror är viktiga.

  1. Inte allt på en gång. Mystiska teckningar och instruktioner du inte förstår? Det är inte meningen att du ska förstå allt på en gång! Börja från steg ett och arbeta dig igenom beskrivningen så kommer det vara mer logiskt när du kommer fram till punkten och har ditt arbete i handen.
  2. Fuska. Inte sugen på att lära dig sy passpoalfickor just nu? Hoppa över dem då och sy det du är sugen på. Personlig design kallas det att göra mönsterändringar.
  3. Mönsterpappret från helvetet. Sömnadsindustrin vill gärna att det ska vara så svårt som möjligt att sy, eller så är alla mönsterutvecklare snåla- jag vet inte. Grejjen är att mönsterarken är gjorda i världens tunnaste skräpkvalité, och om du frågar på tygaffären så kommer de sälja dig en rulle mönsterpapper i samma tunna skräpkvalité. Gå inte på det! Köp istället byggplast, sådant som du har för att skydda golvet när du målar väggar, eller köp non-woven mönsterpapper som är lite mer som ett tunt tyg i kvalitén. Bägge är genomskinliga, går bra att rita på men går inte sönder lika lätt som vanligt mönsterpapper. Nu kan du rita av alla delar du behöver på bättre material, och skratta medan du gör det.
  4. Svårt att veta vilken linje du ska följa? Fram med en markeringspenna igen! En glad röd linje längs med alla rätta linjer i din storlek på originalmönsterarket kan verka tråkigt att göra, men gör det så himla mycket lättare att rita av bitarna sedan. Lätt är rätt.

Sist men inte minst; välj vilka märken du köper dina mönster ifrån. Vissa märken kan vara svårare att förstå än andra, och vara gjorda med olika standardmått (ja, det finns olika) beroende på var de är producerade. Ett av mina favoritmärken är Svenska Mönster, vars ägare Stina jag träffade på en Symässa. Svenska Mönster har storlekar anpassade efter svensk (europeisk) standard, lätta mönster och beskrivningar på svenska som är enkla att följa. Men framför allt är grundaren en sån himla cool kvinna som gör allt själv, driver sitt företag på svensk mark och är både kunnig och trevlig. Jag rekommenderar!

I bilderna ovan har jag använt ett mönster från Burda som exempel, de är internationella men har svenska översättningar på sina mönster, och ett enormt utbud. Det finns också många små mönsterutvecklare som säljer via internetbutiker på tex Etsy, och där kan du hitta formgivare och designers som utgår från speciella mått, kroppsformer, stilar, nivåer på sömnadskunskaper… Allt du kan tänka dig, och sjukt mycket mer.

Spara

Spara

Spara


2 Comments

Träffa min vän Linnea!

Det här inlägget är en gästpost, skriven av min vän Linnea. Hon har återskapat trossfraus/kvinnor i landsknektsarmén från 1500talets Tyskland i nästan tio års tid. Hon berättar om sin dräktresa, saker hon lärt sig, och vackra dräkter hon sytt. Läs och inspireras! (fotografer är angivna där Linnea har haft namn på dem/tillhör mig.)

This is a guest post by my friend Linnea. Since she chosed to write in Swedish, I will publish it accordingly- but use google translate to read about her journey as a handcrafter and 16th century camp follower from the German areas. She presents her different outfits and things she has learned along the way!

Linnea:

Jag gick med i SCA, Styringheim på Gotland, 2008. Det var en kompis som sydde min första klänning, tidigt 1400-tal, i ett tjock mörkblått ylle med en ljusare blå underklänning i linne. Den ligger undanlagd i gömmorna sedan länge. Kanske använde jag den bara vid två eller tre event. Redan på mitt första event fick jag syn på en klänning som skulle sätta så djupa spår i mig att jag för tio år framöver inte skulle ha några andra stilar. Det var en klänning som tillhörde Jovi, som skulle komma att bli en av mina vänner, och hörde hemma i det tyska 1500-talet. 2009 gick jag med i landsknektsföreningen Proknekt och var under två år föreningens ordförande.

Efter den första egensydda dräkten har det blivit betydligt fler och i dagsläget har jag sytt 10 klänningar i samma stil. Det har varit min egen utveckling, en strävan efter att hela tiden förbättra kläderna, utan att för delen ha en önskan om att forska djupare. I början var klänningarna inspirerade av andra klänningar jag sett och med tiden har jag för varje klänning gjort en förbättring. Jag anser att alla måste lägga sig på en nivå som känns bekväm, vi har alla varit nya och måste få ha rätten att börja någonstans. Det här är min klädresa.

Första klänningen syddes i ett tungt mörkblått, nästan svart, ylletyg med orangea detaljer. Den är sydd på maskin och eftersom jag tröttnade på att sy i det alldeles för tjocka yllet, är slitsarna till viss del limmade. Kjolen består av två raka stycken, vidden blev 3 meter. Klänningen har synlig snörning, något jag förstått senare inte är historiskt riktigt. Men så stolt jag var första gången jag hade klänningen på mig! Om jag inte minns fel så var det på Knäckekriget 2009. Skjortan är sydd för hand med en smockad kant. Kanten fick inget stöd och viker därför ner sig på ett mindre smickrande sätt.

Andra klänningen syddes i ett något tunnare mörkgrönt ylle med mörkblå detaljer. Klänningen är helt handsydd. Ärmarna var löstagbara och med en kant som gick att vika upp. Kjolen består av två raka stycken, vidden är 3 meter. Här hade jag gjort en ny underkjol i blekt linne. Den här klänningen var färdig 2010, och jag gjorde samtidigt en ny smockad skjorta.

När jag sydde klänning nummer tre valde jag ett tunnare ylle än för klänning nummer två. Det är fortfarande mörka färger som gäller, blå med röda detaljer. Klänningen består egentligen av kjol och jacka. Ärmarna är fastsydda och har en kant som går att vika upp. Slitsarna är alla sydda för hand, liksom klänningen i övrigt. Kjolen består av två raka stycken, vidden är 3 meter. Den här gången hade jag lyckats få en bättre form på ringningen både på fram- och baksidan, mer fyrkantig i likhet med originalen. Den här klänningen var också färdig till 2010. Här är också första gången som jag har korrekta skor, så kallade oxmular, till kläderna istället för ett par vikingaskor. Delarna syddes ihop till en klänning 2017 för att sen säljas. (Fotograf Ulf Ekberg)

Klänning nummer fyra syddes i ett tunt kostymylle som jag fick billigt. På grund av att kostymyllet var så tunt blev det detaljer i ett brunt syntettyg för att matcha. Men den är helt handsydd. Ärmarna är avtagbara. Kjolen består av två raka stycken, vidden är 3 meter. Klänningen saknar slitsar, något som jag alltid varit mycket sparsam med. Överlag tycker jag att många återskapade klänningar har för många slitsar om man jämför med originalen. Klänningen var klar till Peter und Paul festival i Bretten 2011.

Klänning nummer fem är sydd av ett petroleumblått ylletyg som jag hittade på en militärloppis i Tallin, och svarta detaljer. Ett helt suveränt tyg men kanske inte 100 % ylle. Det regnade under en eldshow på Medeltidsveckan för ett par år sen och regnet bara rann av istället för igenom. Den är handsydd och jag har dagen till ära sytt en ny hatt, i orange ylle. Ringningen är också fyrkantig i likhet med originalen, något jag inte alltid fått till. Kjolen består av två raka stycken, vidden är 3 meter. Klänningen var klar till Medeltidsdagarna på Hägnan 2012. (Fotograf Kim F Rehnman)

Klänning nummer sex var en klänning i linne att fäktas i. Slitsarna är alla nedsydda för hand men i övrigt är klänningen sydd på maskin. Kjolen består av två raka stycken, vidden blev 3 meter. Den var klar till 20th Anniversary of Drachenwald på Ludwigstein Castle 2013.

Klänning nummer sju är sydd i Historiska rums ylleflanell, ett tyg som är tunt och svalt samtidigt som det ganska fort får en lite sliten patina. Den är handsydd, vilket inte var helt kul med tanke på att det är 12 meter handsömnad i varje rand i kjolen… Snörningen är gjord med korsettband, ett mycket bekvämt fusk. Ärmarna är löstagbara med slitsade överärmar. Kjolen består av två raka stycken, vidden är 3 meter. Jag lämnade här min trygghetszon med annars så mörka färger för en ljusare blå. Underkjolen är av oblekt linne. Klänningen var klar till medeltidsveckan på Gotland 2014 och såldes vidare 2017. (Fotograf Bella Ekström)

Till 2017 syddes en underklänning i Medeltidsmodes råväv. De skjortor jag haft under klänningarna har inte varit helt korrekta. Det ska, enligt mina vänner som lägger mer tid på forskning än vad jag gör, vara en underklänning mellan skjorta och överklänning. Det blir varmt och därför har jag den sällan, men här, vid matlagningen på Landsknecht Hurra i Tyskland, passade den ypperligt. Den är handsydd efter samma mönster som mina överklänningar men utan dekorationer. Snörningen är synlig med handsydda snörhål. (Fotograf Torbjörn Walberg)

Klänning nummer nio är sydd i brunt engelskt kläde från Historiska rum med krappröda detaljer. Kjolen är sydd i våder vilket ger 5 meter i nederkant. Inga slitsar här heller, bara dekorbanden. Den här klänningen sitter ihop med hyskor istället för snörning, väldigt bekvämt! Jag har gått från starka färger till en mer nedtonad färgskala, beige och krappröd, något jag föreställer mig är lämpligt för en mindre bemedlad kvinna i trossen. På bilden har jag också en jacka i rött ylletyg med oblekt linnefoder. Jag har också sytt små tossor i linne som skyddar strumporna i stil med tossorna som återfinns på träsnitten. Under överklänningen har jag underklänningen som syns tydligare på bilden ovan. Alltsammans blev klart till Landsknecht Hurra i Tyskland 2017.

Klänning nummer tio syddes också under 2017 och var klar till Medeltidsveckan på Gotland. Det här är den första klänning jag syr efter ett specifikt träsnitt. Den är sydd i ylleflanell från Historiska rum, i bärnsten och krapprött. Kjolen är sydd med våder vilket ger en vidd på över 5 meter. Den stängs med hyskor. Nedre delen av ärmarna är lösa i enlighet med träsnittet. Jag slyngade snörena med slynggaffel. Det var ett test från min sida, jag har hört att det kanske var vanligare med fingerflätade snören. På bilden har jag också en ny hatt, en ny huvudduk i ylle och nytt smockat förkläde. Strumporna är från Kapitelhusgården och väskan från Craft Hive. Banden på kjolen finns inte på träsnittet, jag tyckte det blev snyggare med band än utan. Klänningen ska egentligen också vara rosa med röda detaljer. Men trots att jag har gått från mörka till ljusa färger ligger rosa utanför min gräns… (Fotograf Erika Hernlund)

Blev du inspirerad? Under min sida “tutorials” kan du lära dig att göra en knekthatt, eller spana in högerspalten och klicka på Lansknecht & Trossfraus för att läsa mer om knekt och trossfraudräkter, hur du gör egna och var det finns inspiration. Jag har också länkat till föreningarna som Linnea pratar om, och till de inköpsställen hon använt sig av direkt i texten.

Spara

Spara

Spara

Spara


1 Comment

Pin on sleeves- a quick tutorial

Here is how I make my pinned on sleeves for my 14th and 15th century outfits. Pin on sleeves is an easy and quick project, perfect for that spare bit of extra fancy fabric you may have stashed.

IMG_1374 (2)

The easiest way to make a pinned sleeve is to base it on a regular S-sleeve, that is to say, a sleeve with the seam on the back of the body. Here is my sleeve pattern and my pinned on sleeves, do you notice that I make the upper part of the loose sleeve a bit flatter? Since I won’t be sewing on the sleeve to a bodice, I can cut away some excess fabric to make the sleeve laying more smoothly on my arm. In this case, I also make it a bit more narrow than my regular sleeves, to achieve a tight fitted look. These sleeves also have a cuff so the main piece is shorter than a regular sleeve.

WP_20150921_14_21_37_Pro

If you don’t have a sleeve pattern that fits you, you can draft your sleeve on a piece of paper or scrap clothing first to make a toile. Measure your arm’s length, and then around your upper arm, your bent elbow, and last around your wrist. Add some cm or about 1 inch in movement space, add seam allowance, draft the sleeve, cut it out, and then try it on. Remember that silk fabric often is stiffer and less flexible than cotton or woollen fabrics.

I sew my sleeves with running stitches on the inside and then fell the seams with whipstitch by hand, but you can of course use the sewing machine. The hem I usually fold twice and whipstitch, if I don’t line the sleeve or use a reinforcement piece.

WP_20150921_14_21_13_Pro

The sleeve should be quite tight fitted if watching North European paintings, and also long enough for your arm- be sure to try it on with a shift/dress under and bend your elbow.

At the wrist, you can just finish the sleeve with a whipstitched hem, or add a cuff with one to three buttons (for 15th century style). The yellow sleeves have a cuff; they make it possible to have a tightly fitting sleeve around my wrist, and if they get stained or worn I can cut off the cuffs and replace them with new fabric. It is also a good way to save some fabric if you need sleeves longer than half the width of your fabric (or if you need to piece out your sleeves on scrap pieces of fabric).

mg_9992.jpg

To fasten the sleeves on your dress; use dress pins to pin them on. Very simple and practical! If you have small children though, you might want to fasten the sleeves in a different way so the small ones don’t touch it by mistake. A way to do this is to sew a small hook on the inside of the sleeve, right at the top where you should pin it to your arm, and then fasten the hook in an eye sewed onto the dress. If you have a small enough hook, and a sturdy woollen dress, you may put the hook directly in the fabric. This may not be the most historic way (pinning seems to be the thing) but is a safer way for not accidentally stabbing yourself or someone small.

Also, if you have a very delicate patterned silk fabric, a sewed on hook will make the fabric last longer.

IMG_1375 (2) - kopia

Talking about delicate silk fabrics; it could be good to strengthen the sleeves by adding a lining, either line the whole sleeve with thin linen fabric, or just add a strip on the inside at the upper and lower hem. That may add to a more durable sleeve, get you a better edge and make it easier to sew. Do you notice that the sleeve on the picture above has a visible line around the upper arm? (The fabric doesn’t lay smoothly) this fabric would probably have been better of with a reinforcement strip on the inside of the hem, instead of folding down and whipstitch it. This was a quite stiff silk brocade fabric.

So, learn from my mistakes so you don’t have to make your own!

wp_20150921_11_23_49_pro.jpg

mg_9994.jpg

Spara


2 Comments

Making a better Apron dress

This blog post contains a collaboration advertisement for sewing machine guides from Sewingland.

I thought I would share my best tips and tricks for making good apron dresses, since I have made a whole bunch of them by now, and probably most of the mistakes too. If this is your first try at an apron dress, check out my tutorials Easy apron Dress or Fitted apron dress first. At the end of my post, you’ll find a link to useful sewing machine guides if you would like to make your dress on a sewing machine.

Nr 1. Use enough fabric. I know it’s tempting to save on the fabric, but trust me. Too short and tight a dress will look like a modern dress. I use around 2 m *1,5 m to mine, and if you are larger/longer than me, you need a bit more.

Nr 2. Use a thin enough fabric. Save the sturdy, felted wool fabrics for a coat or a cape and chose a thin, rather loosely woven fabric. It should be comfortable and have a nice fall, try to drape it over a piece of furniture, like a table, and look how the folds drape.

Nr 3. Try it on while sewing with all your other layers of clothing, to make sure you will have enough room under the apron dress for a shift and a possible warmer dress if you think you will be needing that.

Nr 4. Don’t make the straps too long. I think it looks very strange when women are wearing their dresses in the middle of their bust, or even under their nipple area. Please don’t. When you fasten tortoise brooches, you can pin them through your strap, or make a knot at the end of a strap being a bit too long.

Nr 5. If you don’t have tortoise brooches to fasten your dress with, don’t use modern buttons or fastenings in the meantime. I have learned that apron dresses were not a thing without brooches, like the dress is an accessory to the jewellery and not the other way around. You don’t have to wear apron dresses for reenacting a viking woman, a simple long kirtle will do. So skip the apron dress if you don’t own the brooches, or sew the straps directly to the dress itself if you are momentary without them.

Nr 6. The thin fabric could be lined with a strip of linen or wool to protect the hem and support the top.

Nr 7. You may sew on a piece of tablet-woven band or a thin silk strip around the upper part of the dress, to make it durable, enhance the fitting and also, for decoration. Another way to decorate the dress is to sew a small wool braid to the top.

Nr 8. Decorating your dress doesn’t have to be expensive. Use thin strips of patterned silks, tablet woven bands, viking silver posaments, or just a braided cord. On the small figurines, it seems like there is decoration around the hem of the dress, and in grave finds there are remnants of silk and decorations around the upper part, partly inside the tortoise brooches. Save money and time and decorate only the upper part of the dress, or do the whole thing!

Nr 9. Use the same type of thread as the decoration you want to sew to your dress. Silk thread for silk fabrics, wool thread for woven bands, and a very thin and fine silk thread for posaments. This will give you a nice seam, that is as little visible as possible, and doesn’t damage the decorations.

Nr 10. To protect your dress from everyday stains; use a belt to fasten up your dress while working, this will protect the hem from mud, open fire and stains. Also, an apron is a very good choice for protecting your clothes. Or remove the apron dress and work in your shift or woollen dress. It seems the apron dress was a status symbol and finer wear, so it is probable that women didn’t wear them while labouring.

Follow this link to more help on sewing machines: http://sewingland.org/best-sewing-machine-for-cosplay/

Spara

Spara


2 Comments

Hi! I am Linda

  Hi handcrafters!

I do realise I’ve been going on with this blog now for quite a while, without giving you the chance to really get to know me. As new readers find they way here (welcome!) I really think it is time to do a better presentation.

What is Handcrafted History?

Handcrafted History is my own, one person company, my full time commitment and my dream coming true of working with the things I love most. From the beginning I called my blog and business “Hantverkat” which means “Handcrafted” but as I started translating my content and write in English, I realised I needed a better sounding name; easy for you non-Swedish readers to find.

Who am I?

My name is Linda, I am from North Sweden (from a town called Luleå) and is a woman trying my best to find balance in a life (like everybody else really) with work, free time, dreams, commitments, love, bills to pay and animals to care for. I have a horse named Rocken, bunnies and a husband whom I married in the summer of 2017.

Rocken in his winter coat, by the river

I’ve been interested in all things medieval, viking, fantasy and adventurous for as long as I can remember; but my first historic adventure was a larp I attended at age 16. Since then, I have studied arts and handcrafts, achieved a master in arts and teaching, and working as a teacher in these subjects for several years, finally realising there might be a way to combine paid work with dreams of how my life could be.

All in all, I try to live my life the way I really want to live it, as the person I really want to be, at the same time affording my bills and the food on the table. Working as your own is really a lot of long hours, the pay is not always good, but there is love and freedom that makes it worth your while, if you are ready to really go for it and not afraid to evolve yourself in areas you did not even know existed.

Were do I live?

I live in the middle of Sweden, by the Baltic Sea just outside a town called Sundsvall. Me and love have a small house, a garden with berries and different kinds of gardening projects, and bunnies digging holes everywhere if not watched. I run my company from home, partly because I like it that way, but also for keeping expenses low.

The viking age rune stone closest to my home, pass it almost every day by car.

What’s the blog about? What will you find here?

Mostly, medieval and viking age stuff; outfits, patterns, tutorials and lots of inspiration for your own handcrafting and adventuring. Occasionally, modern sewing tips find their way here, as well as everyday happenings and personal stuff. But mostly, sewing. If you click on the “Tutorial” page you’ll find all my free tutorials there. If you want to buy ready-made things, or order clothes for yourself, click on “Order your clothes” to learn more, or send me an email if you are non-Swede and wants information in english.

Why am I blogging?

I started blogging some ten years ago, with different blogs about art, handcraft and larping. For a short period I also tried out that lifestyle thing- but really, it was not for me. Some years back I landed with Hantverkat which mainly was about handcrafting, arts and historic adventures. I have always loved to write, take photos and tell stories about what I have done, as well as teaching others about handcrafting.

My Handcrafted History blog is a way of being creative, educational, artistic and running my business, all in the same place!

How can you support the blog (without monetary contribution)?

Did you know, that if each reader would contribute with a dollar/month I could go on making you online tutorials as my full-time work. That would be like 2-3 tutorials for free each week!

But, as they say, free is always good (or in Swedish “gratis är gott”) so if you like the blog and what you see here; go to my facebook page and give it your like/follow me. If you have tried the tutorials or attended one of my workshops, it would be wonderful if you could give me a review there. I also get very happy if you share things you like with your friends.

Don’t use facebook? A comment on the blog makes me a very happy person too, or you could tell a friend about Handcrafted History =)

Why? Because the more activity on social channels the more new people will find their way here to read, order clothes or book a workshop. That means money for me, and when I have food on the table I always feel inspired to do more free tutorials! Yeay! (Due to how facebook and other medias work, more likes and interactions also leads to more visibility for more persons.)

If you feel that a small monetary contribution would be in your taste; I am working on an easy way to make that possible during 2017.

Living close to the forest

Other Media Channels

Apart from my blog, I also have an Instagram: #handcraftedhistory

Etsy shop: Handcrafted Histories

Facebook page/shop: Handcrafted History

Pinterest: Handcraftedhist

Mail: linda.handcraftedhistory @ gmail.com


So, that was a bit about me! It would be so much fun to know You a little more; please comment and tell me were you are from, what you like to sew and if you have a blog on your own!

Spara

Spara


15 Comments

Tutorial Apron Dress

One of the dresses that I still like after using for many events, is my Viking age apron dress (it’s actually one of my oldest piece of clothing). It´s made of a medium-heavy tabby woven wool and the construction of the dress is inspired by the find from Hedeby. The pattern is made of 4 pieces and is quite simple, you´ll achieve the fitted look by making small adjustments according to your body.
As you probably already noticed, there are amazingly many different variations of reconstructions and suggestions on how the apron dress may have looked, and I also think there were different variants during the viking age. However, I decided to imitate the find from Hedeby, as this has a piece of a probable seam preserved, and gives a suggestion of how the skirts/panels may have been assembled. After reading some discussions on the website Historiska världar and looking at gold figurines, I also chose to sew the dress too long, to create a train. That’s my interpretation on the figurines and picture stones and I was curious about how the fabric would fall with such a model. After a while, however, I cut off the excess fabric that made the overly long skirt, since I got irritated about the fabric dragging mud everywhere and getting in my way. It was a nice view though, the long skirt trailing behind.

hängselkjol2

Here is a list of what you need, and some easy steps to follow to make one of your own!

What you need:

  • 2-3 m *1.5 m fabric (2 m= small, 3 m=large)
  • scissor
  • measuring tape
  • markers for fabric
  • pins
  • needle and thread or a sewing machine
  • a friend to assist with the final adjustments on the dress

The measurements you need:

  • Armpit-hemd (3) (as long as you want the dress to be) + 3 cm sewing allowance at the bottom, and 5 cm at the top if you would like to make the dress with a higher look (like my green one) when measuring from the armpit; start as high up as you can get under the arm. you will cut out space for your arm movement later.
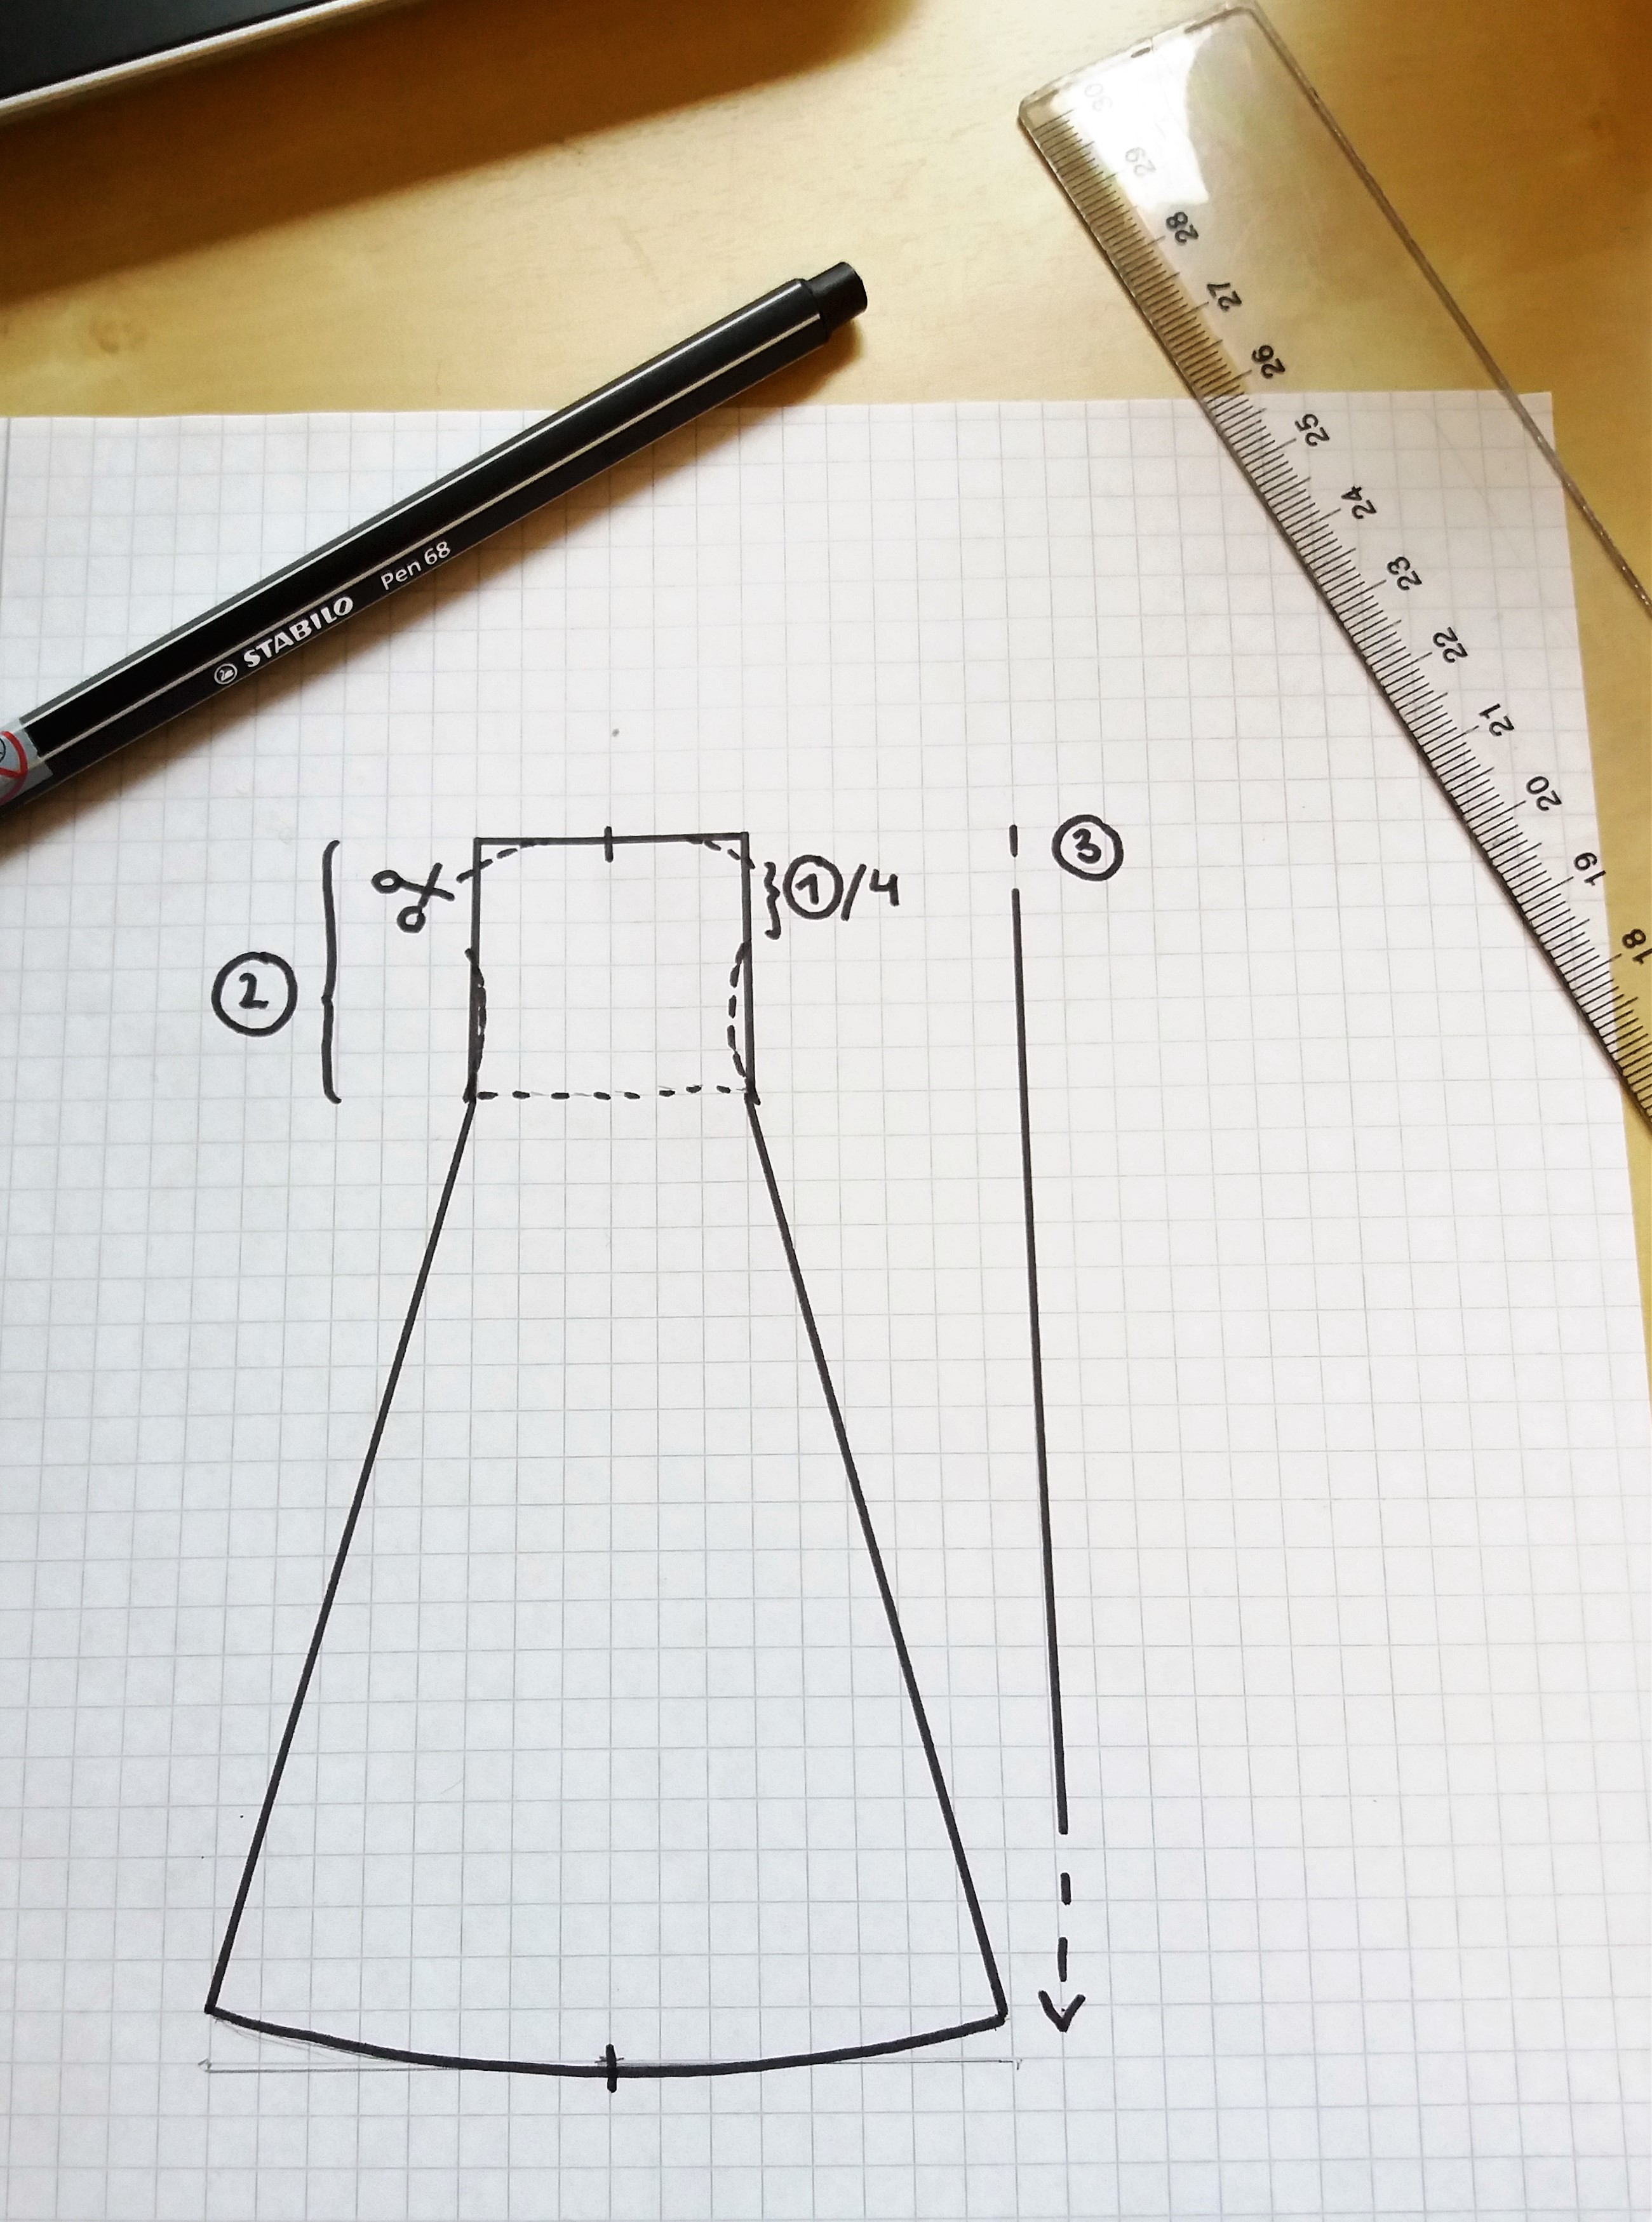
  • Width around your body (1) (the widest part of your body, often around your bust. Divide this measurement in 4 and then add 4cm to each piece (seam allowance and leisure of movement)
  • Armpit-waist (2) (in this case, your waist is your slimmest part of your body, after which the dress is going to get wider)

I chose to make my dress rather fitted, but a more loose style will make it possible to wear a pair of underdresses under it, which can be nice during colder weather. The 4 pieces are of the same size and shape. They start out straight and then gets wider at the waist.

The amount of fabric you need depends on your measurements, but I drafted up three different ways of putting your pattern pieces out on your fabric, depending on how much fabric you want to use.

For the draft to work you need to have a fabric that is 150 cm in width, and the dress can not be longer than that. 1F + 2F is the two side pieces, 3B + 4B is the front and back ones. The bottom-left draft shows how you can use the fabric in an effective way by doing a gore in one panel.

The upper pattern takes 250 cm of fabric and gives you a dress with a hem circumference of 80cm *4= 320 cm. You can absolutely do with less; the one at the bottom- right gives you a hem of about 270 cm, using under 200 cm of fabric. This is for a small-medium sized person. If you have a larger size, remember to add width not just to your upper area but to the skirt as well, to make the dress drape nicely and give you space to move.

After cutting the pieces from the fabric, baste them together in order to try the size and fitting. The dotted lines on the picture above indicate where you can fit the dress (waist+under the bust, under the armpit and at the small of your back). When you try out the dress, remember to have your shift underneath so it won’t get too small. If you’re using a modern bra during your viking adventures, then also wear it during fitting sessions.

When the dress is done, I usually make the straps in linen or wool fabric (linen straps are more common in finds). Make them as narrow bands (folded double) and sew them on to the back of your dress at the same position as your bra straps would be, this will make them fit comfortably on your shoulders. In the front, you may sew them down to the dress if you haven’t got tortoise brooches yet, otherwise use these to fasten the straps to the dress. I prefer to do a loop at the end of the strap, and then another one at the front of the dress; these you can clearly see in finds from the viking age, and it also makes it easier to use the brooches without damaging your fabric.

If you feel that you would like to add something; decorations are a nice way to spice up your apron dress. A tablet woven band, a small piece of silk fabric or a silver thread posament are all find-based decorations from the viking age. Good luck with your sewing!

Spara

Spara

Spara

Spara

Spara

Spara

Spara

Spara

Spara


1 Comment

The green houppelande

I recently made (ok, rather recently…) this new green wool dress. It is an overdress for the 15th century outfit, and is commonly called a houppelande, which is like french for just ‘overdress’. The fabric is from Medeltidsmode, it’s a tabby woven fabric with a soft rich fall, and quite warm. The lining and the whole sleeves are lined with silk ( which is both fancy and in the case with the sleeves, very practical as the dress gets easier to take on and of) and the front is lined with a rabbit fur, that is from an animal/ecofriendly farm, and tanned with plants in an old-fashioned way. The dress is completely handsewn.

I wanted to show you this, because it’s a dress I’m very satisfied with, and also – I’m planning on a later tutorial about houppelandes and how to draft patterns for them. So, enjoy – here is a picture post about the green houppelande!

Great amounts of fabric gives you nice, deep and dramatic folds.

Under the houppelande I wear a blue silk dress, and rasberry-red shoes that I traded with Hans-Gunnar.

The belt is made of black leather and bronze fittings from a 15th century painting. The purse holder (to the right) is a way to be able to wear a purse in the belt- but I have not found that exact solution in any sources. It seem to be more common to carry your purse under the dress, in the belt of the kirtle. I had my Very-Fancy-Purse in the belt that day, but if you want to strive for a more historical accurate look- go without any visible purse.

Holding up the fabric is almost a must if you want to move around


Here you can see one of the gores I put in to save fabric, but expand the width.

The houppelande is a fancy dress, and should pool around your feet when you walk, if you don’t lift it of course! If you want to make one yourself- do it overly long. When I stand still, the dress arrange itself around me in deep folds.

Another thing is the width of the dress, and the amount of fabric it takes to do it. I had around 4 meters of 1,5 m width, but could definitely have used more fabric. As you can see, the dress gets very wide, and dramatic when hold up.


Spara

Spara

Spara

Spara