This tutorial is made with the support of my Patreons. Support me to help me make more free tutorials!
The Skjoldehamn hood is a find from the 11th century, and because it is the only find of this type of garment (from Scandinavia) dated close to the Viking age period, it is often used as a Viking/Iron age garment by reenactors.
We don’t know who the garment belonged to; man or woman, rich or poor, or if the wearer considered themself a part of the Viking culture, the native Sami culture, or both. The clothing was found in a bog burial in northern Norway and the garment items resemble modern Sami clothing according to articles I found on the subject. But the hood also reminds us of the later medieval hoods, although it has square gores. Hoods with slits over the shoulders, or long cloaklike hoods can be seen from earlier periods in Europe.
Skjoldehamn in Norway
All considered, it is a good choice to make if you need a warm garment for iron-age clothing and want a hood, at least if you have a north Scandinavian-based outfit, a Birka-based Viking outfit might have had a hat instead. Overall, the hood is probably more common in reenacting than it was during it’s lifetime, but who does not want a practical garment when it is cold or wet?
Materials:
Most outdoor clothing that has been found from the period seems to be practical rather than decorative. Choose a warm and sturdy fabric, slightly fulled, and use wool or linen thread for sewing. The original has a seam on top of the head to give the hood some shaping, and a pair of cords on the side to pull it closer to the head. This tutorial is a simplified version without these elements, but feel free to add them if you like. And don’t be afraid of piecing together the hood if needed, piecing is very historical!
How to make the pattern:
The hood is constructed with two long rectangles (or one piece folded at the top) and two squares.
This guide give you a hood similar to the original, covering your shoulders but not your arms. You could also make a longer one by lengthening measure B.
A is the depth of the hood, measure from the face where you want the opening to be, around your head and back. Divide the measurement in 2. I like deeper hoods to get protection from wind and rain, I usually have 32 cm.
B is the length of the hood from the head down to the shoulder, measure yourself from the top of the head, following your body, to the shoulder point (where the shoulder ends). Mine is 60 cm.
Measurement C is the face opening, measure around the whole face, under the chin, to get an opening. Try pulling the measuring tape “on and off” the head so you know if the opening is big enough to be comfortable. I like a looser opening to accommodate hairstyle/veils. Divide the measurement you get by 2. Mine is 34 cm.
Measurement D is B-C; the length of the hood minus the opening, 26 cm on my hood. D is also the sides of the gores.
You can make a paper pattern with these measurements. If you want to include seam allowance while drafting the paper pattern, add 2 cm to all measurements before drawing the pieces. Otherwise, do it directly on the fabric.
How to make the hood: Put the pattern pieces on the fabric and add seam allowance by drawing 1 cm outside all paper pieces.
You may cut the long rectangle in one piece, or in two pieces that are sewn together on top of the head. Cut out 2 square gores, one for the front and one for the back.
If this is your first hood, basting it together is a good choice to try out the fit. if you like it, leave the basting thread in as a guide while sewing. If you want to adjust anything it is easier to remove basting than a sewn seam.
sewing order
Start with sewing the seam on top of the head, if you have one.
Sew one side of each gore to the rectangle, right side to right side.
After that, fold the rectangular piece at the top to make it look like a hood, and pin the gores to the rectangle. Sew the gores from the bottom and up.
In the back, you continue with the seam all the way up to the top.
Finish the face opening by folding in the raw edge, press it and whip stitch it in place.
Repeat with the bottom edge.
Tip: In the front, sew the hood together 1 cm above the gore for added durability, and then leave the face opening.
Seams:
Sew the hood with backstitching to make it sturdy, or use running stitches if you are in a hurry.
Finish the seams by pressing the seam allowance, cut one side down and press it to that side, and whip stitch it down for added strength. I like to fold the seam allowance toward the larger piece; in this case, I sew the seam allowance down to the main hood and not the squares. In the back seam you can fold it either way.
There are two cool finds of sewn mittens available at the National Museum of Iceland’s webpage and you can see them here and here. They are both sewn in wool cloth and constructed with a separate piece making the thumb. I adore the Garðar Mitten and decided to make a pair for myself.
My first thought was to make them as a type of over-mitten to be worn over my regular needle-bound ones, but then I got sidetracked while making the pattern and made the grey ones the exact size for my hands. So I made another pair in red, for really cold days.
The outside of the mitten is larger than the inside, meaning you will shape the outer side around the inner, creating a gathered effect that is both pretty and practical.
The tumb is inserted in a round hole in the hand, making it both fun to do and comfortable to wear.
Tips for working with the pattern:
Add seam allowance to the mittens, 1-1,5 cm. Remember to sew with the correct seam allowance, small garments really differ in size if you are lazy with the seam allowance.
The tumb seam can be made in different ways; by using a backstitch and sewing the pieces right side together, or:
If you find it difficult to make the thumb insertion seam, try treating it like an “inserted gore” from my tutorial, and press the seam allowance on the inside piece, before sewing it to the thumb piece. (I will show you how to do it below, on the red mitten).
Or go inspired and fasten the thumb piece from the outside as I did with the grey mittens, adding a decorative seam to protect the fabric edge.
Step by step instructions
Place the paper pattern pieces on the fabric with some space in between for seam allowance, and pin the paper in place.
Trace around with a fabric marker, 1 cm outside the pattern. Use a ruler/measuring stick to guide you.
In small projects, some extra seam allowance can make a big difference. To help yourself making the garment the right size, you can trace around the pattern pieces with a basting thread.
It is fast, and you will know exactly were to place your seam. Here the basting line is blue, and I moved the pattern piece for it to show better on the photo.
Cut out all your pieces (remember to check that you have a left and right mitten before doing this).
Tip: it is always easier to cut a sharp line if you have a sharp scissor, and cutting the fabric with the scissor resting on a table.
Pieces ready for basting and trying on!
Start with basting the tumb together at the top, down to the start of the semicircle shape.
Use your blue basting lines, pair them together and pin the tumb in place on the inside piece. Work from the right side of the mitten, the blue lines should line up on top of each other.
Variations: If you want to sew your mitten according to the seam in the original, use a backstitch and attach the pieces right side to right side. If you want to use the “attached gore method”, scroll down to the red mitten photos.
Bast the tumb in place, with the raw edge of the inside piece visible.
Baste the inside seam of the wrist, and continue up basting the tumb to the outside piece.
Before basting the rest of the mitten together, put in a gathering seam around the top piece to to gather it to match the inside. If you have already basted the seam allowance to guide you, you may use this thread and pull it gently to gather the top of the outside fabric together.
Gather the fabric so it fits to the inside piece, and distribute the folds evenly. Sew a basting seam holding them together.
Baste around the top and continue down to the gore. Put this in place, baste both sides, and then you are ready to try the mitten on!
Looks nice! Remember to try your mitten on with the right side out.
I chose a linen thread 35/2 and backstitches, to make the seam sturdy. I follow along the basting threads, and rip these out as I go along (or afterwards if you prefer). Place the seam 1 mm inside the basting seam instead of on top of it, to avoid sewing the basting seam to the mitten.
The tumb is secured with whip stitches, this is on the inside while felling the seam. You can see some red thread which is the decoration from below. I felled the seams to one side after sewing them, to make the mitten more comfortable and the seams more resistant to water.
To secure the raw edge of the inside piece where the thumb is, I chose to make a decorative stitching with wool thread, sewing on the right side. I used a blanket stitch for the edge, and then an embroidery stitch for added decor. Instead of doing this, you can whipstitch the tumb in place on the right side.
Decorating mittens are fun, but don’t show in the historical sources I used.
Soon finished, now I need to finish the embroidery and hem the bottom edge!
The historical red mittens
I made another pair of mittens to be used for medieval reenactment, big enough to be able to insert a smaller mitten or lining for added warmth. These are made without embroidery, and instead I made the thumb hole seam like this:
Cut the pieces out as above, and then fold the seam allowance in, but only in the tumb hole. Press with an iron to make it lie flat.
Work from the right side and pin the tumb in place. If the tumb seem a bit large for the hole, don’t mind that but just follow the seam allowance. This will create more space for movement for the tumb.
Whip stitch the tumb in place, from the right side. (This is what I referred to when I wrote that you can use the “inserted gore” method.)
Another round of whipstitching on the inside to secure the seam allowance. Make the tumb on the other mitten the same way, and finish the rest of the mittens as above.
Felling seams inside small garments: It is often easier to finish one seam before making the next one. Sew one seam, press and cut it, then sew it down with whipstitching. After that, take the next seam etc.
If you want to sew the mitten together first, I find it easier to work with my hand inside the mitten while felling seams. This way you can adjust the seam and seam allowance while sewing, and keep the fabric stretched out. You are also sure not to accidentally sew throught the next layer of mitten.
Stretching out the fabric and seam with my hand, while sewing with the other.
If you want to make a pair yourself, the pdf including a pattern, can be found on my Etsy and Patreon. If you have 2023 years Advent Calendar, you will find the pattern in there. If you have larger or smaller hands than size 9-11, you might need to make a mock up/test the mittens in cheap fabric to adjust the sizing (mainly the width and lenght of the front and back pieces).
Beeswax cloths are a really simple way of storing food or a picnic snack during your historical event, and they are also nice to cover bowls and jugs!
After this year’s Double Wars event when our encampments got overrun with aphids/lice, I really had it and promised myself to make some protective cloths for next year. And here they are! It was so easy and practical so we use them as everyday items at home, too.
To make some for yourself, start with measuring the sizes you want to have; I made two for covering jugs, a couple for bowls and some bigger ones for wrapping cheese in. I prewashed the linen fabric, cut it in squares, and hemmed the edges with linenthread and a whipstitch before waxing. (To be fair, I used scraps from earlier projects.)
You can wax cloths in different ways; by melting beeswax in a pot and scooping it over the cloths, or by distributing small pieces of wax on the cloth and then melting it in your oven or with an iron. The important thing to know is that beeswax tends to get sticky and may be hard to remove from your favourite pot, oven tray etc. Use baking sheets to protect your kitchen as well as your oven and iron. An apron might be good too, it is hard to get beeswax stains off your clothes.
I chose to melt the wax in a pot that I have already used for beeswax, this was quicker and allowed me to just dump in a big block of beeswax at once. I melted the vax on low heat and scooped it from the pot over the cloths with a spoon.
To save time, I stacked all the cloths on top of each other, poured over a generous amount of wax, and then covered everything with a baking sheet and used an iron on middle heat to help distribute the wax over and through all the cloths.
As soon as the wax is melted into the fabric your first layer is ready- remove it, put it on a baking sheet to cool, and continue down through your stack. You can do this task on your oven too, just make sure you protect surfaces with baking sheets. The cloths gets darker with the wax on, and while they are hot they look shiny and smell nice!
Don’t use too much heat- you want a generous layer of wax to remain in your cloth rather than soak through. Too much heat or too much time in the oven/under the iron will not give you enough wax in your cloth. If this happens, the waxed cloth will look uneven, and won’t stay in shape after cooling down (try to fold it or make a shape with the cloth, it should stay in place and stick to itself). If this happens, just repeat the procedure; pour on more wax and melt it down.
If you have to low temperature, the wax will not melt in properly but lay in cakes/lumps on your fabric. Try to add a little more heat! Beeswax is nice to work with because nothing gets destroyed if you don’t get it perfect the first time, it will just take a bit longer time.
I calculated 2-3 tablespoons of melted beeswax for a 40*40 cm cloth, but this depends on the thickness/weight of the cloth. In retrospect, I would have liked my fabric to be a bit thicker (around 180-250 grams/meter) than this 120 grams/meter linen. It was so fine it had problems holding enough beeswax, but turned out ok for this round of cloths. Next time, I will make them from other scraps.
If you want to make lids for jars, jugs etc. from leather you could also use this process much the same way. Make sure your leather piece is vegetable-tanned and undyed, and get some extra wax since it often takes more to wax a leather piece than a fabric piece of the same size.
Förutom klassikerna där du lär dig göra medeltida mönster till din överkropp, och kursen där du lär dig allt om ärmkonstruktion, har jag tagit fram en kurs med sammansydda hosor, efter flera önskemål! Mönsterkonstruktionskurserna är intensivkurser där du får designa/rita/prova in ett mönster till dig själv, som du sedan tar med dig hem och använder i framtida medeltida sömnad.
Hosor? Den här kursen går igenom hur du tar mått och sedan ritar ett hosmönster + provar in det på dig själv. Vi går igenom separata hosben, fot, sammansydda hosor (byxor) och blygdkapsel (tänk 1300-1500tal). Prat om historiska, nördiga moden, stoppade vader och annat roligt kan förekomma…
Det brukar vara roligt, mycket tankeverksamhet och nya kunskaper! Kurserna passar dig som provat sy något plaggliknande innan, typ en tunika eller moderna plagg, samt dig som redan kan sy men vill vässa mönstertekniken. Alla kurserna passar för alla kön/identiteter och vi ser till att alla känner sig bekväma vid nålning på varandra. Tips: ta på dig tajta, moderna kläder såsom tshirt/linne/shorts/tights för att det är enklare att prova in mönster då.
Jag har också populära Brickbandsvävningskursen på onsdag eftermiddag, perfekt för dig som vill lära dig brickbandsvävning men typ bara hållit i garn förut (eller för dig som provat men nu vill ha alla grunderna)!
Du behöver inte skaffa något; allt material, verktyg och häften ingår. Kaffe/te/vatten finns på Kapitelhusgården. Ta gärna med fika/frukt om du vill snacksa under kursen (men inga nötter pga allergier).
Om Covid: Vi håller till i den stora stensalen på Kapitelhusgården. Under kurserna är det bara kursdeltagare i rummet och det finns möjlighet att arbeta med avstånd mellan varandra, tex vid olika bord. Vid inprovning på varandra får ni egna nålar/verktyg att hantera, det finns handsprit och du får gärna ta med eget munskydd om du vill använda. Jag är fullvaccinerad. Blir du sjuk eller får symptom kommer du givetvis inte, utan ger bort din plats till en vän (säg till på plats).
Jag kommer finnas på Kapitelhusgården stora delar av veckan, och har min shop med mig ifall du vill fylla på med extra material, sömnadsredskap, vävgarner/tråd eller bara nöjes-shoppa fint bling. Jag kommer också sälja lite extra nördiga saker från andra hantverkare såsom knivreplikor, hårnät och smycken.
Men jag tror att jag startar veckan med att ta med mig gamla kläder, skor, testplagg och en hel del utförsäljning som jag hoppas ska få nya ägare som vill bära dem under veckan… Vi ses!
This blog post is made with the support of my Patreons
According to my notes, I made an update on this sewing project when moving it to the current blog address, in 2014. 2014? That is some time ago… With that said, I hope you have patience with this old version, and hopefully, it will help you make one of your own.
Materials and tools needed:
Fabric 150 cm width, 200-240 cm length
Measuring tape
Scissors
Chalk
Threads + needle
Long ruler or a stick
Measure:
The measuring and construction for the Euradress are quite a bit different than other viking and medieval garments, but it is a fun project. The first measures to take here are the base and lenght of the sleeve-piece, everything else will be based on these measures
Hold the measuring tape in the middle of your throat and measure along your arm to the thumbnail. This measure will give you a little bit of extra range of movement to avoid making too short a sleeve.
My measure is 74 cm (my regular sleeve pattern is 66 cm long.)
Measure the base (width) of your sleeve by holding your measuring tape one hand width below your collarbone, drape it over your shoulder towards your back, and take the measure from the back when you are parallel with the start by the front of your body (a friend might be useful here).
My measure is 40 cm, this might be a good measure for size small-medium, while larger sizes will probably have a longer measure (if doing this pattern with measures that differs greatly from mine, be sure to draw your own pattern pieces in a way that works for you. This might be quite different from my draft, but the principle would be the same).
Note: the base of the sleeve is also the upper measure of the front and back pieces. “15 cm” is where my wrist would be, it is not the whole circumference since I will have a long gore adding width for my arm to fit. As a reflection, I would probably have made this measure at least the circumference around my wrist (can’t remember why I did not) but I advise you to do that.
This is my draft of the pieces, on a folded fabric. The width is folded in halv (75 cm) and the dress pieces are drafted along the length of the fabric. Here you can see how much fabric you need after taking your measures: the length of the sleeve + the length of the dress from 1 hand below your collarbone to the bottom hem. Remember to add SA, I have not done that on this old draft.
How to make a draft of your own:
Fold your fabric in half
Make a line to mark out the middle on the fabric’s surface (red dots).
Draft the width of the sleeve around your wrist by the start of the line (highest up) 1/2 width on either side of the line.
Mark the length of the sleeve from the wrist to the base (green line)
Draft the base of the sleeve where the green line ends, 1/2 width on either side of the line. (purple line) make sure the line is at a 90degree angle to the green line.
Draw out the rest of the sleeve (blue area) by drawing lines from the edges of the purple line to where the wrist is (thin lines surrounding the blue area).
Draft the front and back body pieces (pink area), starting from the sleeve base edge, down to the corners of the fabric surface, basically continuing on the lines making the sleeves (pink lines). The measuring tape or a long ruler is a great help here.
That’s it! The blue is your sleeves, the pink your front and back piece and the yellow area being “leftover” is your side gores, you will have 1 whole and 2 halves. Cut the pieces out through the folded fabric, if it wants to move around you may pin the fabric layers together with pins along the lines.
Sewing order:
One side gore is cut out in halves; sew this one into a whole gore. You may also make a false seam along the middle of the whole one, creating two identical side gores. “False seams” are seen in finds, made by sewing a very narrow seam in a whole piece, to create the look of a symmetrical garment.
Sew the base of the sleeves against each other, but only a short seam of 1-2 cm on each edge. This will make it easier to sew the rest of the dress. The opening left on either side of the sleeve bases is your neckline. Finish that later.
Sew the sleeves to the front piece, I find it easiest to start in the centre front and sew the sleeves out to the edge of the front piece on either side. Repeat with the back piece.
Add the side gores. I started by the hemline of the dress, sewing in the gores from the bottom and up to the wrists. I did this to be sure to get use of the whole width of the base of the gore since the gore might be a bit longer than the pieces it fastens against (I guess this was also the reason I made my wrist cf so small, I got additional width from the side gore before I cut off the abundance. Looking back on this method, starting by the wrist and sewing down you would get a better opportunity of shaping the bottom hem evenly, by trimming away the corners of the side gores). I would recommend pinning/basting the side gores in place first before sewing.
Try the dress on, and adjust the bottom hem and sleeves before folding down the hem and whipstitch it in place.
Adjust the neckline on your body by deciding how low you want the opening to be front and back. I closed mine in the back around 4 cm from the base and then hemmed the rest of the opening with whipstitching.
Adjustments and fitting:
The side gores might be a bit too long; check before sewing and cut off the abundance after the wrist.
This garment might be a bit loose-fitting; adjust the seams between the gores and the front/back parts if needed.
Check out the bottom hem by putting the garment on and measure + adjust to make it look good.
About the find:
The Eura finds are from Finland and dated to the Iron Age. It is a great find with lots of information about the Finnish clothes and how they were worn, and have been documented and recreated mainly in the Finnish historical clothing culture.
The Eura dress is a different outfit than the Swedish and Norwegian viking outfit, but the peplos/overdress is similar to other early finds on peplos and to the Gotlandic early viking outfit. The Euradress in the tutorial above, with its special construction method, do have similarities with other finds from Scandinavia, such as the medieval Uvdal find from Norway.
Sources/learn more?
“Ancient Finnish costume” by Pirkko-Liisa Lehtosalo-Hilander
This is one of my favourites; the “Fässing” (in Swedish), Martebo-sack (from Martebo church on Gotland) or a Wallet (18-19th century). It is a simple, practical linen bag made for carrying loads. I have seen medieval examples worn over your shoulder like below or larger ones strapped over a donkey.
I actually have several of these for my medieval adventures; for grocery shopping, for the picnic, for my showering things like schampoo…
Martebo bag
The bag is made with a piece of sturdy linen or hemp canvas (chose a sturdy tight-woven fabric in linen, or a piece of tent fabric for a large sack).
Cut out a rectangle with the measure 140 * 70 cm, to make a bag suitable for a picnic and your warm hood. Or design your own measures by laying a measuring tape over your shoulder and let it hang down on either side. Adjust and decide on a length you like on the bag, and then decide on the width; between 60-100 cm (makes a bag that is 30-50 cm wide) might be nice. Add 3 cm of SA (seam allowance) to each measure.
Sewing instructions:
1. Mark out the opening on the long sides on the rectangle. It should be in the middle, and between 30-40 cm wide.
2. Put the long sides on top of each other, and sew a seam on either side of the opening. Backstitches with waxed linen thread (if you are using the sewing machine, start with zigzagging the whole fabric piece, then sewing this seam).
3. Press and fold down the SA and whip stitch it down to one side for extra strenght.
4. Hem the opening with whipstitches, working from the inside. It is also good to reinforce the edges of the opening by sewing a couple of extra stitches through each fabric piece to make it less prone to rip open.
5. Now you have a tube, adjust it so the seam is in the middle of the fabric piece inside out, and pin the short edges closed.
6. Sew the edges with backstitching, and repeat the pressing and folded down SA. Done!
The sack may be carried over your shoulder, or wrap it around your wrist and hand to carry it like a grocery bag. If you have valuables in it, you can also make a knot in the middle over the opening to prevent anything from falling out. Very convenient!
I am Linda, and Handcrafted History is my one-woman business located outside Sundsvall, in the middle of Sweden. Follow me on my handcrafting and historical adventuring here on my blog!
My business offers You made-to-measure historical clothing, handmade by me with high quality materials, and designed together with you from historical sources.
During lectures and workshops from Iron age (Viking age) to Late medieval period I share my knowledge from more than 20 years of sewing and research, and help you create the outfit from your dreams.
You can also find historical hats here, or shop away from my historical tent during markets around Sweden, and abroad.
Here is information on How to order clothes, Book me for workshops or browse the free Tutorials on Sewing or Swedish Larping. Below, you find the blog that I’ve been writing for about 10 years. I share research projects as well as fun guides and inspiration for your handcrafting.
Please contact me by email at linda.handcraftedhistory @ gmail.com for invites to markets, ordering clothing, booking workshops or for collaborations regarding the blog.
Welcome to this step-by-step tutorial, perfect for beginners. It might seem long, but explains everything you need to know. Follow it as you go, or look up the section where you might need extra guidance.
This is a great project to begin with! Easy, straight forward and the fabric won’t be too expensive.
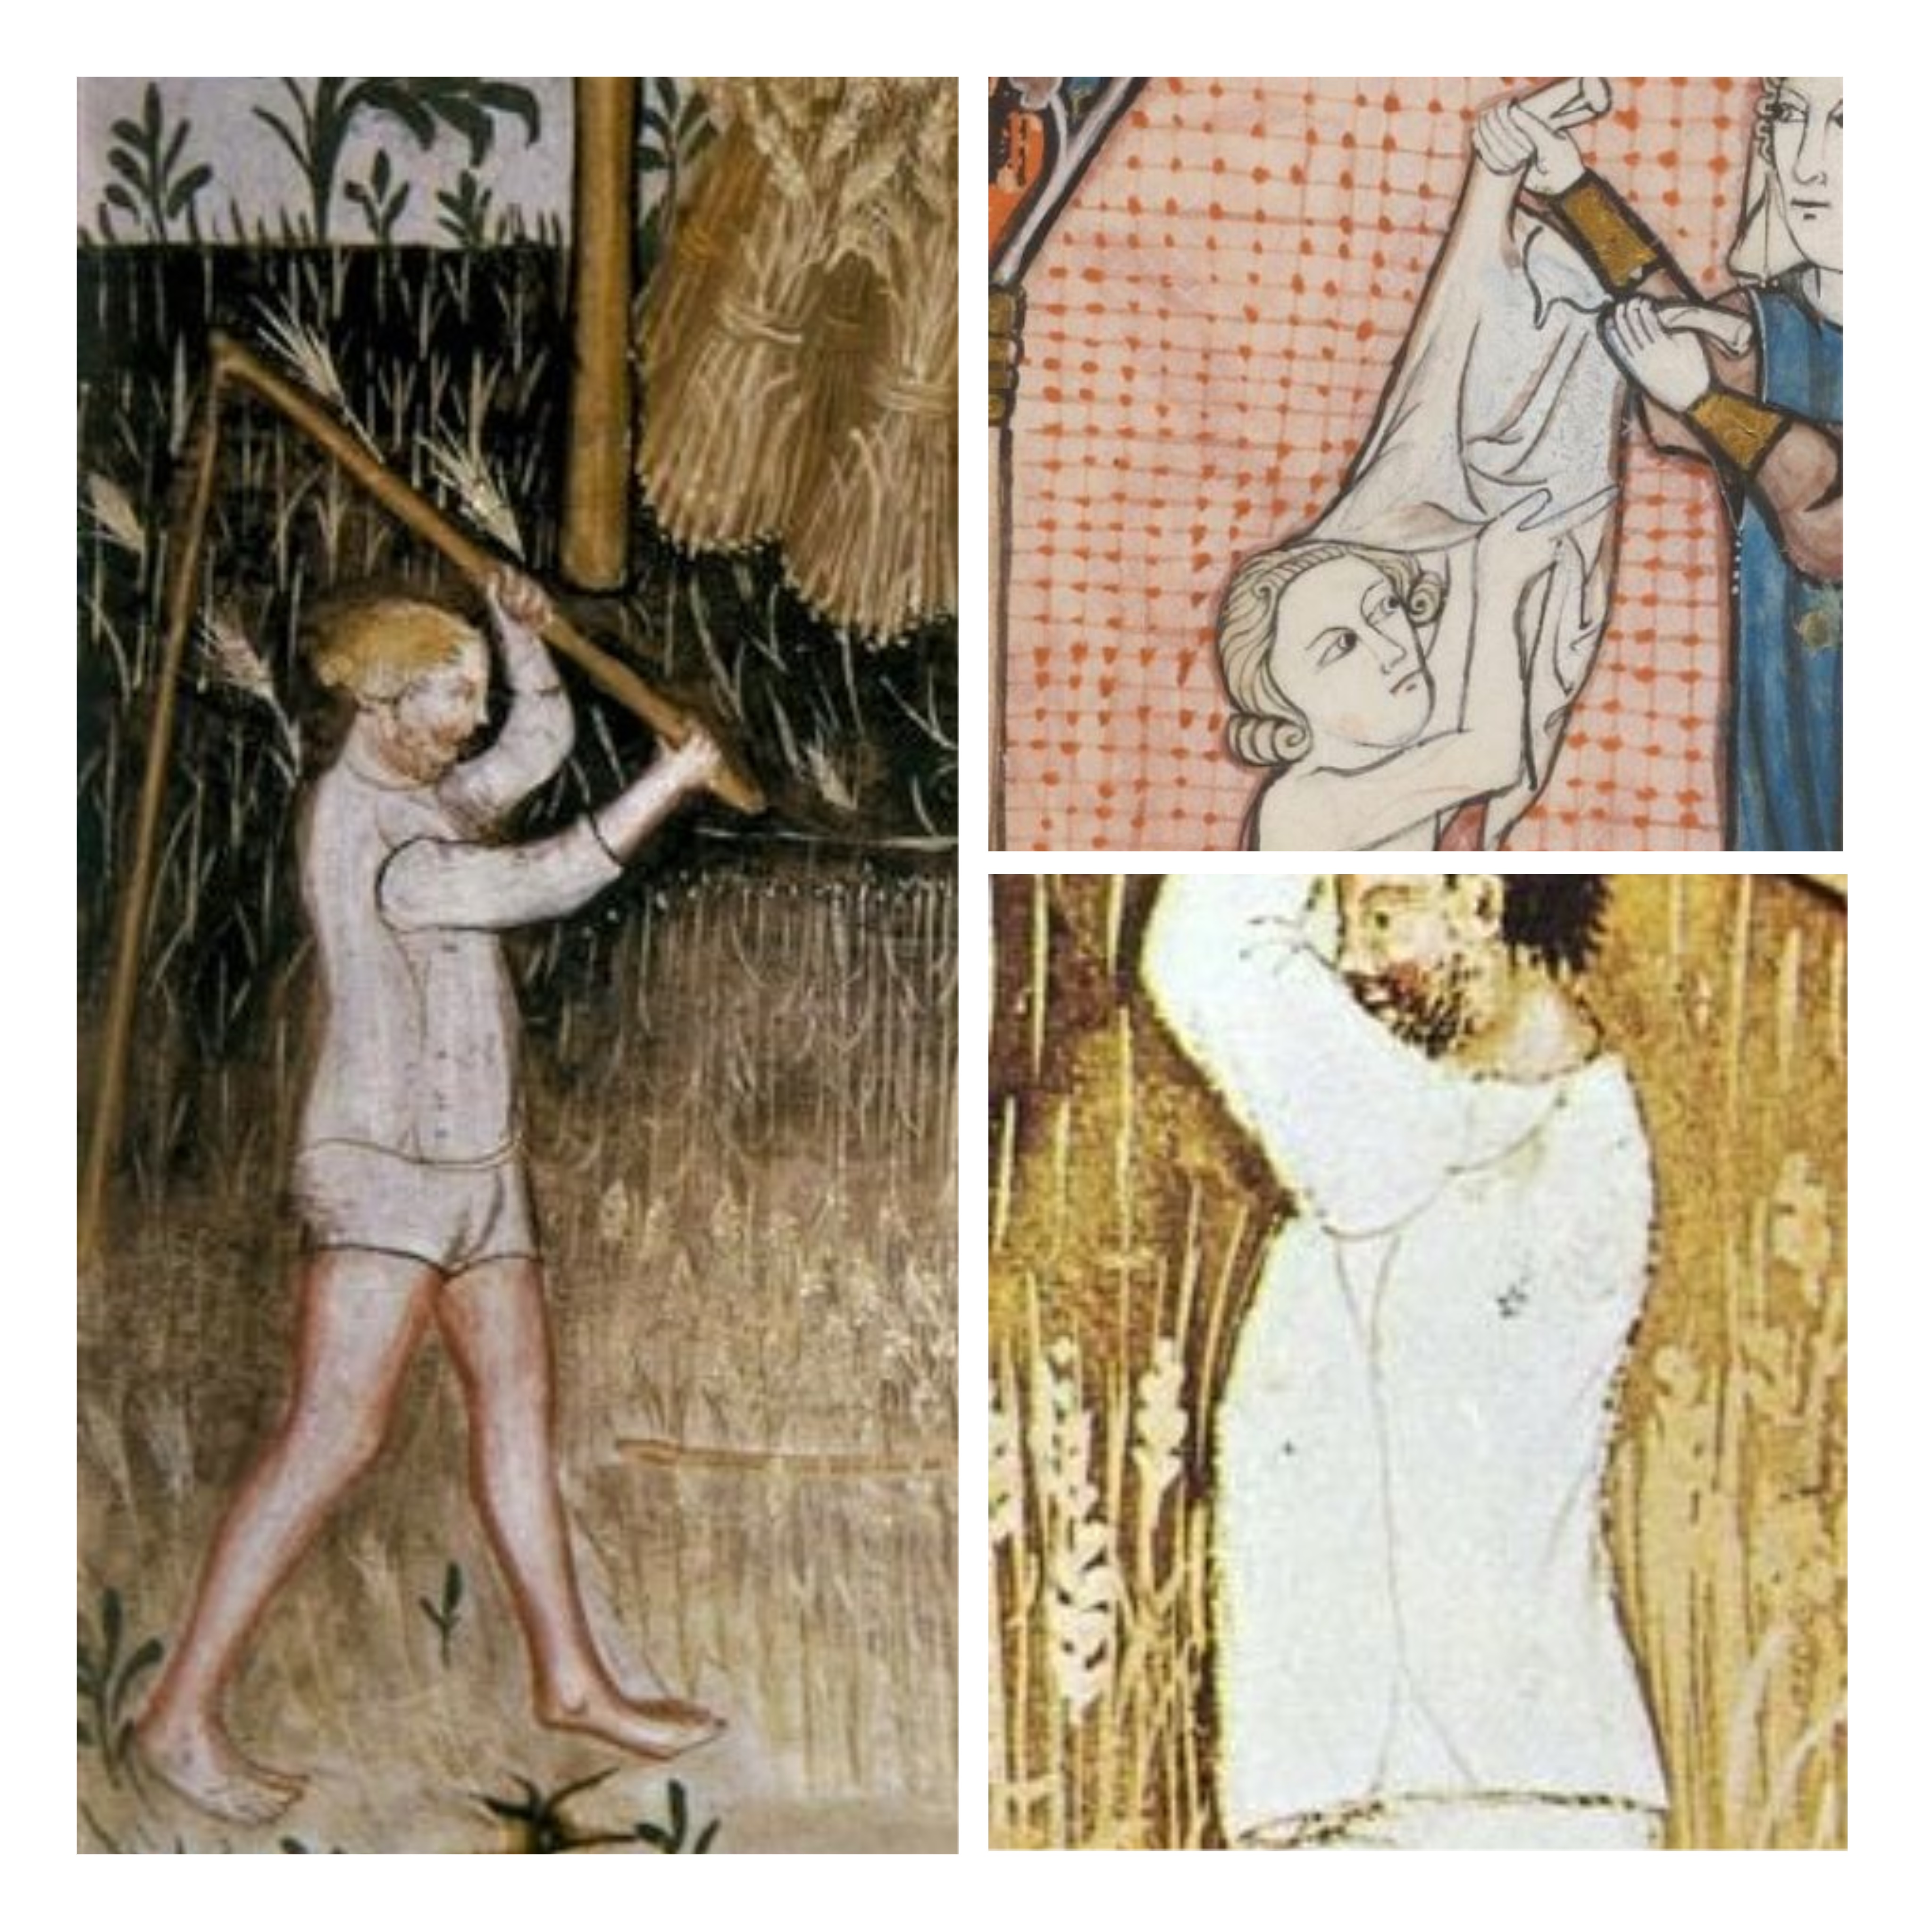
Examples of medieval shirts with slits, gores and seams.
Most people wore linen underwear during the medieval period, and a man’s kit was made up of breeches or a type of loincloth, and the shirt. While you are at it; make two shirts! It is really nice to be able to change and wash your clothes during longer events, and a pleasantly smelling shirt will make it easier to make new friends…
Linen shirt with a slit at the neckhole
Buying fabric:
The amount of fabric you need depends on your size and the width of the fabric. This example will use cloth 150 cm wide. To decide how much you need to buy, calculate the measures on your pieces and how much fabric you need for those, then add another 10% minimum to allow for shrinking or uneven edges. (Fast tip: just buy 2 meters up to XL, a bit more if you have a larger size. Extra fabric may always be used for other projects.)
Look for linen fabric of 120-180 gram, I prefer a thin and even weave. (That is more historical and comfortable than a coarse and lumpy weave.) Bleached or unbleached linen, according to the status you would like to aim at. Bleached linen was a bit more expensive, but don’t go for the super-white ones in modern stores.
Pick a shirt model of your choice
Preparing the fabric:
Zigzag the raw edges to prevent them from fraying while washing, or buy a bit of extra fabric if you don’t want to bother with machine work.
Pre-soak, wash and iron your fabric before starting to cut and sew your shirt. Washing will avoid future shrinkage, make the weave even and remove any pesticides. Pre-soaking the fabric will lessen the wrinkles and make it easier to iron. 40-60 degrees c machine washing, hang dry.
Things you will need:
Needle, linen thread, beeswax, scissor, measuring tape and something to mark your fabric with (fabric chalks or just a pencil). A ruler or straight piece to draw against is nice, but not necessary.
Tools for handsewing
Measure:
1. Lenght of finished shirt from shoulder to hemline.
2. Circumference around the widest part of your upper body, often the chest.
3. Length of sleeve from shoulder to wrist.
4. Circumference around your hand/wrist (make a loop with the measuring tape, and try to pull your hand through it, it should be big enough to be easy, in order for you to be able to take the shirt off.)
5. Armhole (measure around your should/arm as the picture shows, then make the measuring tape into a loose circle, and when you find it comfortable-check the measurement.) I usually add about 25% extra from my body measure, from 40 cm body measure to making the sleeve hole 50 cm.
Example (with measures) so you can see how I do this:
1. Lenght of finished shirt from shoulder to hemline: 100 cm
2. Circumference around the widest part of your upper body, often the chest: 100 cm.
3. Length of sleeve from shoulder to wrist: 70 cm
4. Circumference around your hand/wrist: 28 cm
5. Armhole: 60 cm. This means the sleeve base will be 60 cm, and the armhole on the body parts will be 30 cm on front and 30 on back.
Add ease of movement:
What is that? If you were going to cut out your pieces with the above measures, the shirt would fit tight along your skin, making it impossible to move, or take it on and off. Therefore, we will add extra space for movement. I usually calculate 6% of the circumference around your body, 10% if I want a loose fit.
Example: 100 cm + 6 cm (6% of 100 cm) =106 cm. Split this measure in 2 for front and back: 53 cm each.
That’s it! (we already added ease into the sleeve by making sure we could pull the hand through, and the sleeve base by adding extra room there)
Add seam allowance:
What is that? Seams always need to be a bit from the edge of the fabric in order to be durable. The space between seam and fabric edge= seam allowance. Short= SA. I will add 1 cm, between 1-2 cm is recommended.
Example: Add 1 cm to all edges around your pieces, like this:
Seam allowance can be added directly in your calculating and drafting the pieces, to paper pattern pieces, or drafted on the fabric outside the pattern. We use the first method here.
Example:
1. Lenght of finished shirt: 100 + 2 cm SA= 102 cm (I like to add another 1 cm to hems; so 103 cm)
2. Circumference around chest: 100 + 6 cm movement + 2 cm SA= 108 cm
3. Length of sleeve from shoulder to wrist: 70 + 2cm SA= 72 cm
4. Circumference around your hand/wrist: 28 + 2 cm SA= 30 cm
5. Armhole: 60 + 2 cm SA = 62 cm sleeve base. Armholes: still 30 cm *2.
Draft your measures into a pattern:
Now you are ready to draft your pieces! I like to do this on paper first, to save as a reference, for future projects, and to determine how to save on fabric. I draw my piece of fabric onto paper, making 10 cm=1 square:
Nr. 1 is the front and back pieces, nr. 2 sleeves. As you can see; if you would like to have side gores instead of slits in your shirt, nr. 3 would be excellent to use. This is just an example, do a draft with your measures and lay out the pieces in a way that suits you.
I recommend drafting the front, back and side gores either along or across the length of the fabric (do all these in the same direction) the sleeve may go along or across, depending on what is more convenient (the shirt will look better with this method).
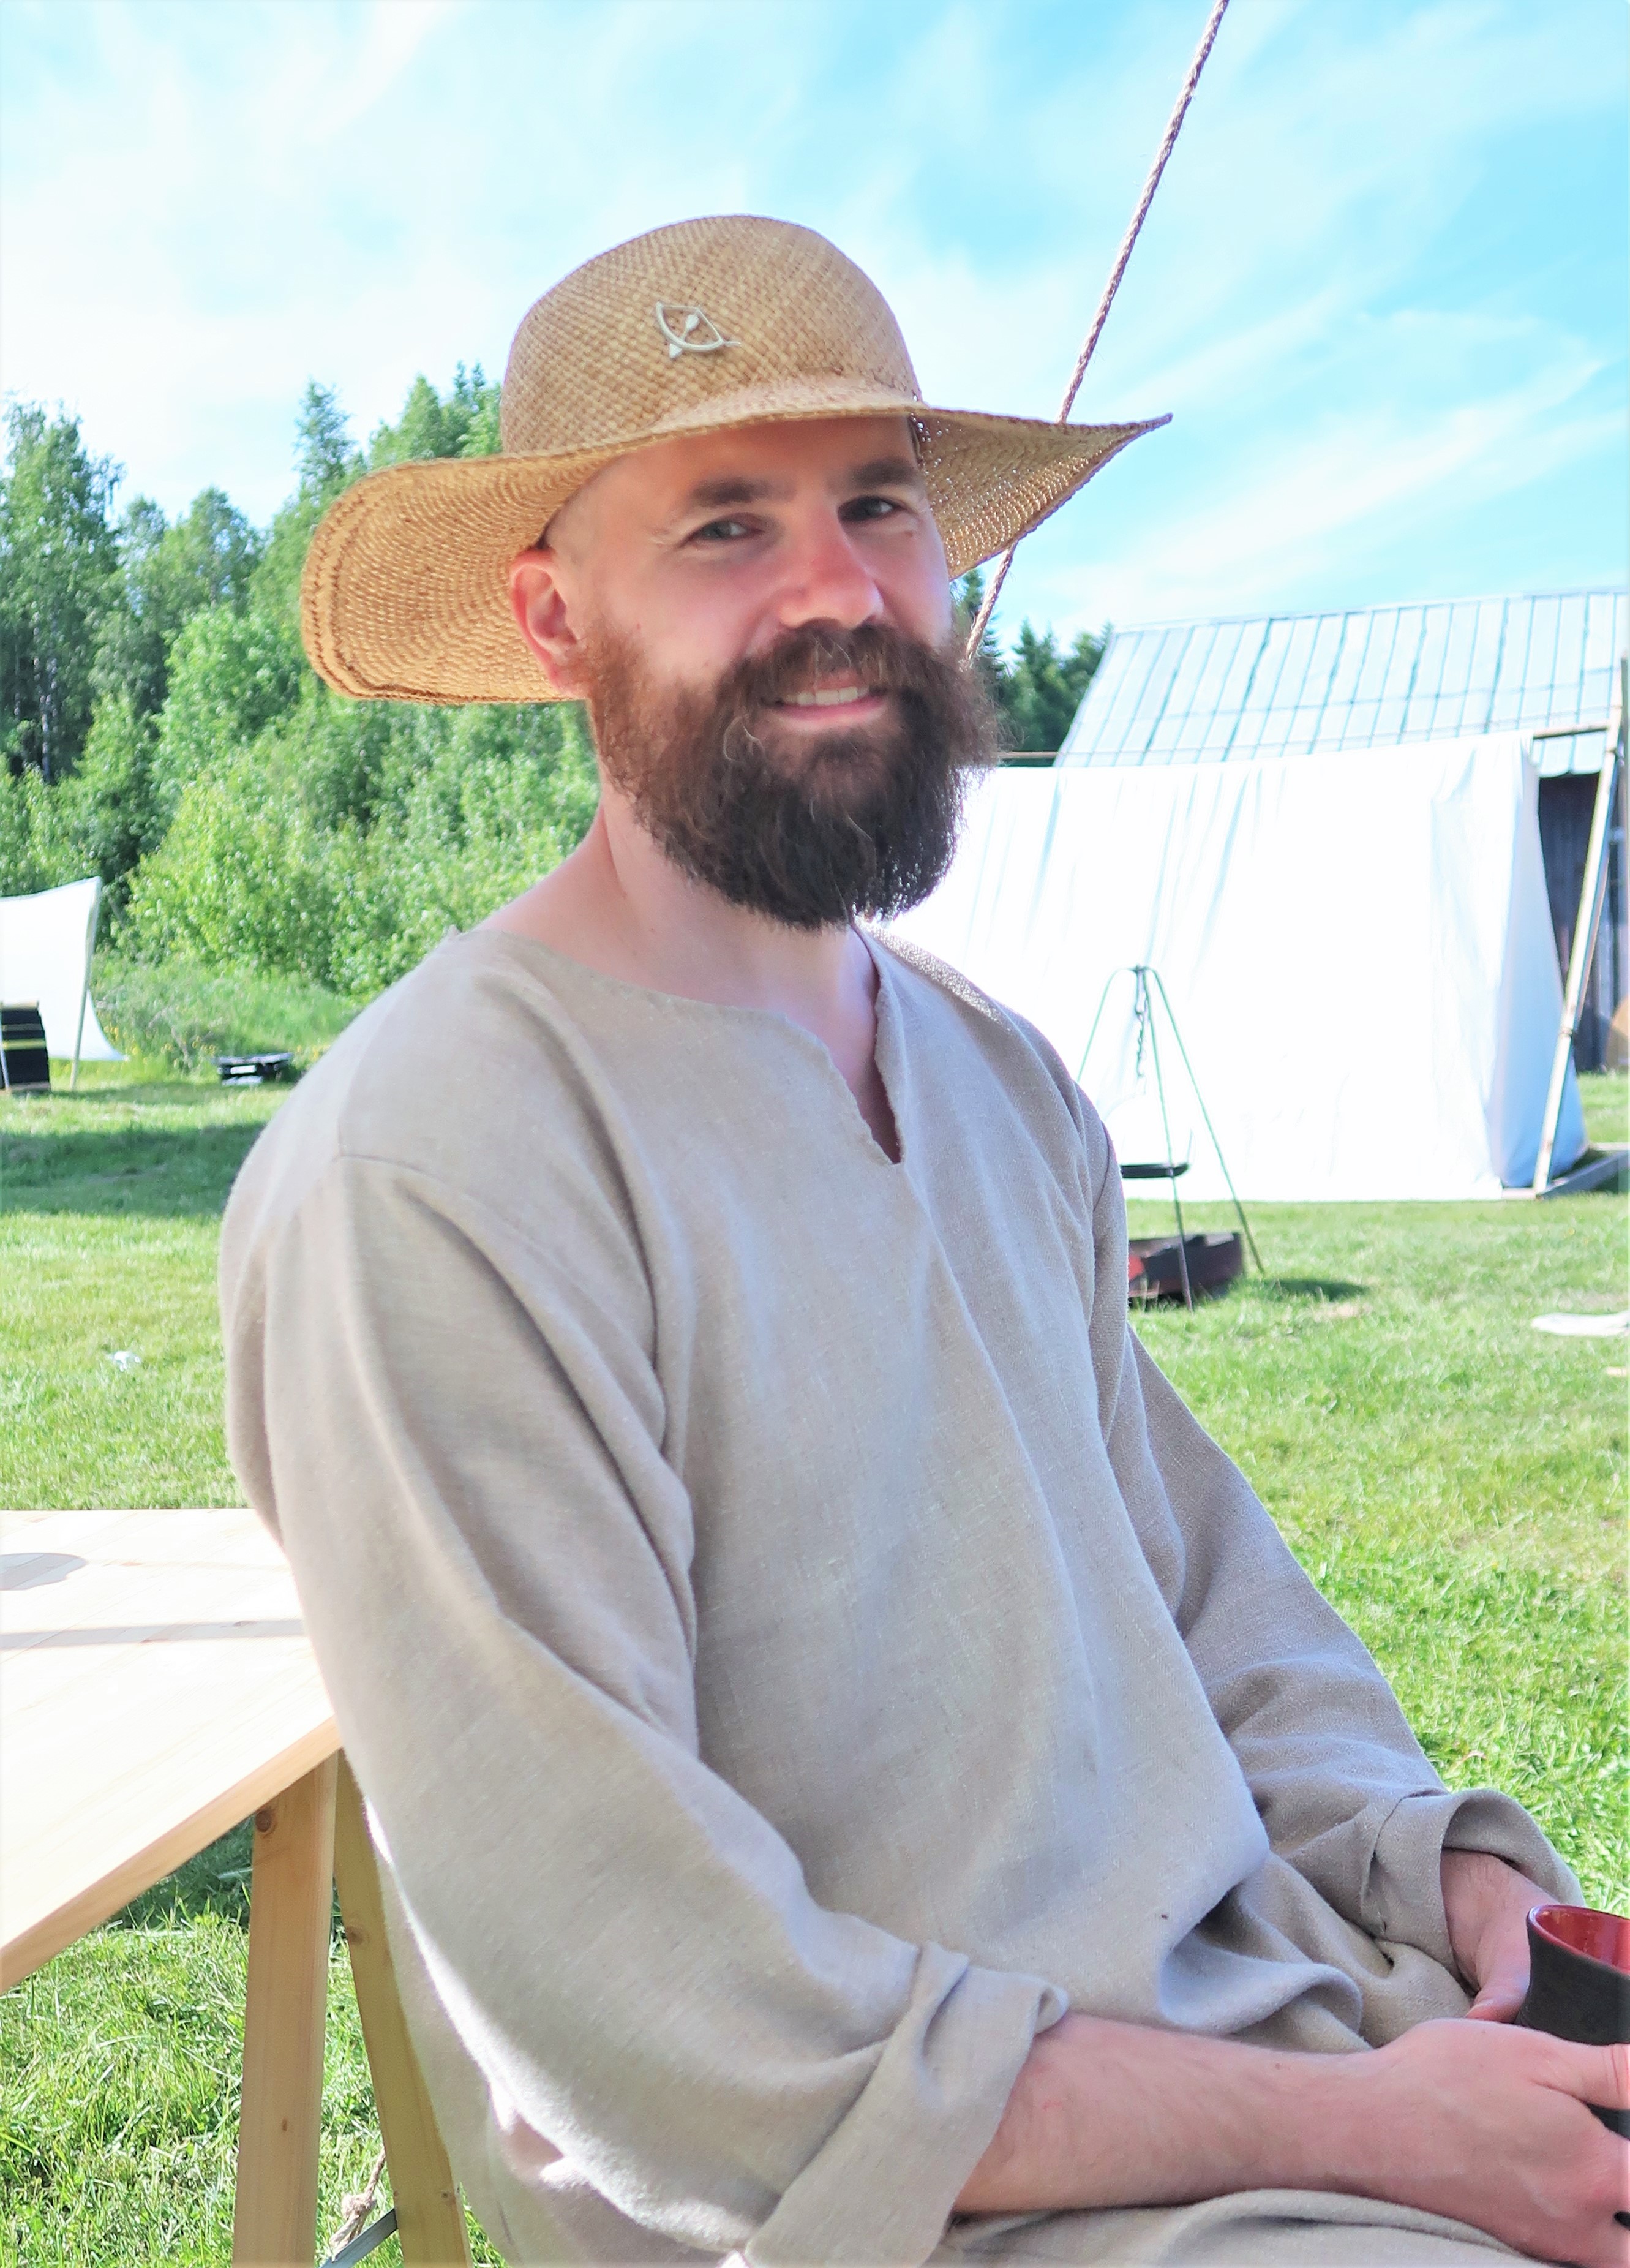
A note on sleeve measures: this sleeve doesn’t sit on top of the shoulder when finished, it hangs on your upper arm (see photo at the beginning), which makes this measuring method work. When measuring for a fitted sleeve, always measure around your bent elbow.
Design your neckhole:
These are my general measures: small-medium: 1 = 18 cm. large-xlarge: 1= 20 cm. The back I cut out around 5-6 cm deep, the front (2) is cut 10-15 cm deep. If I want a slit at the front (3) I cut it around another 10 cm deep. If you don’t want a slit, you might need to make the neck opening a bit deeper/wider in order to fit your head. You can always draw it out, cut a little, try it on, draw a bit more, cut and so on, until you are satisfied with the look.
Shape your armholes:
If you feel that the shoulders are a bit wide, you may shape the armholes a bit (common if you have a large chest but narrow shoulders). Cut 4 cm (small/medium) to 6 cm (large/xl) from the shoulder top (4) and create a gentle curve to the armpit, or draw a straight line from the top (4) to the armpit (see photo further below). Then sew the sleeves as described. The seam should still be hanging slightly below your shoulder, not at the top of it.
Cut out the pieces:
When you have drafted all your pieces on paper as above, you are ready to draft them onto your fabric! Iron the fabric and lay it down on a flat surface, draft all your pieces and check the measures with a measuring tape. Use a piece of chalk suitable for fabric, or if you don’t have that; a pencil. A ruler, a large book or a straight stick can be used to make the lines even. Everything seems good? Cut the fabric pieces out! (you may also want to mark them Front, Back, Sleeves if you are unsure.)
Sewing time!
The order of sewing is as following, I will walk you through every step below: shoulder seams if any, sleeves to shoulders, side gores if any, sew together sleeves and sides. Adjusting neck-hole, adjusting sleeve length to your wrist, hemming.
1. Start with pinning the shoulder seams. Putting in pins alongside the fabric edge makes it easier to avoid stabbing yourself when handling the project.
2. Cut a piece of linen thread, the length of your arm. Coat it with bee´s vax by pulling the thread over the vax piece a couple of times. Thread a needle (the needle should be as small as possible, but thicker than the thread to make it easy to sew), and make a knot at the other end.
The needle is thicker than the thread
3. Sew the shoulder seams with backstitches. 3 stitches/cm is a good guide, and 10-15 mm seam allowance depending on what you drafted on your pattern. If you find it difficult to make the seam straight, draw a thin line with a pencil where you want it to be.
4. Press the seam allowances to either side. Use your fingernail, a pressing tool or ironing. Fold the seam allowances double, and pin down.
5. Use running stitches (or whip stitches) to sew the folded edge down to the shirt. The stitching should only be visible at the right side as small dots.
6. Try out the neck hole by pulling it over your head. Cut out more if you need, and check in the mirror to see if you like the look. When you are satisfied, hem the neck opening. Start with folding the edge twice and pin it in place. Make the folds as narrow as possible, to make it easier to sew nicely, mine is 5 mm. Sew the edge down with whip stitches.
7. Pin one sleeve to the armhole of the shirt, right side against right side (this photo show a shaped armhole). Sew it in place, using running stitches or back stitches. Pin and sew the other sleeve in place. Press the seam allowance to either side.
8. Now we are going to save some time with a folded over seam allowance! (photos below in 10.) Trim one side of the seam allowance down to approx half-width (5-6 mm) and then fold the larger one over this, press in place. To avoid fraying and loose threads, fold in the edge of the fabric under the seam allowance. Press down, and pin in place. Now you have a neat looking fold, ready to be fastened down. When sewing the seam allowance down like this, you save time and make the seam more durable since the fabrics will be sewn twice to each other. I prefer whip stitching for this seam, it is easy and durable.
Which way should you press the folded over seam allowance? I often go for pressing and sewing down to the biggest fabric piece. So for the sleeve seam, the seam allowance will be pressed down onto the body parts. On side gores, the gores will be pressed out onto the body piece. It makes it easier to sew and gives the garment a nice drape.
9. Time to sew the side seams and sleeves! Lay the shirt down inside out on a flat space, and pin the side seams and sleeves. Make sure the fabric is smooth and the edges lays on top of each other. Mark where you want the seam to be if needed, and then sew from the sleeve wrist, all the way down the side seam. I like to leave the bottom 10-20 cm open on the side seams to create a slit in the shirt, if I don’t have side gores. Backstitching will make the seam durable, but if you are in a hurry a running stitch with some backstitching in the armhole will also suffice.
Slits at the bottom
10. Finish of the side seams by pressing the seam allowance flat, and make a folded over seam allowance. Press, pin and sew this down.
Folded over seam allowance, above the side slit in the shirt
11. Now it is time to fold the edges and sew them down. On linen fabric, I like to make a double fold to avoid fraying threads from the fabric edges. Start with the hem around the bottom of the shirt. Fold two times, around 0,5 cm each (or the SA you choose), and press the fabric in place with an iron or your nail. Sew with whipstitching, travelling on the inside of the shirt, which will make small dots of threads visible on the right side of the shirt.
After that, finish the sleeves in the same way. I like to try the shirt on before hemming, to be able to adjust the sleeve length. If they are a little too long, just create a deeper fold, or cut off the extra fabric. If you have made them too short you can sew on another piece of fabric and make a hem on that one. Piecing is always historical.
How to fasten the thread:
When there is about 10 cm thread left (approx the width of your palm), it is time to fasten the thread and take a new one. Sew another stitch, pass through that loop before pulling tight, and repeat at the same place a couple of times. Then you can pull the rest of the thread down into the fabric before snipping off the leftover, hiding the thread inside the seam. Neat! Take another thread, prepare, and start sewing at the same place you stopped.
Uhm, this is a lot of steps for a simple shirt? Yes, it is. Can you cut the corners, get a bottle of beer and sew it all on the sofa? Of course you can, but each step may not be as easy, and it will be harder to have a nice view of the process. What I mean is- this is just my way of describing the process as easy as possible for you, to allow a handcrafting process where each step is straightforward, and where the sewing will be as fast as possible to do.
General advice:
Always pin on a flat space to make sure your seams will be even.
Be nice to yourself; sit comfortable, take lots of breaks, use tools to make your sewing easier.
Remember to actually try out the fit, the length, the neck hole etc before finishing sewing. It is very easy to just continue sewing once in a flow, but if you end up with a garment you don’t like, you will have to redo lots of work.
Is the measuring a bit off? No worries; in this project, a 1-2 cm difference will not matter. You can probably go on sewing. I sometimes have wonky measures. Medieval finds are full of uneven pieces, wobbly seams or piercings. Don’t worry!
Other types of shirt models:
Shirt with side gores: adding side gores is easy, and give you extra movement on a longer shirt. Sew them in place before sewing the side seams closed. Use the same stitches and folded over seam allowance as above.
Shirt with sleeve gussets: small square pieces of fabrics get stitched in under the arm, to add more movement and to save on fabric instead of making larger sleeves. I usually sew these after the sleeve, while sewing the sleeve and side seams closed.
That’s it on shirt sewing. These techniques will also do well on a number of different projects, and is somewhat of a basic go-to. Enjoy your sewing! Did you like this post? Support me on Patreon to help me make more.
Lacing is a really easy solution when you would like to make a tightly fitted garment and need an opening to be able to get in and out easily. During the medieval period, lacing comes and goes as a popular fashion and practical solution choice, so if you aim for a historically believable garment make some research first to determine if the lacing is the best option!
Historical garments may also be closed with fabric or metal buttons, hooks and eyes, pins or a regular whip stitch.
spiral lacing with a lucet woven wool cord, on a 14th century dress
Lacing can be seen on male and female clothing, but today I wanted to show you how I make lacing on a dress. The most common lacing method is spiral lacing; one cord for closing the open space by going through lacing holes spaced a little uneven from each other. This is easy and quick, and you only need one cord.
Fastening the lacing; a double round at the top prevents gaping.
To unlace; thread the point back again, or as below: use a loose knot at the start of the lacing (at the bottom) and unravel the lacing from the bottom up.
Use a knot at the start of the lacing, on the inside of the dress.
Spiral lacing up close, and on the finished dress.
I place the lacing holes like this; the first two and the last two are aligned but the rest is spiralled. This gives you a tighter lacing, that looks better and is historical. By making the first and last pair even you will get the front panels even to each other. This kind of lacing can be seen in paintings by Weyden for example.
Lacing holes needs to be quite close to each other; between 1,5 to 2,5 on one side, depending on the fabric and the amount of support you need. A tighter gown supporting a heavy bust needs a closer lacing, while a looser garment might have more space between the holes.
To make lacing holes I use a sharp awl to make a small hole, and then a fitting thicker awl in metal, wood or bone to make the hole bigger. I do have real awls, but since they seem to always be “somewhere else” a bunch of different objects has been used; needle binding needles, hairpins, chopsticks… You don’t need anything fancy, was my conclusion. Yeah…
After the hole is made the right size, I sew around it with a buttonhole silk thread or a waxed linen thread (depending on social status, period, colour etc) I never bother with any fancy stitch, just sew around like this, and cover the hole equally with thread. Practise makes perfect; don’t bother if your first holes are a bit uneven, if you start from the bottom and work your way up they will look really nice by the time you reach the area others actually look at.
A tip for making the hole more even is to first sew one round of stitching around the hole, and then another turn, dense enough to cover any gaps.
On the inside of the lacing, you can see a thin strip of tabby woven, sturdy linen fabric. I always use a piece of fabric on the inside (if I don’t have a whole lining in place) to strengthen the edge and make the lacing look better. You can use linen fabric scraps: cut it in a straight piece, fold in the raw edges and sew in place with whip stitches or slip stitches.
I prefer to make the cord in either wool or silk thread. The wool thread is cheaper, flexible and will stay put. The silk one gives a nice shine, is very strong and easy to lace with. Decide based on your project. To finish the cord (this one is done with a lucet but they could also be braided or tablet woven) I like to use a point. That will make it easier to lace the dress, but if you don’t have one a thick needle will do the trick too! Just thread the cord on a needle, and use that to lace yourself in. Another option is to make a cord long enough to just loosen up, without having to lace up the whole garment.
I wanted to share some thoughts with you today; things I have learned and things I find important when I design medieval clothing. Both for myself and for customers. Being new in any branch of historical reenacting or costuming can be overwhelming, and just like with all other things in life there’s no simple answers or an ultimate guide. “Just read this book, and then you will know everything”… I haven’t found it at least.
But don’t feel overwhelmed! It is such an interesting journey you have ahead, exploring and experiencing other times and new handcrafting. And there are lots of others that love to share their knowledge in this field as well. Here are some great things I have learned over the years, that I like to share whenever I can!
Choosing materials is clearly one of the more difficult things when starting with historical handcrafting, and often the simplest way to succeed in making a good outfit is to pay the price for good material and buy the same as everyone else. Seems boring at first, right? But instead of wanting to make that perfect deal on super-cheap wool in a really unique colour; think about what historical look you want to achieve with your outfit, and what qualities you would like the garment to have.
The places that sell fabrics especially for reenactors often produce high-quality fabrics, and their customers will come back to buy more if they like it. The chance will also be that they are knowledgeable in historical fabrics so you can find materials, colours and qualities that resemble the historical originals, whilst giving you a fabric that will last for a long time at an affordable price.
The quality of the fabric will differ with manufacturers, places of origin, type of material etc so make sure to read up a bit on what material would be good for your individual project. Look at what others say about the seller and the different fabrics they offer and learn some useful words: tabby and twill are weaving techniques, and twill is often more stretchy. Felted means the fabric has been fulled and is often less stretchy, but more weather resistant and smooth. Thin, medium and heavy are different weights in wool fabrics, whereas 120 grams etc are the weight of an m2 fabric.
Fabric shopping at The historical fabric store
It is always best to be able to see and feel the fabric yourself, and now when we stay at home, fabric samples are a good choice. If you have friends, a group of other people around you that are good at different fabrics, ask them for advice (or use a forum online) and always state what kind of garment you would like to make (a kirtle) for what period (14th century) and for what kind of use (reenactment event during winter etc). That way you may save both money and effort instead of buying the first fabric you find, and then get disappointed.
Preparation of fabric
Wool and Linen
I always prewash fabrics before sewing, even for my customers. I know that many in the field claim that you can’t wash wool fabrics in water, but that’s just bullsh*t. Of course you can wash fabrics, at least good ones. Bad ones? Might shrink uneven, get too much wear or completely change the look, feel and even the colour in contact with water. But you know what? That is not ok for garment fabrics. They should be made to endure everyday wear and wet weather, washing, food stains and so on. Those things totally existed in the medieval ages, it would be strange if your medieval outfit couldn’t endure the same right?
Furthermore, prewashing fabrics will release the weaving tension in the warp, making it shrink slightly and give you the fall it will have after ironing/washing/a rainstorm. You could get the same result by steaming the fabric with an iron before sewing, but that won’t remove the…
Chemicals and anti-mould treatments. Fabric today needs to last for longer times during shipping and warehousing, and look good when arriving on the shelf in the fabric store. To achieve this most fabrics (and ready-made garments) are treated with different kind of chemicals, which will wash out in the washing process. Or rub off on your body… Not a good thought, right? Always prewash your fabrics!
Linen: soak in water a while before washing, to get a smoother fabric. Not necessary, but worth it. Fold it loosely in the bathtub for example. Wash the wet fabric in 40- 60 degrees C (the temperature you would like to wash your linen shift/shirt in later) hang to dry and then iron on a high temperature.
Wool: wash by hand or use the wool setting in the washing machine. Use cold to lukewarm water and wool detergent. If you don’t have that, use a little shampoo, because wool is hair, and will not look its best after strong detergents. Also, hot water might felt it and make it look dull.
Silk and silk velvets are the only fabrics I don’t wash before use, but rather iron very gently and hang out to air before use.
This dress has been washed several times in water, and still looks like new.
Which thread?
That depends on what fabric you want to use, and what you want to make. But I prefer natural materials and “same for same”: silk for silk fabric, linen threads for linen, and wool for wool fabrics. Oh, or silk and linen for wool fabrics too, because that is a historical choice and very easy to work with. If you prefer to use a sewing machine, cotton thread for linen and silk for wool garments work nice. A polyester thread is a bit too “sharp” and might lead to breakage in the fabric rather than the seam if you happen to get stuck in something with your garment. But yeah, it will work on a sewing machine if that is what you have, I just don’t recommend it.
Where to start?
It is always good to start with underwear like a shirt, shift and breeches. They will make up the base, are often easier to make and linen is not as expensive as wool. Also, you’ll get to try out the fit, the seams and some techniques.
After that, it is more a question of what you need versus what you are inspired to start with. Remember, handcrafting should be fun and not only practical! I like to make a middle/base layer next, often in wool, to be worn on warm events or when I work. After this is done, I adjust and finish of necklines at under-garments so they are not visible (if that is not fashionable) and start with some accessories and another layer for warmth and weather protection. The medieval period (and others too) often have an outfit made up of several layers, and that is really practical when going to outdoor events!
Wearing a thin wool gown on a summer event. Photo taken by Catrine Lilja Kanon
Another good tip is to make a mock-up or toile, basically a try out on the garment you desire, made in a cheap/recycled cotton fabric. It might seem as you are doing the work twice, but this is really handy as you get to try out the pattern, fit and look on the garment without risking that really expensive fabric. And if the mock-up gets really good, you just pick apart the basted seams and use it as a pattern!
Basting is also a good investment; long-running stitches will hold together your fabric pieces enough for a final fit before sewing and will make it both faster and easier to sew all the seams by hand. I will confess, when I started sewing medieval clothing I NEVER basted anything and rarely pinned the seams, but after several surprises (Whot, how come I got this fit?) I learned it was both better and faster to check the fit, before sewing the final seams…
How to decide on social class and status?
Ohh, don’t ask me, I always change between working-class garments and fancy party outfits depending on the event, place and what I feel like… But generally, just go for whatever catches your fancy! Or pick clothing after your preferred activities; are you going to stroll around a market fair with friends? Visit a fancy banquet? Or do you prefer mud wrestling, archery, beer taverns or outdoor cooking? Not only will you look much better with the right kind of clothing, but you will also find that your activities will be much more fun with the right garments! A short dress and practical hood for the forest archery, or a thin and cool kirtle with hose for the indoor festivities.
A well of working-class doublet, perfect for active events…
And a silk brocade doublet for those fancy strolls in the garden
Garments you need
This is always a tricky question, as it depends on the weather, the type of event and the gender and social status you want to portray. I thought I did great at my first events wearing a linen tunic, shoes and a cloak, I neither froze too much nor died, but nowadays I confess to having higher standards… Like, I want to both look like I fit in the historical context, being comfy, not getting too many mosquito bites, and not freeze during chilly evenings. I also like to change my linen underwear every day to feel fresh, as well as having some change of outerwear/dresses just because I feel like it. (Oh, now I’m babbling again. You would never guess how much text I always have to delete because of babbling…)
Getting dressed in the morning; linen shift, wool hose and leather turn shoes
1. You generally need linen underwear and a change for longer events. Several changes, if you’re not going to wash the clothes during the event. We want to look medieval, not smell medieval…
2. A thin or medium warm wool layer for summer events, for working or for indoor events.
3. An outer layer for cold evenings, if you get wet or want to look well dressed. I recommend another layer of kirtle/dress/coat rather than a cloak to get more use out of your clothing.
4. Headwear like hats, veils, hoods etc. Both to complete the outfit esthetically, but also because it gives you cover from weather and bugs.
5. Shoes! Don’t forget shoes, make or buy a pair that is looking good and feels comfortable. Hose (long or short) with thin leather soles is also workable on warm events, paired with pattens.
6. Accessories, both fancy and practical: belt, garters, bags, purses, cloaks, headwear, gloves… You name it. These can really set the style and time period, so check out sources before you decide on what to add to complete your outfit!
A 15th c outfit in 3 layers; shift, middle kirtle and overdress complete with shoes, headwear and accessories.
Wear it!
Historical clothing should be worn, because it is awesome and comfy and looks great… You know that you’re allowed to wear it around the house right? Or take the great cloak for that chilly walk, or use the apron when doing gardening work. You shouldn’t need to be super careful with your garments, they will look even better when you have worn them a couple of times. My favourite shift is 6 years old and worn transparent thin over my shoulders and back after months of wearing, but I love it.
And make it last longer:
If you have long skirts, fold them up or pull them up into your belt when walking so you don’t step on the hem, or drag it through the mud. That will make the fabric last longer. Protect the handsewn leather turn shoes with pattens when walking through rain or mud, and always mend holes and rips as soon as you find them on your garments. At the end of the season, I always wash, mend, air and look through all my garments before putting them into the wardrobe. For this covid-year though, I recommend taking them out for airing a time or two to avoid dust and bugs.
Getting dressed in historical clothing is actually a bit different than getting dressed in your favourite comfy pants and T-shirt. If you are used to wearing stretchy clothing, you will need to be a bit more careful getting dressed and undressed with woven natural fibres. Imagine it more like a suit, pull it carefully over your head, always open lacing and buttons before removing the garment, and never “jump” into your medieval joined hose. Another tip to make your hose last longer is to always pull them up before kneeling or sitting and to wear garters under the knee to make them stay in place.
Early 14th c outfit with accessories
Yeah, I think I got the most parts down here, and it became quite the long blog post. Maybe I am tired of sitting at home, talking to the cats and love all the time? Who am I kidding? I am REALLY tired of sitting at home, I miss events, adventures and being able to go out and do fun stuff. But most of all, I miss you friends, readers and fellow history travelers! Stay safe and take care so we can meet each other soon!