HANDCRAFTED HISTORY


11 Comments

Tutorial viking/medieval shift or underdress

Underwear in linen – you can always use another one. Here is an easy and basic tutorial about how to make your own. I use prewashed white or natural linen fabric, about 150 cm in width. You need about 2 meters for a shift for size small to medium. If you are tall, take another 50-60 cm. If you need a bigger size or want the shift to be long and full, take 3 meters of fabric (or draw out the pattern pieces on paper first.)

Early morning in only my linen shift. This also has a gore in the middle, to make that- check out my tutorial on how to put in a gore in your dress.

Before you start:

Soak the fabric in water for a couple of hours, then prewash in 40-60 degrees C. Zigzaging the edges before washing will prevent fraying. Hang dry linen, and iron it on high heat after it is dry. Now you are ready to sew, without having to worry about the garment shrinking during washing.

Take your measures:

  1. Length of shift/shirt + 3 cm seam allowance (SA).
  2. Width of shift (around your chest or your widest part of your upper body) + 6 % for movement.
  3. Width of armholes + some cm for movement. Compare with a modern shirt that fits you.
  4. Length of the arm, from shoulder to wrist.

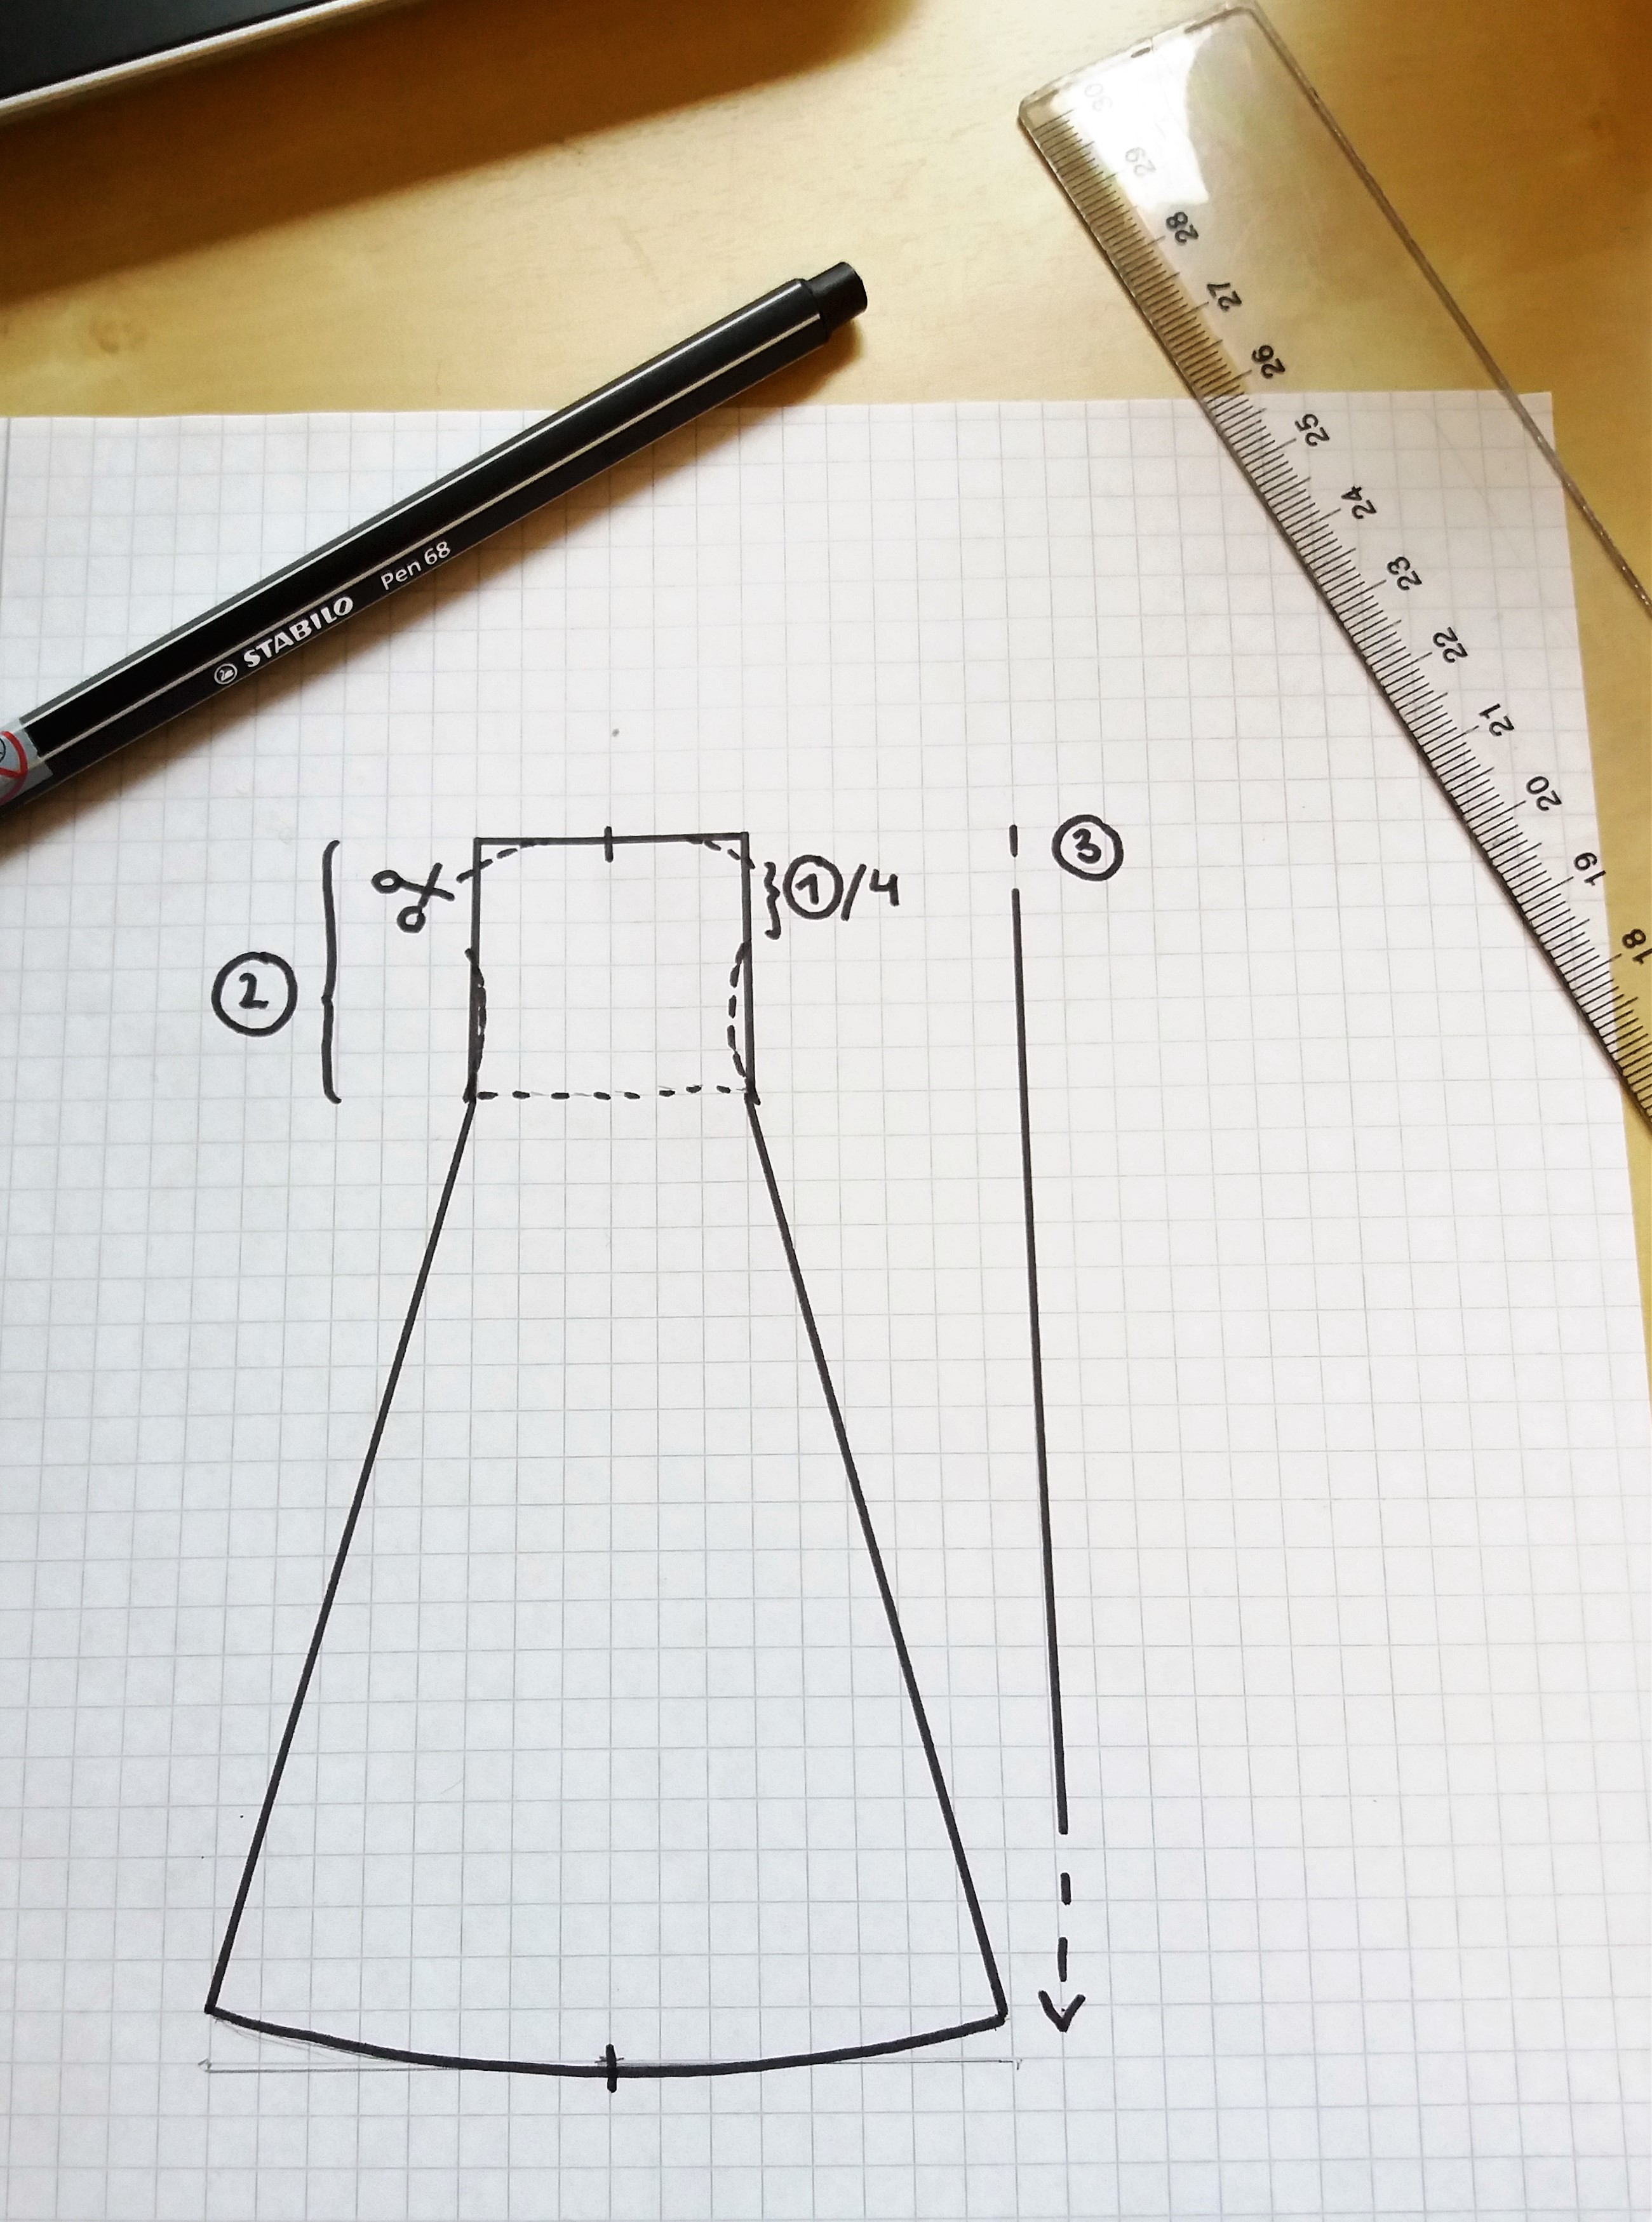
After measuring yourself; draw out the pieces you need on paper with the measurements you got. This is my layout with pattern pieces; front, back, two sleeves, two sleeve gussets, two side gores (one is split in two). Add seam allowance (SA) 1-1,5 cm on each side, 2 cm at hems (sleeve wrist, neck-line, bottom hem).

Adjustments:

I cut out my neckline at once, but you can start with a narrow neck-hole of around 18 cm width, sew your shift together and then try it on to adjust the neckline to your taste. Note that I also cut out my armholes on the body pieces; around 4-6 cm on the shoulders and then in a straight line down. This makes the shift lay better on my shoulders.

Draw the pieces on fabric:

When everything has been drafted on paper with measurement+ SA added, it is easier to transfer it all to the fabric. Draft the pieces out on your linen, starting with front and back pieces, sleeves, then side gores and sleeve gussets (if you want any). I draft my side gores around 40-60 cm wide but use the fabric you have and adjust to your size (xs-small=minimum 40 cm, medium=min 50 cm, large= min 60 cm etc.)

001

If you are going to sew everything on the machine, start with a zig-zag or serger around all fabric edges. This is important so the fabric wont fray and fall apart when wearing and washing.

If you sew your shift by hand, start with assembling the pieces, and then finish off the edges. Backstitches for assembling, and whipstitch down SA and double folded edges are durable and historically accurate.

Sewing:

After this, it is time to sew the pieces together. Start with the sleeves + sleeve gussets and then assemble the split side-gore. Next step is to sew the side-gores to the sides of the front piece. I always pin the pieces first, on a flat surface.

003

Sew the pieces together, and press the SA to each side with an iron, or by hand. Repeat these step after every seam, and it will be easier to sew the crossing seams nicely and make the seams look better.

004

Sew the shoulders together. When these are done, lay the garment out on a flat surface, with the right side up, and put the sleeves on top of the garment right side down and pin the sleeves to the armholes. (You don’t need to do a fitted sleeve on this item, just sew the sleeves in place as a regular flat seam.) The middle of the sleeve should meet the shoulder seam, continue to sew along the sleeve until you reach the gusset, sew this in place but leave 1 cm open at the edge.

Pin the side seams and sleeves together. I start sewing from the wrist, along the sleeve to the start of the gusset. Then I sew the gusset in place from the sleeve to the armhole, fasten the thread, change directions and sew the gusset to the armhole and down towards the side gussets.

When sewing the area around the sleeve gussets you might find it a bit bulky. Don’t be afraid to finish your seam, cut the threads and then change direction or the way the fabric run on the machine (or in your hand). Pinning or basting before sewing is also a great help. Remember your SA on the gusset; leave 1-1,5 cm open at the edges of the seams to make it fit. Make it as easy as possible for you at every step and you will find it much more fun!

005

When your garment is assembled, try it on to adjust the neckline and the length of the sleeves if necessary, and then finish the hems by hand. The easiest way to do this in a historical way, is to fold the hemline twice and whip stitch it down (this will keep the fabric from fraying, or hide your zig zag stitch). I use waxed linen thread in the same tone as the fabric, which makes for a descreet seam.

Good luck sewing!

Check out my shirt tutorial for help on how to sew a linen garment by hand.

Spara

Spara

Spara


15 Comments

Tutorial Apron Dress

One of the dresses that I still like after using for many events, is my Viking age apron dress (it’s actually one of my oldest piece of clothing). It´s made of a medium-heavy tabby woven wool and the construction of the dress is inspired by the find from Hedeby. The pattern is made of 4 pieces and is quite simple, you´ll achieve the fitted look by making small adjustments according to your body.
As you probably already noticed, there are amazingly many different variations of reconstructions and suggestions on how the apron dress may have looked, and I also think there were different variants during the viking age. However, I decided to imitate the find from Hedeby, as this has a piece of a probable seam preserved, and gives a suggestion of how the skirts/panels may have been assembled. After reading some discussions on the website Historiska världar and looking at gold figurines, I also chose to sew the dress too long, to create a train. That’s my interpretation on the figurines and picture stones and I was curious about how the fabric would fall with such a model. After a while, however, I cut off the excess fabric that made the overly long skirt, since I got irritated about the fabric dragging mud everywhere and getting in my way. It was a nice view though, the long skirt trailing behind.

hängselkjol2

Here is a list of what you need, and some easy steps to follow to make one of your own!

What you need:

  • 2-3 m *1.5 m fabric (2 m= small, 3 m=large)
  • scissor
  • measuring tape
  • markers for fabric
  • pins
  • needle and thread or a sewing machine
  • a friend to assist with the final adjustments on the dress

The measurements you need:

  • Armpit-hemd (3) (as long as you want the dress to be) + 3 cm sewing allowance at the bottom, and 5 cm at the top if you would like to make the dress with a higher look (like my green one) when measuring from the armpit; start as high up as you can get under the arm. you will cut out space for your arm movement later.
  • Width around your body (1) (the widest part of your body, often around your bust. Divide this measurement in 4 and then add 4cm to each piece (seam allowance and leisure of movement)
  • Armpit-waist (2) (in this case, your waist is your slimmest part of your body, after which the dress is going to get wider)

I chose to make my dress rather fitted, but a more loose style will make it possible to wear a pair of underdresses under it, which can be nice during colder weather. The 4 pieces are of the same size and shape. They start out straight and then gets wider at the waist.

The amount of fabric you need depends on your measurements, but I drafted up three different ways of putting your pattern pieces out on your fabric, depending on how much fabric you want to use.

For the draft to work you need to have a fabric that is 150 cm in width, and the dress can not be longer than that. 1F + 2F is the two side pieces, 3B + 4B is the front and back ones. The bottom-left draft shows how you can use the fabric in an effective way by doing a gore in one panel.

The upper pattern takes 250 cm of fabric and gives you a dress with a hem circumference of 80cm *4= 320 cm. You can absolutely do with less; the one at the bottom- right gives you a hem of about 270 cm, using under 200 cm of fabric. This is for a small-medium sized person. If you have a larger size, remember to add width not just to your upper area but to the skirt as well, to make the dress drape nicely and give you space to move.

After cutting the pieces from the fabric, baste them together in order to try the size and fitting. The dotted lines on the picture above indicate where you can fit the dress (waist+under the bust, under the armpit and at the small of your back). When you try out the dress, remember to have your shift underneath so it won’t get too small. If you’re using a modern bra during your viking adventures, then also wear it during fitting sessions.

When the dress is done, I usually make the straps in linen or wool fabric (linen straps are more common in finds). Make them as narrow bands (folded double) and sew them on to the back of your dress at the same position as your bra straps would be, this will make them fit comfortably on your shoulders. In the front, you may sew them down to the dress if you haven’t got tortoise brooches yet, otherwise use these to fasten the straps to the dress. I prefer to do a loop at the end of the strap, and then another one at the front of the dress; these you can clearly see in finds from the viking age, and it also makes it easier to use the brooches without damaging your fabric.

If you feel that you would like to add something; decorations are a nice way to spice up your apron dress. A tablet woven band, a small piece of silk fabric or a silver thread posament are all find-based decorations from the viking age. Good luck with your sewing!

Spara

Spara

Spara

Spara

Spara

Spara

Spara

Spara

Spara


Leave a comment

The easy apron dress

This apron dress is really simple and easy to sew together- perfect if you want to save fabric, try to hand stitch your first garment, or just want to try out a looser fit on an apron dress.

The description is based on the fact that you have a fabric that is approximately 150 cm wide, and the dress in the picture is about 130 cm long. If your fabric width is different, you will have to redraw the pattern pieces and probably piece the dress together with more gores. I show you a way to make the skirt fuller with a small gore on the drawing below. The method can be used for larger gores also. B = back of the dress, F = front.
Customize the measurements according to your own measurements. The amount of fabric you need depends on your measurements + how long you want the dress to be. On the pattern diagram, 1 square = 10 cm, so it takes 2.2m of fabric to make the dress to my measurements. Draw a separate paper sketch before you begin so you will understand how the pieces are laid out!
This description is mostly about the pattern-making assembly. If you want to know more about seams and techniques, check out my other descriptions and tips on the blog.

Start with calculating your measurements, and draw the pattern on paper. The dress consists of an entire front piece (F), and a two-piece back piece (B) that is laid out on the folded fabric. To get some extra fullness in the dress hem you can cut it according to the suggestion in the picture (the back piece is then cut in the bottom with a small gore).

Measure around the bust/widest part of your upper body = the measurements on the narrowest part of the dress: split the measure in two to make the front and back. Remember to add seam allowance; 1-2 cm on each side. The measures on the pattern are approximately 90 cm to fit me (40 cm on the front and 50 cm on the back piece). Because the dress does not start in the middle of the bust, but a bit above, you get enough space to move and dress/undress easily even if the measure is a little less than your widest circumference (I have 93 cm over my bust).

The length of the dress; measure from the armpit and as far down as you want the dress to go. Add seam allowance of about 4 cm. In the picture, the pieces are 130 cm long. The width of the dress hem becomes 2 * the total width of the fabric so 2 * 150 = 300 cm.

Once you have cut out your pieces; sew the back piece in the middle, then sew on gores if you made any. Bast the front and back together and try; cut out a little for the armpit if you want, and mark with pins where your straps should be attached (I usually like to wear them in the same position where I have my bra straps, I guess my shoulders are used to that.)

Sew the sides together, press and fold the seams, whip stitch them down to one side, and finish the hems by folding them once (on a thicker fabric) or twice (on a more lightweight fabric) and whipstitch them. Finish with sewing on thin fabric straps (I usually fold mine twice towards each other, whip stitch them together and then sew them on the garment. Then you are finished!

I really recommend buying a lightweight, more loosely woven fabric for this dress. Sturdier wools will not fall as nice and might feel like you are moving around inside a tent-like garment…

Spara

Spara

Spara

Spara

Spara


2 Comments

To finish what you started

Since the end of December I have been having a real cozy and calm time at home. Friends have come and stayed for some days, and much time has been spent in the sofa with tea, conversation and handcrafting. I decided to “get shit done” and emptied all my baskets and boxes with UFOs- UnFinishedObjects. It turned out that I am a real hoarder of started projects, some as old as 4 years and beyond. I decided that I may not start on anything new (except work of course) before I’m finished with everything thats old.

Now I have been productive and finished of some nice things, so I wanted to show you some projects to inspire you to get your unfinished work done!

img_1523

img_1516

Hose for a medieval woman in white wool from Medeltidsmode. Started last summer. The fitting is nice and all, but the cord should of course be just below the knee. I was rather tired that evening. But they will stay up the first times I wear them, and then I just have to move the cords.

wp_20170104_18_32_40_pro

My viking apron dress got a party embroidery in runes that my friend K wrote down for me. Started 1,5 years ago, finished last week. This kind of embroidery is not historical accurate, but the dress is nowadays my party-in-the-evening-dress, so some fun details will be just right.

wp_20170103_21_02_56_pro

A new st Birgitta cap, all hand sewn in linen thread, and a matching linen veil took one evening.

img_1514

Finally finished Hs landsknecht shirt, that should have been ready two years ago.

img_1489 img_1474 img_1472

And made a new smocked apron in handwoven linen for my 16th century outfit.

Dp you have any UfOs laying around that should be done?

Spara