This tutorial is made with the support of my Patreons. Support me to help me make more free tutorials!
The Skjoldehamn hood is a find from the 11th century, and because it is the only find of this type of garment (from Scandinavia) dated close to the Viking age period, it is often used as a Viking/Iron age garment by reenactors.
We don’t know who the garment belonged to; man or woman, rich or poor, or if the wearer considered themself a part of the Viking culture, the native Sami culture, or both. The clothing was found in a bog burial in northern Norway and the garment items resemble modern Sami clothing according to articles I found on the subject. But the hood also reminds us of the later medieval hoods, although it has square gores. Hoods with slits over the shoulders, or long cloaklike hoods can be seen from earlier periods in Europe.
Skjoldehamn in Norway
All considered, it is a good choice to make if you need a warm garment for iron-age clothing and want a hood, at least if you have a north Scandinavian-based outfit, a Birka-based Viking outfit might have had a hat instead. Overall, the hood is probably more common in reenacting than it was during it’s lifetime, but who does not want a practical garment when it is cold or wet?
Materials:
Most outdoor clothing that has been found from the period seems to be practical rather than decorative. Choose a warm and sturdy fabric, slightly fulled, and use wool or linen thread for sewing. The original has a seam on top of the head to give the hood some shaping, and a pair of cords on the side to pull it closer to the head. This tutorial is a simplified version without these elements, but feel free to add them if you like. And don’t be afraid of piecing together the hood if needed, piecing is very historical!
How to make the pattern:
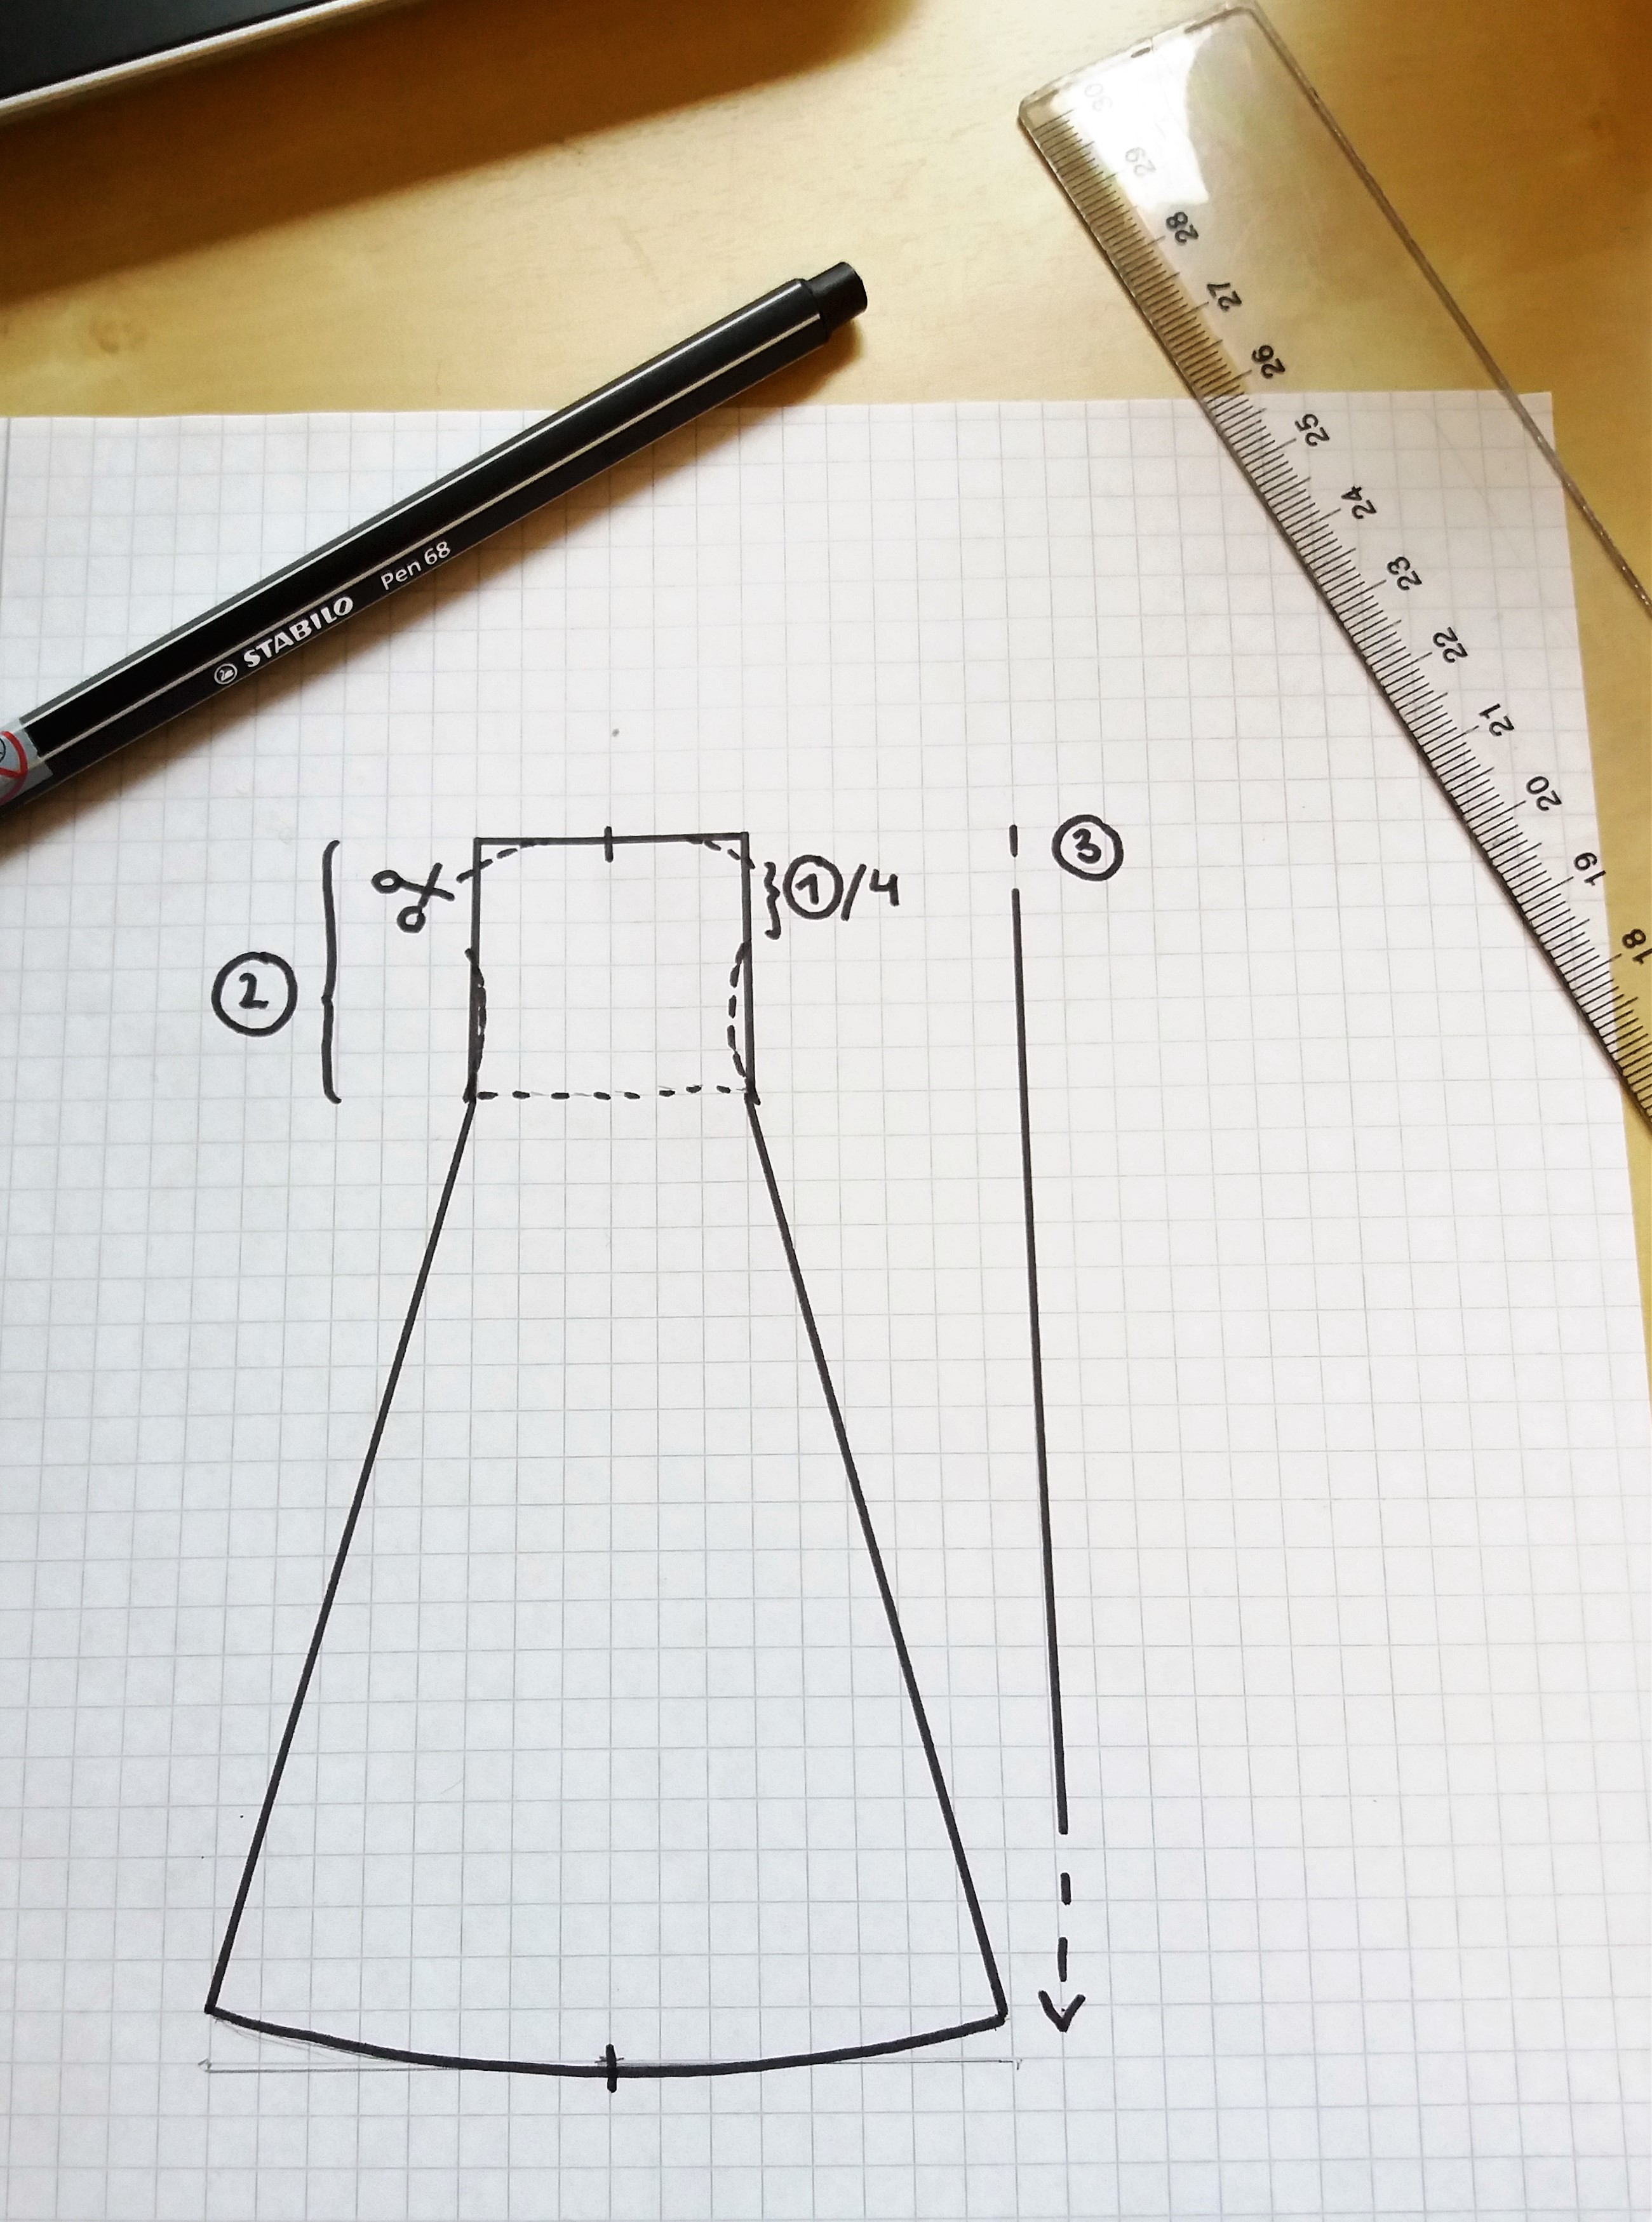
The hood is constructed with two long rectangles (or one piece folded at the top) and two squares.
This guide give you a hood similar to the original, covering your shoulders but not your arms. You could also make a longer one by lengthening measure B.
A is the depth of the hood, measure from the face where you want the opening to be, around your head and back. Divide the measurement in 2. I like deeper hoods to get protection from wind and rain, I usually have 32 cm.
B is the length of the hood from the head down to the shoulder, measure yourself from the top of the head, following your body, to the shoulder point (where the shoulder ends). Mine is 60 cm.
Measurement C is the face opening, measure around the whole face, under the chin, to get an opening. Try pulling the measuring tape “on and off” the head so you know if the opening is big enough to be comfortable. I like a looser opening to accommodate hairstyle/veils. Divide the measurement you get by 2. Mine is 34 cm.
Measurement D is B-C; the length of the hood minus the opening, 26 cm on my hood. D is also the sides of the gores.
You can make a paper pattern with these measurements. If you want to include seam allowance while drafting the paper pattern, add 2 cm to all measurements before drawing the pieces. Otherwise, do it directly on the fabric.
How to make the hood: Put the pattern pieces on the fabric and add seam allowance by drawing 1 cm outside all paper pieces.
You may cut the long rectangle in one piece, or in two pieces that are sewn together on top of the head. Cut out 2 square gores, one for the front and one for the back.
If this is your first hood, basting it together is a good choice to try out the fit. if you like it, leave the basting thread in as a guide while sewing. If you want to adjust anything it is easier to remove basting than a sewn seam.
sewing order
Start with sewing the seam on top of the head, if you have one.
Sew one side of each gore to the rectangle, right side to right side.
After that, fold the rectangular piece at the top to make it look like a hood, and pin the gores to the rectangle. Sew the gores from the bottom and up.
In the back, you continue with the seam all the way up to the top.
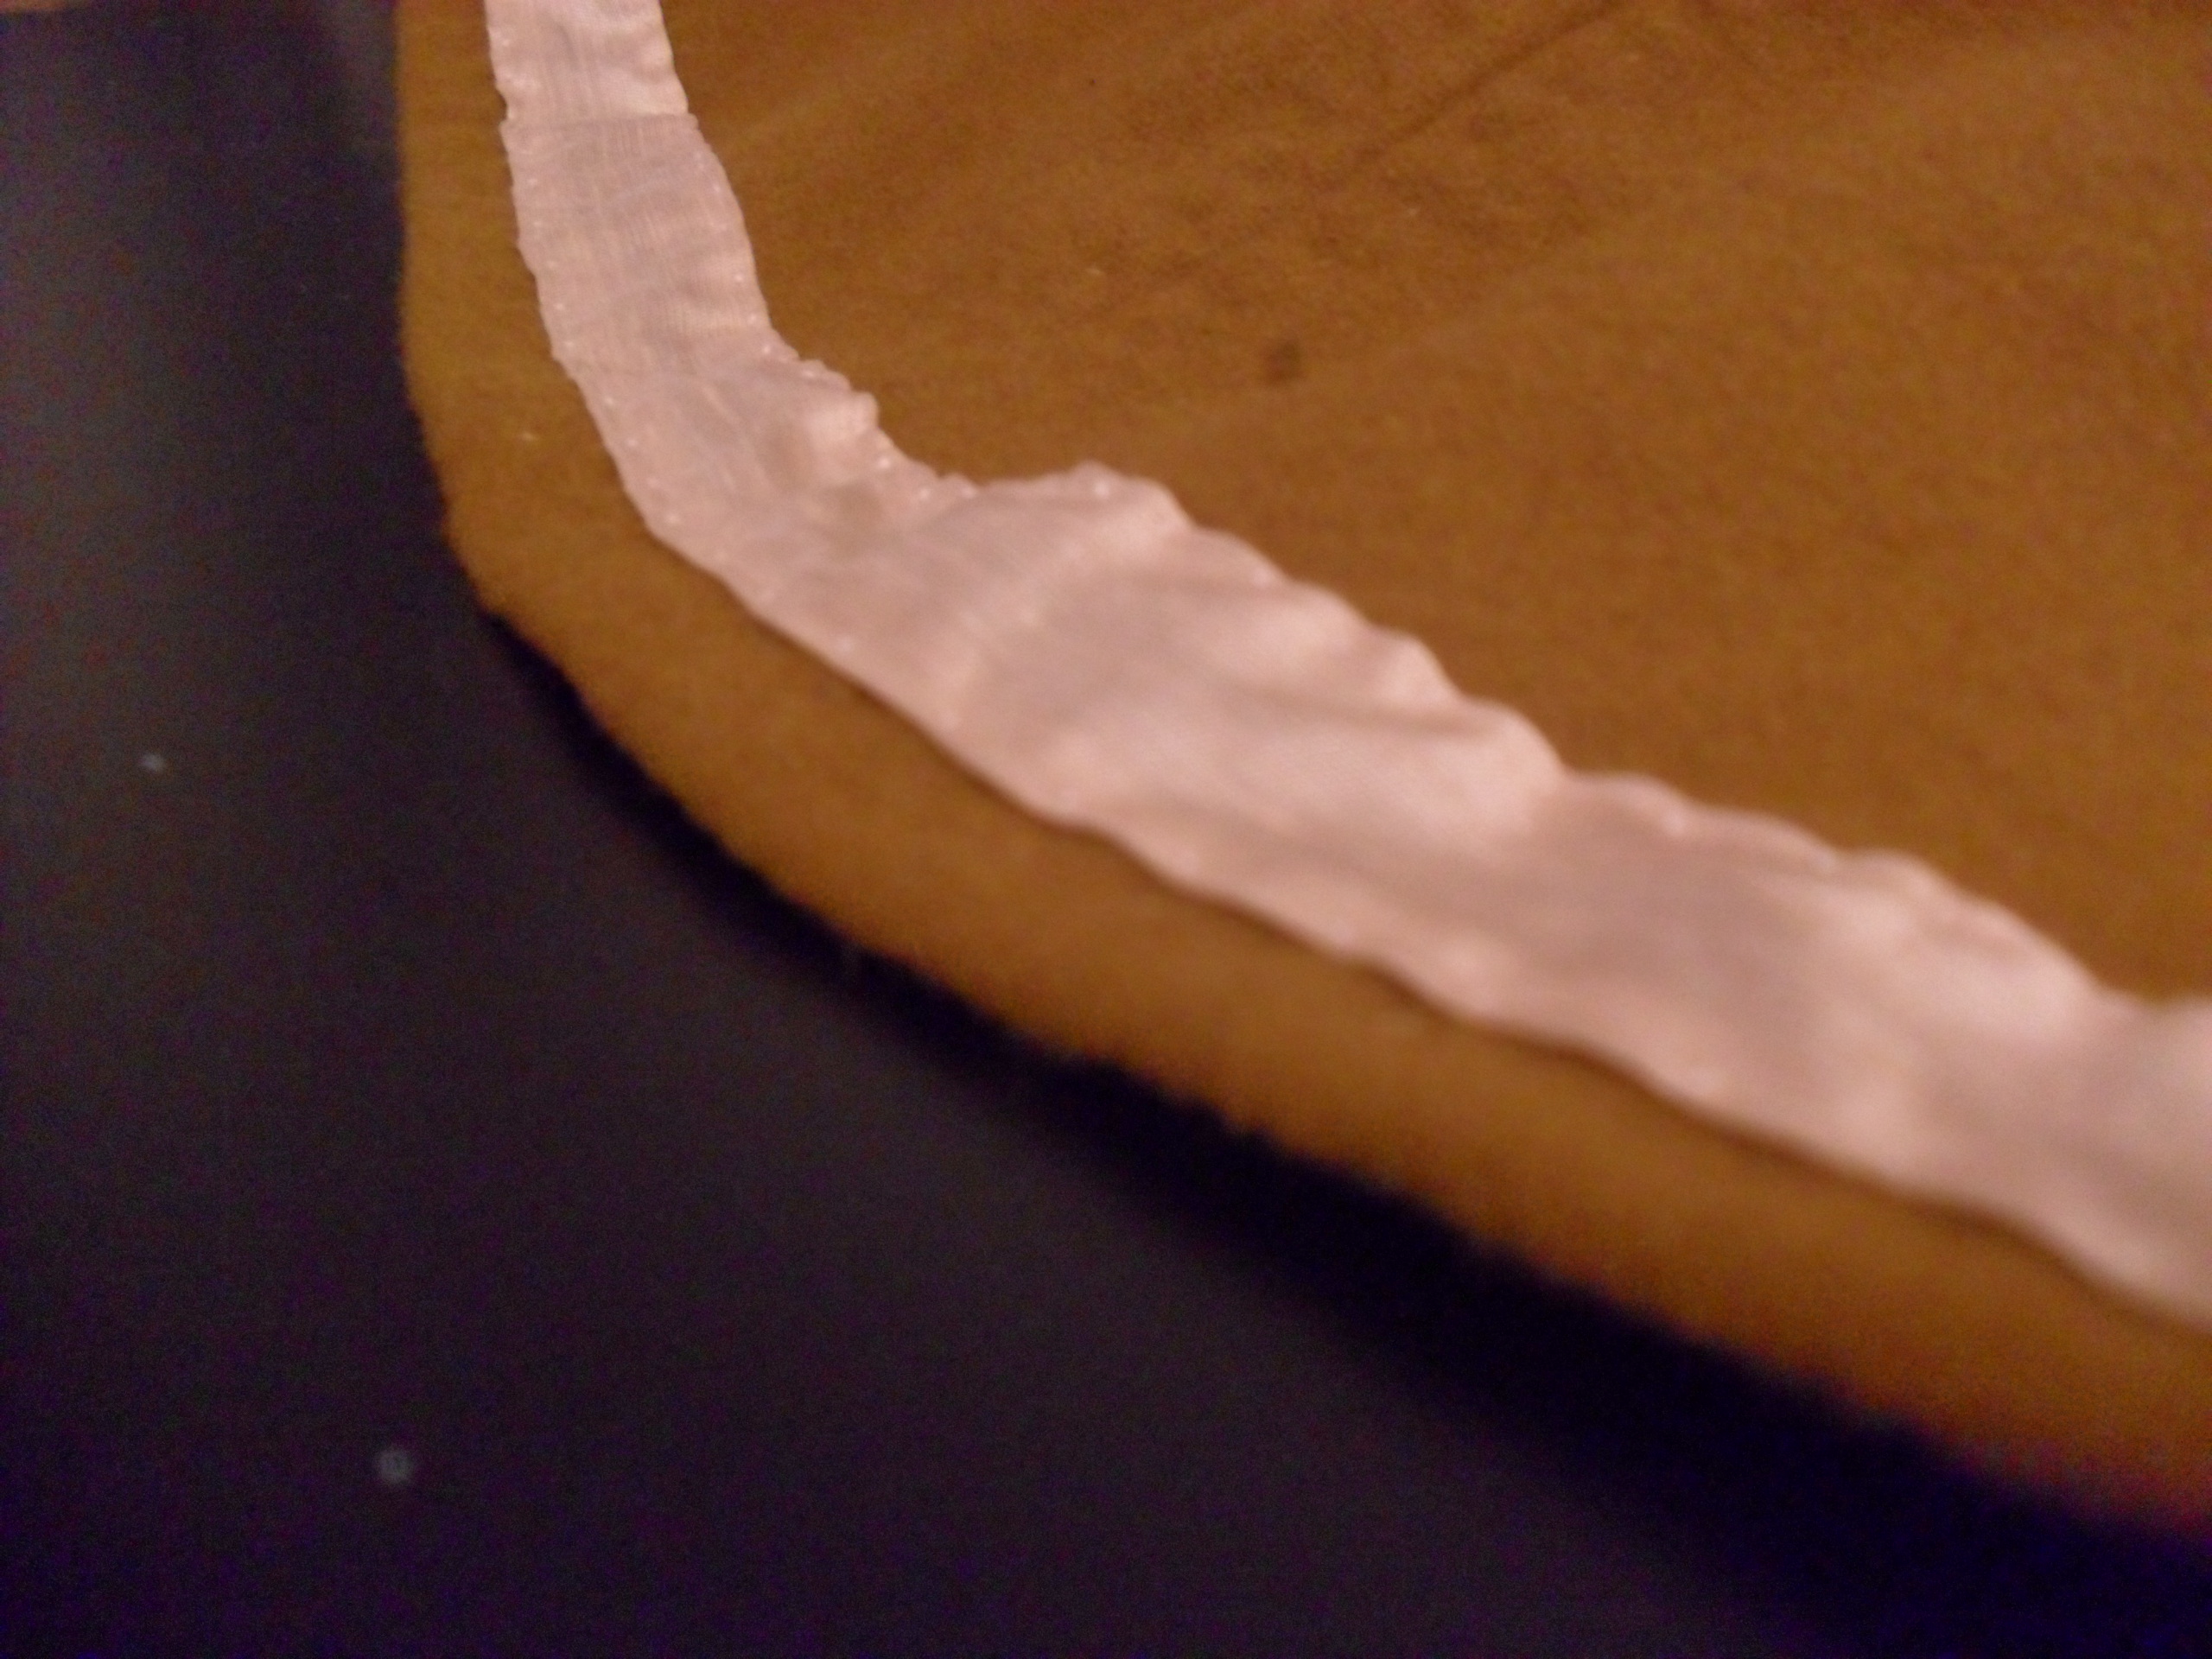
Finish the face opening by folding in the raw edge, press it and whip stitch it in place.
Repeat with the bottom edge.
Tip: In the front, sew the hood together 1 cm above the gore for added durability, and then leave the face opening.
Seams:
Sew the hood with backstitching to make it sturdy, or use running stitches if you are in a hurry.
Finish the seams by pressing the seam allowance, cut one side down and press it to that side, and whip stitch it down for added strength. I like to fold the seam allowance toward the larger piece; in this case, I sew the seam allowance down to the main hood and not the squares. In the back seam you can fold it either way.
With this blog post, I am celebrating 10 years worth of blog posts on this blog. I had another blog before this, so I have been writing for a longer time, but when I moved here I decided to take with me the handcrafting posts, and the first one is dated to late October, 10 years ago.
So with this, I am sending a big THANK YOU to all of you who read and support the blog; by reading, sharing, liking, talking, supporting the blog on Patreon and doing business with me whenever we meet. It is thanks to you the blog still remains, without your support I would probably have lost the heart to continue writing here. Let’s hope we stay together for 10 more years to come!
This summer I visited the island Björkö again, where the viking city Birka flowered as a centre for trade and cultural influence during the Iron Age. Birka is such a magical place, and I can really see how people have chosen to live here for such a long time.
I wore my most recent viking outfit, I call it my Västerbotten Viking (which I explain in the blog post about the garments) and enjoyed wearing a comfortable and practical outfit as I strolled the pastures, enjoyed magical light and amazing sunsets.
One evening my friend Rand I enjoyed a nice view of the harbour when we got company from a friendly sheep and her lambs. Apparently, vikings give the best scratches, and handmade beads and bronze jewellery is great to nibble at. Yes, I now have lamb drool all over my things. Totally worth it.
We also enjoyed some adventuring; rowing out with this viking boat (…ship? Do you call it a boat or a ship? I know nothing about boat-things) which was fun, sweaty and a great experience.
In the viking harbour, several reconstructed boats were available for admiration and occasional trips around the island. Here another group of vikings set sail out into the evening sun. In Sweden, there are several viking groups specialising in maintaining and using these ships, and we met lots of friendly and knowledgeable persons that gladly shared their knowledge with us.
One evening we had a great feast in the village, with skilful cooks preparing a meal and festive-dressed vikings enjoying it. After a long time with pandemic restrictions, it felt almost unreal to meet so many other people at the same time and eat by the same table. But alas, some work was required to take nice photos without the hand sanitisers visible…
Pretty vikings with pretty flowers and glass replicas.
And even more pretty vikings up at the hill, enjoying a guided tour ending by the sunset. This year we got a guided tour by Max, who kindly shared all his knowledge and told us about strange finds from around the site.
Viking age clothing; linen sark, wool apron dress, wool shawl and a veil. From my brooches, my knife and needle case is hanging by chains.
Birka is one of my latest infatuations and I long to go back there. This is really one of the most amazing things with my work and hobby; getting to visit and live at these historical and lovely sites. It is also really hard, because I now harbour a deep love and longing to visit places all over Sweden such as Visby and Birka, but also Tällberg where the larping area is, as well as southernmost Sweden for Double Wars, and Hamar in Norway to mention a few… How will I have time for it all?
Do you also have a magical place that you keep in your heart?
Welcome to this step-by-step tutorial, perfect for beginners. It might seem long, but explains everything you need to know. Follow it as you go, or look up the section where you might need extra guidance.
This is a great project to begin with! Easy, straight forward and the fabric won’t be too expensive.
Examples of medieval shirts with slits, gores and seams.
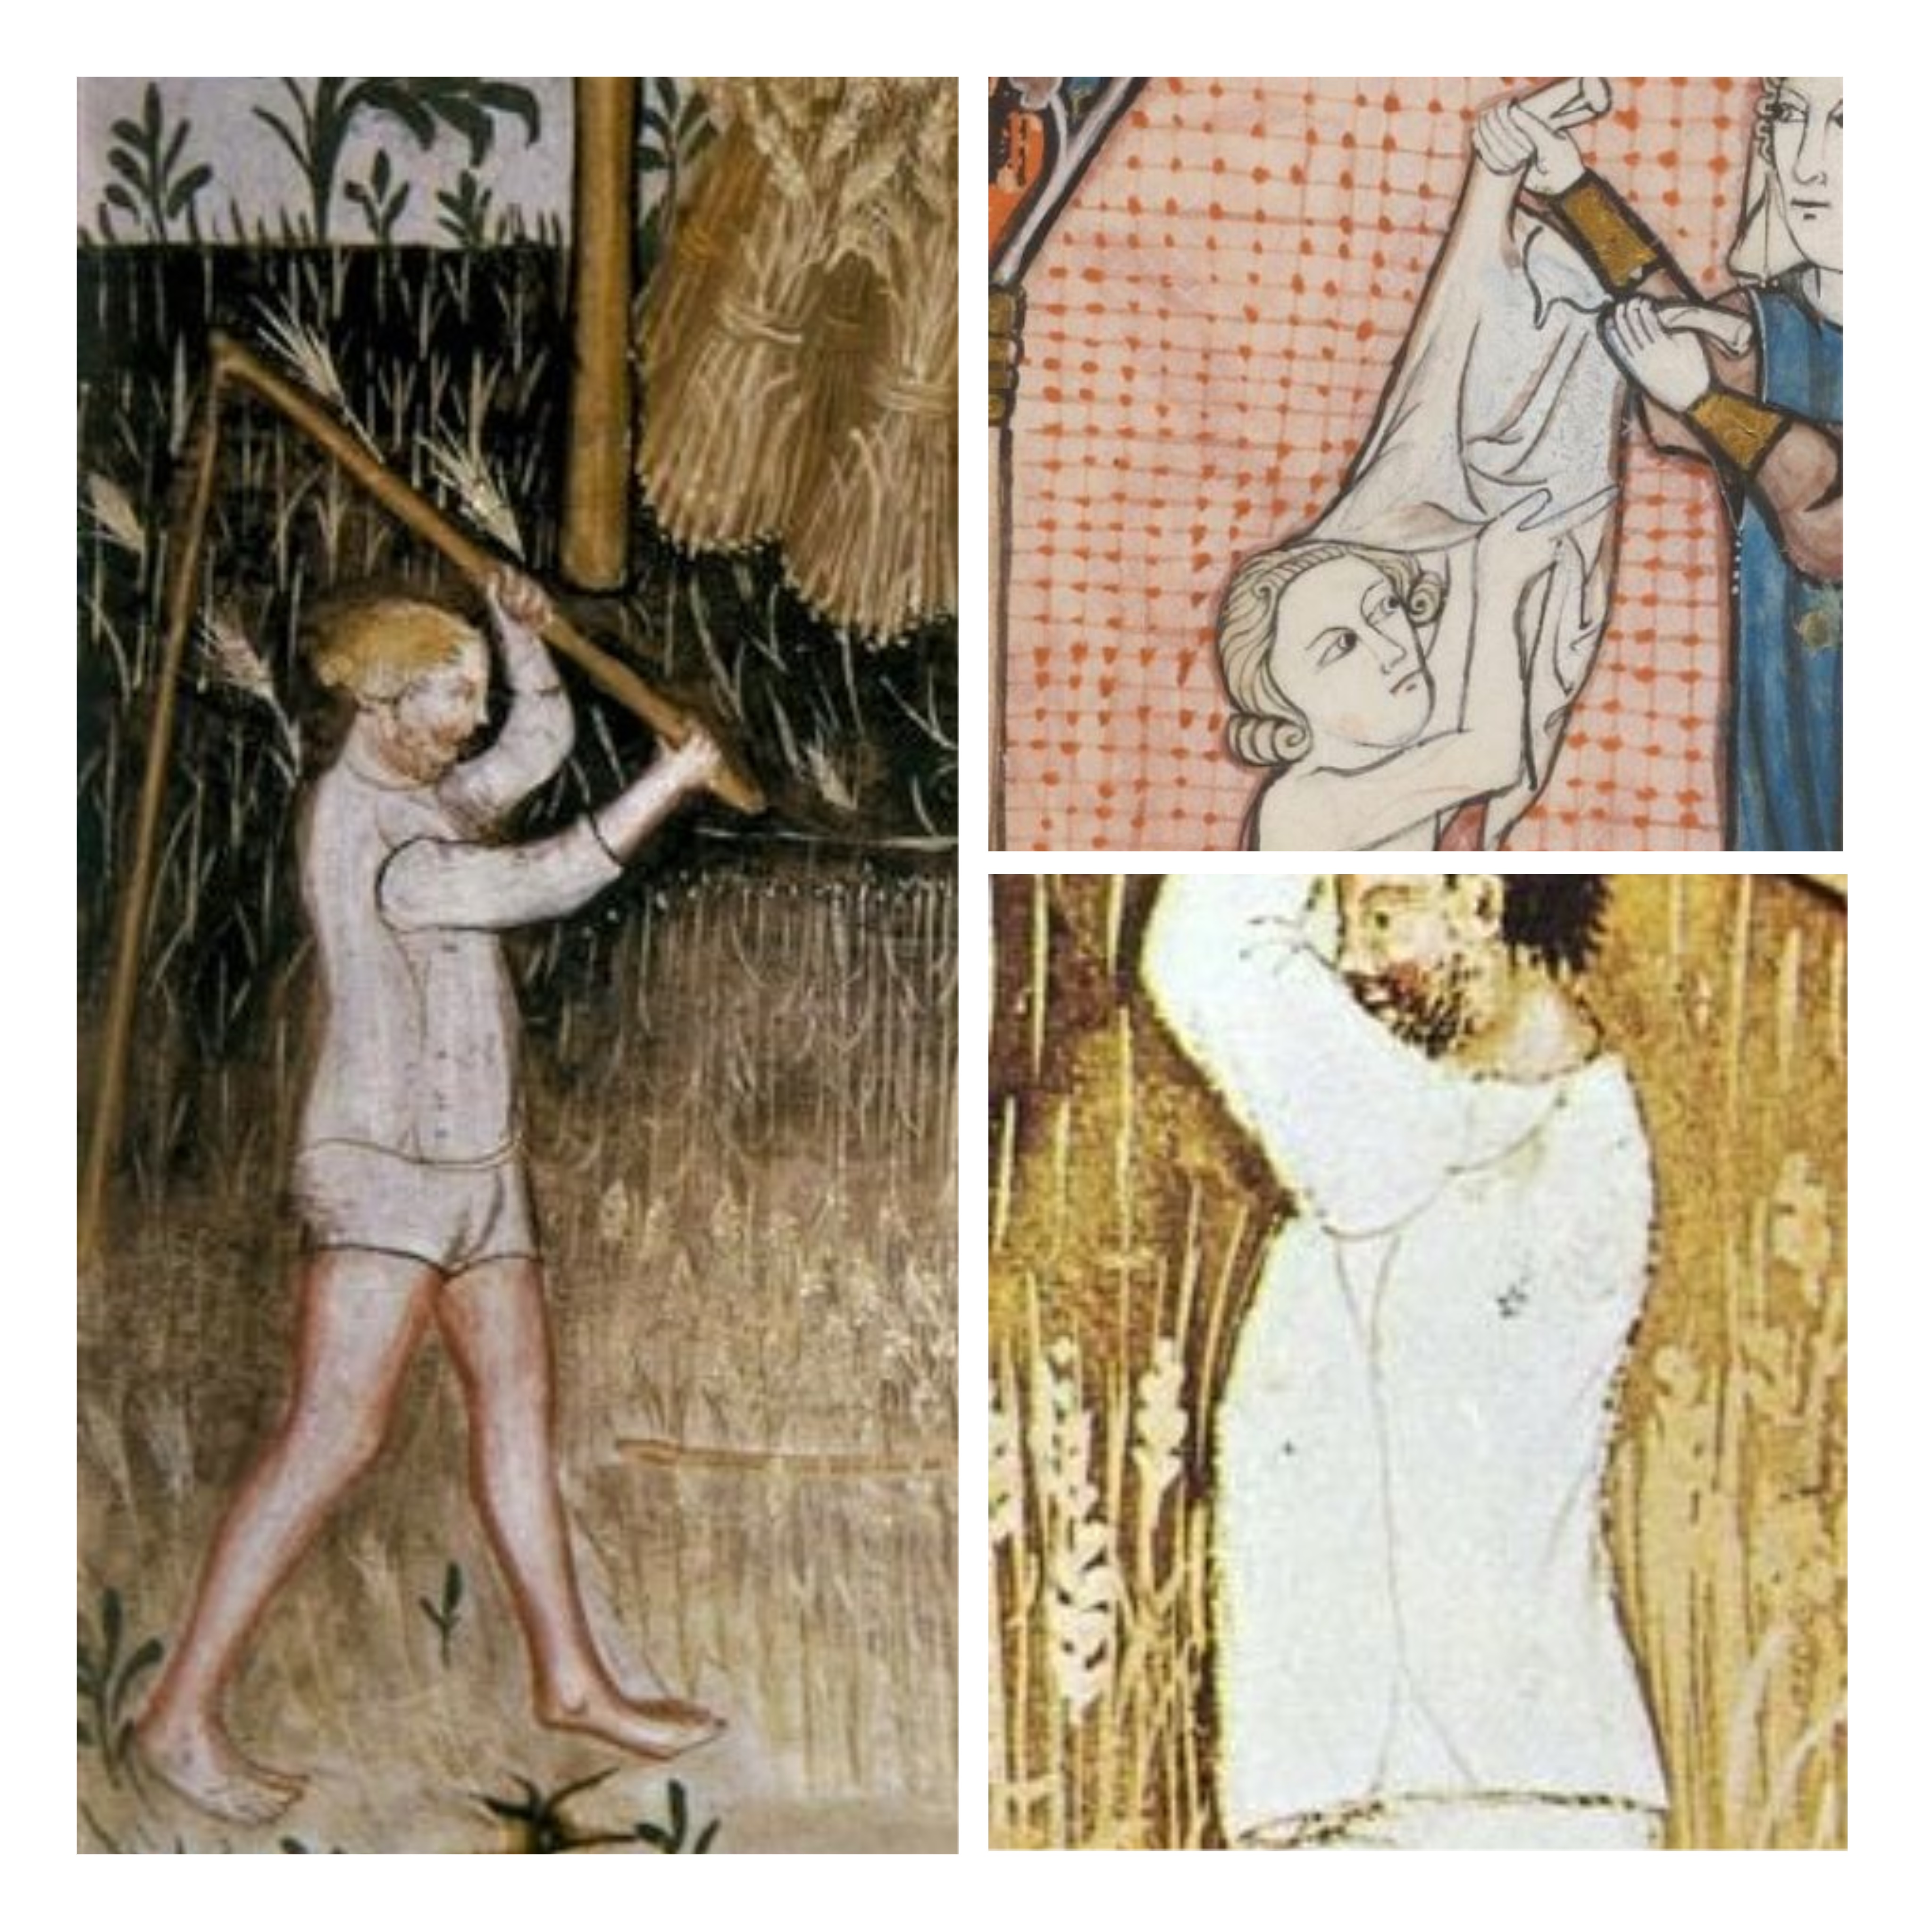
Most people wore linen underwear during the medieval period, and a man’s kit was made up of breeches or a type of loincloth, and the shirt. While you are at it; make two shirts! It is really nice to be able to change and wash your clothes during longer events, and a pleasantly smelling shirt will make it easier to make new friends…
Linen shirt with a slit at the neckhole
Buying fabric:
The amount of fabric you need depends on your size and the width of the fabric. This example will use cloth 150 cm wide. To decide how much you need to buy, calculate the measures on your pieces and how much fabric you need for those, then add another 10% minimum to allow for shrinking or uneven edges. (Fast tip: just buy 2 meters up to XL, a bit more if you have a larger size. Extra fabric may always be used for other projects.)
Look for linen fabric of 120-180 gram, I prefer a thin and even weave. (That is more historical and comfortable than a coarse and lumpy weave.) Bleached or unbleached linen, according to the status you would like to aim at. Bleached linen was a bit more expensive, but don’t go for the super-white ones in modern stores.
Pick a shirt model of your choice
Preparing the fabric:
Zigzag the raw edges to prevent them from fraying while washing, or buy a bit of extra fabric if you don’t want to bother with machine work.
Pre-soak, wash and iron your fabric before starting to cut and sew your shirt. Washing will avoid future shrinkage, make the weave even and remove any pesticides. Pre-soaking the fabric will lessen the wrinkles and make it easier to iron. 40-60 degrees c machine washing, hang dry.
Things you will need:
Needle, linen thread, beeswax, scissor, measuring tape and something to mark your fabric with (fabric chalks or just a pencil). A ruler or straight piece to draw against is nice, but not necessary.
Tools for handsewing
Measure:
1. Lenght of finished shirt from shoulder to hemline.
2. Circumference around the widest part of your upper body, often the chest.
3. Length of sleeve from shoulder to wrist.
4. Circumference around your hand/wrist (make a loop with the measuring tape, and try to pull your hand through it, it should be big enough to be easy, in order for you to be able to take the shirt off.)
5. Armhole (measure around your should/arm as the picture shows, then make the measuring tape into a loose circle, and when you find it comfortable-check the measurement.) I usually add about 25% extra from my body measure, from 40 cm body measure to making the sleeve hole 50 cm.
Example (with measures) so you can see how I do this:
1. Lenght of finished shirt from shoulder to hemline: 100 cm
2. Circumference around the widest part of your upper body, often the chest: 100 cm.
3. Length of sleeve from shoulder to wrist: 70 cm
4. Circumference around your hand/wrist: 28 cm
5. Armhole: 60 cm. This means the sleeve base will be 60 cm, and the armhole on the body parts will be 30 cm on front and 30 on back.
Add ease of movement:
What is that? If you were going to cut out your pieces with the above measures, the shirt would fit tight along your skin, making it impossible to move, or take it on and off. Therefore, we will add extra space for movement. I usually calculate 6% of the circumference around your body, 10% if I want a loose fit.
Example: 100 cm + 6 cm (6% of 100 cm) =106 cm. Split this measure in 2 for front and back: 53 cm each.
That’s it! (we already added ease into the sleeve by making sure we could pull the hand through, and the sleeve base by adding extra room there)
Add seam allowance:
What is that? Seams always need to be a bit from the edge of the fabric in order to be durable. The space between seam and fabric edge= seam allowance. Short= SA. I will add 1 cm, between 1-2 cm is recommended.
Example: Add 1 cm to all edges around your pieces, like this:
Seam allowance can be added directly in your calculating and drafting the pieces, to paper pattern pieces, or drafted on the fabric outside the pattern. We use the first method here.
Example:
1. Lenght of finished shirt: 100 + 2 cm SA= 102 cm (I like to add another 1 cm to hems; so 103 cm)
2. Circumference around chest: 100 + 6 cm movement + 2 cm SA= 108 cm
3. Length of sleeve from shoulder to wrist: 70 + 2cm SA= 72 cm
4. Circumference around your hand/wrist: 28 + 2 cm SA= 30 cm
5. Armhole: 60 + 2 cm SA = 62 cm sleeve base. Armholes: still 30 cm *2.
Draft your measures into a pattern:
Now you are ready to draft your pieces! I like to do this on paper first, to save as a reference, for future projects, and to determine how to save on fabric. I draw my piece of fabric onto paper, making 10 cm=1 square:
Nr. 1 is the front and back pieces, nr. 2 sleeves. As you can see; if you would like to have side gores instead of slits in your shirt, nr. 3 would be excellent to use. This is just an example, do a draft with your measures and lay out the pieces in a way that suits you.
I recommend drafting the front, back and side gores either along or across the length of the fabric (do all these in the same direction) the sleeve may go along or across, depending on what is more convenient (the shirt will look better with this method).
A note on sleeve measures: this sleeve doesn’t sit on top of the shoulder when finished, it hangs on your upper arm (see photo at the beginning), which makes this measuring method work. When measuring for a fitted sleeve, always measure around your bent elbow.
Design your neckhole:
These are my general measures: small-medium: 1 = 18 cm. large-xlarge: 1= 20 cm. The back I cut out around 5-6 cm deep, the front (2) is cut 10-15 cm deep. If I want a slit at the front (3) I cut it around another 10 cm deep. If you don’t want a slit, you might need to make the neck opening a bit deeper/wider in order to fit your head. You can always draw it out, cut a little, try it on, draw a bit more, cut and so on, until you are satisfied with the look.
Shape your armholes:
If you feel that the shoulders are a bit wide, you may shape the armholes a bit (common if you have a large chest but narrow shoulders). Cut 4 cm (small/medium) to 6 cm (large/xl) from the shoulder top (4) and create a gentle curve to the armpit, or draw a straight line from the top (4) to the armpit (see photo further below). Then sew the sleeves as described. The seam should still be hanging slightly below your shoulder, not at the top of it.
Cut out the pieces:
When you have drafted all your pieces on paper as above, you are ready to draft them onto your fabric! Iron the fabric and lay it down on a flat surface, draft all your pieces and check the measures with a measuring tape. Use a piece of chalk suitable for fabric, or if you don’t have that; a pencil. A ruler, a large book or a straight stick can be used to make the lines even. Everything seems good? Cut the fabric pieces out! (you may also want to mark them Front, Back, Sleeves if you are unsure.)
Sewing time!
The order of sewing is as following, I will walk you through every step below: shoulder seams if any, sleeves to shoulders, side gores if any, sew together sleeves and sides. Adjusting neck-hole, adjusting sleeve length to your wrist, hemming.
1. Start with pinning the shoulder seams. Putting in pins alongside the fabric edge makes it easier to avoid stabbing yourself when handling the project.
2. Cut a piece of linen thread, the length of your arm. Coat it with bee´s vax by pulling the thread over the vax piece a couple of times. Thread a needle (the needle should be as small as possible, but thicker than the thread to make it easy to sew), and make a knot at the other end.
The needle is thicker than the thread
3. Sew the shoulder seams with backstitches. 3 stitches/cm is a good guide, and 10-15 mm seam allowance depending on what you drafted on your pattern. If you find it difficult to make the seam straight, draw a thin line with a pencil where you want it to be.
4. Press the seam allowances to either side. Use your fingernail, a pressing tool or ironing. Fold the seam allowances double, and pin down.
5. Use running stitches (or whip stitches) to sew the folded edge down to the shirt. The stitching should only be visible at the right side as small dots.
6. Try out the neck hole by pulling it over your head. Cut out more if you need, and check in the mirror to see if you like the look. When you are satisfied, hem the neck opening. Start with folding the edge twice and pin it in place. Make the folds as narrow as possible, to make it easier to sew nicely, mine is 5 mm. Sew the edge down with whip stitches.
7. Pin one sleeve to the armhole of the shirt, right side against right side (this photo show a shaped armhole). Sew it in place, using running stitches or back stitches. Pin and sew the other sleeve in place. Press the seam allowance to either side.
8. Now we are going to save some time with a folded over seam allowance! (photos below in 10.) Trim one side of the seam allowance down to approx half-width (5-6 mm) and then fold the larger one over this, press in place. To avoid fraying and loose threads, fold in the edge of the fabric under the seam allowance. Press down, and pin in place. Now you have a neat looking fold, ready to be fastened down. When sewing the seam allowance down like this, you save time and make the seam more durable since the fabrics will be sewn twice to each other. I prefer whip stitching for this seam, it is easy and durable.
Which way should you press the folded over seam allowance? I often go for pressing and sewing down to the biggest fabric piece. So for the sleeve seam, the seam allowance will be pressed down onto the body parts. On side gores, the gores will be pressed out onto the body piece. It makes it easier to sew and gives the garment a nice drape.
9. Time to sew the side seams and sleeves! Lay the shirt down inside out on a flat space, and pin the side seams and sleeves. Make sure the fabric is smooth and the edges lays on top of each other. Mark where you want the seam to be if needed, and then sew from the sleeve wrist, all the way down the side seam. I like to leave the bottom 10-20 cm open on the side seams to create a slit in the shirt, if I don’t have side gores. Backstitching will make the seam durable, but if you are in a hurry a running stitch with some backstitching in the armhole will also suffice.
Slits at the bottom
10. Finish of the side seams by pressing the seam allowance flat, and make a folded over seam allowance. Press, pin and sew this down.
Folded over seam allowance, above the side slit in the shirt
11. Now it is time to fold the edges and sew them down. On linen fabric, I like to make a double fold to avoid fraying threads from the fabric edges. Start with the hem around the bottom of the shirt. Fold two times, around 0,5 cm each (or the SA you choose), and press the fabric in place with an iron or your nail. Sew with whipstitching, travelling on the inside of the shirt, which will make small dots of threads visible on the right side of the shirt.
After that, finish the sleeves in the same way. I like to try the shirt on before hemming, to be able to adjust the sleeve length. If they are a little too long, just create a deeper fold, or cut off the extra fabric. If you have made them too short you can sew on another piece of fabric and make a hem on that one. Piecing is always historical.
How to fasten the thread:
When there is about 10 cm thread left (approx the width of your palm), it is time to fasten the thread and take a new one. Sew another stitch, pass through that loop before pulling tight, and repeat at the same place a couple of times. Then you can pull the rest of the thread down into the fabric before snipping off the leftover, hiding the thread inside the seam. Neat! Take another thread, prepare, and start sewing at the same place you stopped.
Uhm, this is a lot of steps for a simple shirt? Yes, it is. Can you cut the corners, get a bottle of beer and sew it all on the sofa? Of course you can, but each step may not be as easy, and it will be harder to have a nice view of the process. What I mean is- this is just my way of describing the process as easy as possible for you, to allow a handcrafting process where each step is straightforward, and where the sewing will be as fast as possible to do.
General advice:
Always pin on a flat space to make sure your seams will be even.
Be nice to yourself; sit comfortable, take lots of breaks, use tools to make your sewing easier.
Remember to actually try out the fit, the length, the neck hole etc before finishing sewing. It is very easy to just continue sewing once in a flow, but if you end up with a garment you don’t like, you will have to redo lots of work.
Is the measuring a bit off? No worries; in this project, a 1-2 cm difference will not matter. You can probably go on sewing. I sometimes have wonky measures. Medieval finds are full of uneven pieces, wobbly seams or piercings. Don’t worry!
Other types of shirt models:
Shirt with side gores: adding side gores is easy, and give you extra movement on a longer shirt. Sew them in place before sewing the side seams closed. Use the same stitches and folded over seam allowance as above.
Shirt with sleeve gussets: small square pieces of fabrics get stitched in under the arm, to add more movement and to save on fabric instead of making larger sleeves. I usually sew these after the sleeve, while sewing the sleeve and side seams closed.
That’s it on shirt sewing. These techniques will also do well on a number of different projects, and is somewhat of a basic go-to. Enjoy your sewing! Did you like this post? Support me on Patreon to help me make more.
The existence of an open coat for women during the viking age is not a sure thing. We don’t know enough about the viking woman outfit to say for sure that this was what it looked like, or that they even were a thing. Why are they so popular in the reenactment world? They are practical for the kind of reenactment we do! A coat is easily added or taken of as we move between cold outdoors to heated housing, and excellent to add to your viking summer outfit for those colder events, without having to make a completely new outfit.
Coat nr 2, super fun to make! Woollen twill that was woven in two layers, I remember. Decorated with wool tablet weave, silk and fur. Not very practical though…
With that said, here’s the tutorial- feel free to make one if you would like one! Also, as a bonus, you’ll get to see many different coats I’ve done during my years as a viking. Some more inspirational with freely designed decorations, some more historically believable.
(This description is shorter than for the Medieval Dress, since I skipped details and tricks that I describe there. So if you want a lot of extra tips, read that description too!)
I started with an inspirational sketch, very important. The sketch was four years older than the sewing project and not what I ended up with (I guess sometimes a project needs a really long thinking time, you know what I mean..?) On top of it are newly drawn pattern parts and a sketch of the coat when it is sewn together.
Sewing this coat is not so different from sewing a typical dress, with the difference that it is open in the front, of course. Since the coat is an over garment I also want a slightly looser fit, since I usually have two-three layers underneath.
When I took measurements for the coat I based them on the ones below, changed “klänningens längd” (dress length) to the length of the coat. I also added 2-4 cm around the armhole/sleeve insertion to get more movement, as well as the circumference around the upper body. 4-6 cm extra will give you room for more clothes underneath.
The coat also has wider front pieces than half of the total circumference, since I wanted to be able to overlap the front pieces when it’s cold and rainy. I seem to recall that I added 6-8 cm for each front piece after I had calculated the circumference the finished garment would have, divided it into two for back and front pieces. The front pieces are thus a fourth of the total circumference + about 6 cm.
¤ Coat length is measured from the highest point of the shoulder “klänningens längd”
¤ Gore length = coat length – from shoulder to natural waist “från axel…”
¤ Coat width = the widest point of the upper body + extra width for clothes underneath “överkroppens…”
¤ Armscye is measured loosely around the arm/shoulder joint “ärmhål”
¤ Sleeve length is measured from the shoulder, past a bent elbow, to the wrist “ärmlängd”
¤ Measure loosely around the wrist to be able to easily take the coat on and off
¤ Add 1.5 cm seam allowance on all sides
Draw the pieces and write down all measurements on a piece of paper. The base of the gore (C) depends a bit on your other measurements, but don’t be afraid to make wide gores. 60-80 cm is needed to be able to wear the coat over several layers of dresses, and have a nice drape. If you have a larger size; choose the larger measurement to avoid having a square-shaped garment with little body form. Generously made gores will give you a nicer drape and more shaping to the garment.
The sleeve (D) has a sleeve cap/shaped sleeve and the seam is underneath the arm. The sleeve cap is about 6-10 cm high, depending on your size and measurements. If you don’t have a sleeve pattern, make a mock-up sleeve in cheap fabric to try it out. My sleeve (size small-medium) is around 46 cm around the top, 60 cm long, and the curve of the sleeve cap is around 6 cm higher than the edges.
The little square gore (E) is called a sleeve gusset and is in the middle of the armhole under the arm. It is sewn to both the sleeve and the front (A) and back piece (B) and gives width and mobility. It is a way to save fabric as the sleeve can be cut more narrow, and then gain width in the armhole with the help of the gore. You can also sew the coat without a gusset, just make the sleeve a bit wider.
Sew the coat together in the following order:
1. Start by sewing the side gores to the front piece, cut up the back piece and attach the back gore, or sew the gore in a split-back piece. Press seams.
2. Sew the shoulder seams, press.
3. Sew the sleeve gussets to the sleeves along one side so they are attached, press.
4. Pin the sleeves to the front and back piece while they are on a flat surface (no sewn-in sleeve is needed here), sew them together and press.
5. Baste (or sew everything at once) the sleeves together into two sleeves, baste the gussets into the armhole and then baste the side seam (straight piece to side gore). Try it on, and if it feels good- sew it. If you are new to the square gusset underarm thing- it can be easier to insert that one first, basting it into place before you close the sleeve and the side seam.
6. Sew the coat together in the sleeves and sides, press.
7. Try the fit of the neck-hole and cutout in the front, fold the fabric first until you’re happy with form and fall, then cut away the excess fabric on the front pieces.
8. Hem edges, fell seams ( nowadays I usually fell the seams at the same time I sew them together if I hand sew the garment) and decorate your coat if you feel like it.
Simple and practical coat made in woollen twill
Tips:
All these coats are made based on the same pattern, with some variations. With or without sleeve gussets, with or without the back gore, and with different lengths, widths and hemlines. The fabric also matters a lot; a loosely woven twill will drape differently than a sturdy thick twill or tabby woven fabric. If you want a warm and practical coat; choose a heavy, fulled fabric that will protect you from rain.
The gores in the coat are wide, it gives a nice fall and makes it possible for me to wrap the coat around me even if I have several dresses underneath.
I cut the neck-hole/neckline in the front piece when the coat is sewn together, before hemming. This way I can put it on and draw out the opening as I want it.
Don’t make the coat all the way to the ground, it will just get wet and dirty.
I think this was my first viking coat, green woollen twill with fantastic wool embroideries made by my friend Kim, inspired by viking age decor elements
This was the finished coat that I made for the blog post. It has been sold since then, and I now own a similar blue coat made in warm wool twill, with rabbit fur in the neck and hand openings. I use it as my go-to cosy, warm coat on events, for keeping warm when I don’t want to get dressed properly, and on larps as a middle layer. So practical!
Making that matching outfit doesn’t have to difficult or impossible expensive, but it does take a fair bit of planning: before. Yes, I know it is the most boring part, but thinking before shopping is what makes the thing. So I put together a list of my best tips for making an outfit that makes everyone go “Wow” when they see it.
1. Decide on a colour scheme that you like, and follow it. You should have 2 base colours, with additional tones to match. In my case, orange and warm yellow is my main colours, as you can see on the amber necklace, the woven belt, the shawl and the apron dress. The hair band have a darker orange colour, but it is warm and intense to match the other tones. The red coat and the middle woolen dress brings in the additional colours to make the outfit interesting but have likewise a warm toned base.
2. Add some contrast or mismatch to intensify your matching outfit (yes, it works like that) it could be the opposite colour (red-green or yellow-blue) or a really dark detail to an otherwise light outfit. In my case, the green glass beads does match the yellow tones, but breaks nicely with the red ones. Still, they are in the same warm tone as the rest of the outfit. The uncoloured beige dress is another example; it doesn’t follow the main theme but have a warmer undertone so it works fine with the other warmer shades.
3. Patterns or texture adds interest and depth to any colour. My apron dress is woven in a herringbone twill, and the coat is a bit uneven in its colour due to different dyes in the fabric, which is barely visible but adds texture and interest to the finished garment.
4. Darker and lighter shades; when choosing your colours make sure you have different shades and not only different colours. For example; yellow-orange-red make for a change in both colour and shade, but a light blue paired with a similar light green makes the outfit a bit flat. Add a darker green or blue-green tone and you will make the outfit more interesting!
5. Layers; plan for all the layers at once, and make sure they have different tones, shades or textures if they follow the same colour theme. In this case, you won’t end up having two orange dresses on top of each other, and can make sure that details will be visible.
6. Details; don’t we all love a well put together outfit? Making details lifts an outfit, and it can be both jewelry, accessories as well as useful tools, a knife, a jug or something like. Match it in colour, tone, shade or shape to your outfit. In my case, I chose to make a tablet weave to reinforce the apron dress, make the straps, and a matching headband. Having the same colour/pattern appear in different places adds interest and makes the outfit look well planned and matching.
7. Consider your own colours; colour schemes and matching is a whole science on its own, and there is plenty to read or check out on YouTube. Matching colours, creating interesting outfits and the like works the same way on historical clothing as on modern outfits or make up. Consider your own colours, if you have a warm or cold undertone in your skin, and consider what you like to wear. Using those kinds of colours will both make you more comfortable and happy during historical events. But also consider the historical finds; if you love to wear black and dark blue maybe that is not the best choise for your farmer viking outfit. But as these are considered as neutral colours in our modern eyes, maybe a dark grey with soft, plant dyed blues will do great for your viking outfit?
Got inspired? Did you find this guide useful? Please let me know by liking my FB page or leaving a comment on the blog!
This is my latest just-because-it’s-nice project. I wanted to make a viking outfit on a certain theme; so I chosed my amber necklace and worked from that one to create a whole outfit.
Some pieces you might recognise from before; the shawl is my first handweaved project, and the apron dress is in fact the orange dress that I have cut out and redid into an apron dress since my shoulders and back have become a bit bigger (hello gym!) To make straps and a supporting band around the upper hem I made a tablet woven band and sewed it into place.
I also made a bit extra to wear as a headband, looks kind of cute, and is practical for keeping your hair in place and for pinning a veil to it. It is tied in the neck with a knot. I got the idea from a grave in Birka/Björkö were there was a find of the same band on both clothing and skull, though I didn’t read how the band on the skull was arranged or if it was sewed onto something.
The hairdo is inspired from an Iron age find of a woman having her hair in plaited buns (aka Leia buns almost) but to achieve a more historical look, a bit of fake hair could be applied (women seem to have had more and longer hair when washing and chemicals weren’t the thing). It is also a bit messy from having a rest in the tent earlier.
The jewelry is based on findings from mostly Sweden, the brooches from Öland, and some of the bronze items like the needle case is from Historiska Fynd. The glass beads I have made myself, the amber necklace and some other jewelry is bought on different viking markets. Amber beads is found in several graves; if you want to use amber in your viking outfit look for big, regularly shaped beads, or faceted ones. The small nuggets are very modern, the viking lady seemed to prefer her beads big and luxurious.
About the layers: the linen shift is barely visible and over that is a hand stitched woolen dress of uncoloured wool from Medeltidsmode. The apron dress is made of thin wool and have tablet woven bands on it. The coat is made of a wool, also from Medeltidsmode, and hand stitched with woolen thread. Wearing several woolen layers is a good way of staying warm in the autumn season, but they get a bit heavy, so for comfort I used my tablet woven wool belt to fasten the skirts at the waist, so my hips could carry some weight from the outfit.
To keep the shawl in place I fastened it with the brooches; in this way my neck stays warm but you can still se the rest of the outfit and the jewelry at the front. For a warmer look, I use a small brooch to fasten it at the front beneth my breasts.
Historically? There is sometimes a different amount of loops or fabric underneth the tortoise brooches in finds, indicating that several layers of clothing was held in place by the brooches, and sometimes more layers on the bottom or the top of the brooches. But there is also several graves with clasps or brooches at the front of the body with fabric in them, suggesting that the woman wore an other garment that fastened at the front, like a cloak, shawl or coat. But really, there is much we doesn’t know for sure- so this is a “suggested way of wearing viking clothes” and not a “we now this for sure-outfit”.
Without the coat and with the shawl pushed back. Still comfy and warm, without having to hold the shawl in place by myself.
Putting on the shawl. Here you can also se the knot at the neck for the head band.
Dramatic and cool viking woman! Yeah! (I was having a bad cold at the moment, but you can always pretend)
This blog post contains a collaboration advertisement for sewing machine guides from Sewingland.
I thought I would share my best tips and tricks for making good apron dresses, since I have made a whole bunch of them by now, and probably most of the mistakes too. If this is your first try at an apron dress, check out my tutorials Easy apron Dress or Fitted apron dress first. At the end of my post, you’ll find a link to useful sewing machine guides if you would like to make your dress on a sewing machine.
Nr 1. Use enough fabric. I know it’s tempting to save on the fabric, but trust me. Too short and tight a dress will look like a modern dress. I use around 2 m *1,5 m to mine, and if you are larger/longer than me, you need a bit more.
Nr 2. Use a thin enough fabric. Save the sturdy, felted wool fabrics for a coat or a cape and chose a thin, rather loosely woven fabric. It should be comfortable and have a nice fall, try to drape it over a piece of furniture, like a table, and look how the folds drape.
Nr 3. Try it on while sewing with all your other layers of clothing, to make sure you will have enough room under the apron dress for a shift and a possible warmer dress if you think you will be needing that.
Nr 4. Don’t make the straps too long. I think it looks very strange when women are wearing their dresses in the middle of their bust, or even under their nipple area. Please don’t. When you fasten tortoise brooches, you can pin them through your strap, or make a knot at the end of a strap being a bit too long.
Nr 5. If you don’t have tortoise brooches to fasten your dress with, don’t use modern buttons or fastenings in the meantime. I have learned that apron dresses were not a thing without brooches, like the dress is an accessory to the jewellery and not the other way around. You don’t have to wear apron dresses for reenacting a viking woman, a simple long kirtle will do. So skip the apron dress if you don’t own the brooches, or sew the straps directly to the dress itself if you are momentary without them.
Nr 6. The thin fabric could be lined with a strip of linen or wool to protect the hem and support the top.
Nr 7. You may sew on a piece of tablet-woven band or a thin silk strip around the upper part of the dress, to make it durable, enhance the fitting and also, for decoration. Another way to decorate the dress is to sew a small wool braid to the top.
Nr 8. Decorating your dress doesn’t have to be expensive. Use thin strips of patterned silks, tablet woven bands, viking silver posaments, or just a braided cord. On the small figurines, it seems like there is decoration around the hem of the dress, and in grave finds there are remnants of silk and decorations around the upper part, partly inside the tortoise brooches. Save money and time and decorate only the upper part of the dress, or do the whole thing!
Nr 9. Use the same type of thread as the decoration you want to sew to your dress. Silk thread for silk fabrics, wool thread for woven bands, and a very thin and fine silk thread for posaments. This will give you a nice seam, that is as little visible as possible, and doesn’t damage the decorations.
Nr 10. To protect your dress from everyday stains; use a belt to fasten up your dress while working, this will protect the hem from mud, open fire and stains. Also, an apron is a very good choice for protecting your clothes. Or remove the apron dress and work in your shift or woollen dress. It seems the apron dress was a status symbol and finer wear, so it is probable that women didn’t wear them while labouring.
One of the dresses that I still like after using for many events, is my Viking age apron dress (it’s actually one of my oldest piece of clothing). It´s made of a medium-heavy tabby woven wool and the construction of the dress is inspired by the find from Hedeby. The pattern is made of 4 pieces and is quite simple, you´ll achieve the fitted look by making small adjustments according to your body.As you probably already noticed, there are amazingly many different variations of reconstructions and suggestions on how the apron dress may have looked, and I also think there were different variants during the viking age. However, I decided to imitate the find from Hedeby, as this has a piece of a probable seam preserved, and gives a suggestion of how the skirts/panels may have been assembled. After reading some discussions on the website Historiska världar and looking at gold figurines, I also chose to sew the dress too long, to create a train. That’s my interpretation on the figurines and picture stones and I was curious about how the fabric would fall with such a model. After a while, however, I cut off the excess fabric that made the overly long skirt, since I got irritated about the fabric dragging mud everywhere and getting in my way. It was a nice view though, the long skirt trailing behind.
Here is a list of what you need, and some easy steps to follow to make one of your own!
What you need:
2-3 m *1.5 m fabric (2 m= small, 3 m=large)
scissor
measuring tape
markers for fabric
pins
needle and thread or a sewing machine
a friend to assist with the final adjustments on the dress
The measurements you need:
Armpit-hemd (3) (as long as you want the dress to be) + 3 cm sewing allowance at the bottom, and 5 cm at the top if you would like to make the dress with a higher look (like my green one) when measuring from the armpit; start as high up as you can get under the arm. you will cut out space for your arm movement later.
Width around your body (1) (the widest part of your body, often around your bust. Divide this measurement in 4 and then add 4cm to each piece (seam allowance and leisure of movement)
Armpit-waist (2) (in this case, your waist is your slimmest part of your body, after which the dress is going to get wider)
I chose to make my dress rather fitted, but a more loose style will make it possible to wear a pair of underdresses under it, which can be nice during colder weather. The 4 pieces are of the same size and shape. They start out straight and then gets wider at the waist.
The amount of fabric you need depends on your measurements, but I drafted up three different ways of putting your pattern pieces out on your fabric, depending on how much fabric you want to use.
For the draft to work you need to have a fabric that is 150 cm in width, and the dress can not be longer than that. 1F + 2F is the two side pieces, 3B + 4B is the front and back ones. The bottom-left draft shows how you can use the fabric in an effective way by doing a gore in one panel.
The upper pattern takes 250 cm of fabric and gives you a dress with a hem circumference of 80cm *4= 320 cm. You can absolutely do with less; the one at the bottom- right gives you a hem of about 270 cm, using under 200 cm of fabric. This is for a small-medium sized person. If you have a larger size, remember to add width not just to your upper area but to the skirt as well, to make the dress drape nicely and give you space to move.
After cutting the pieces from the fabric, baste them together in order to try the size and fitting. The dotted lines on the picture above indicate where you can fit the dress (waist+under the bust, under the armpit and at the small of your back). When you try out the dress, remember to have your shift underneath so it won’t get too small. If you’re using a modern bra during your viking adventures, then also wear it during fitting sessions.
When the dress is done, I usually make the straps in linen or wool fabric (linen straps are more common in finds). Make them as narrow bands (folded double) and sew them on to the back of your dress at the same position as your bra straps would be, this will make them fit comfortably on your shoulders. In the front, you may sew them down to the dress if you haven’t got tortoise brooches yet, otherwise use these to fasten the straps to the dress. I prefer to do a loop at the end of the strap, and then another one at the front of the dress; these you can clearly see in finds from the viking age, and it also makes it easier to use the brooches without damaging your fabric.
If you feel that you would like to add something; decorations are a nice way to spice up your apron dress. A tablet woven band, a small piece of silk fabric or a silver thread posament are all find-based decorations from the viking age. Good luck with your sewing!
Are you interested in the viking age, but wonders how to learn more? Browsing pinterest on all lovely photos, but thinking that everything might not be historical? Here’s some really good links and reading for you! (And no, of course you don’t have to exercise your hobby the most historical way possible- but it’s always interesting to know-how)
Susanna Broome is a great tip if you want patterns and reading about pattern construction. Her page includes lots of good-to-know, as well as patterns for sale, both in english and swedish. She is both historical well-read, as well as daring to say “I did this, we don’t know if that is the correct way, but it´s working and gives you a nice outfit”.
Viking clothing (Thor Ewing) is a good read. Everything might not be historical accurate since he is making conclusions- but it makes the book interesting for reenactors and not just a list of different finds.
Pinterest is both very good, and quite dangerous. Lots of pretty clothes, lots of fantasy, lots of guesses. But also lots of finds and photos from museum and databases, good quality handcraft and historical interpretations. Look for Viking Finds rather than just “vikings”, archeological material, posts about what have been found and were, and pair it with written sources.
For viking finds of metal, ceramics and the like, different museums offers online databases. For example, I found one of the original tortoise brooches (that I use in my outfit) on the Västernorrlands Länsmuseum which is only a short trip from my home.
Good luck with your reading, and please write a comment if you have any more interesting reading tip to share!
Oh, look! Some more photos from the autumn market at Årsunda vikings. It really was such an awesome and inspiring event so I wanted to share it with you as much as I can!
The amber viking dress.
R in his viking outfit, were most of it is handstitch by him
Cooking without digging a hole in the ground
Hanging out by the house
What a nice tent and camp!
Look at the red shoes- so awesome!
H playing games
Me and M trying to be still long enough for taking a photo.
We happened to wear matching outfits. I’m blaming it on both of us having really good taste in fabrics…


 Fancy blue coat in thick woollen twill, with silk decorations and woollen tablet weave