I have a new digital workshop/masterclass; how to learn tablet weaving! This masterclass is created after several of my followers and friends told me they would love to attend my weaving workshops, but the sites/schedule didn’t add up. So I remade my popular workshop that I have run for 10 years, and made it digital! I am very happy with it, and I hope you will enjoy it too!
from a video clip
In the online masterclass, you will learn everything you need to start weaving: how to set up your warp, weave, solve problems and design simple patterns. The Masterclass is online; log in and follow the instructions at your pace with video clips for every step. Revisit them as many times as you need, and learn more theory in the included PDF booklet. Ask questions in the community and share your experiences with others.
How does it work?
Purchase the masterclass either by email or on Etsy. You will receive a password to the login page here on my website where you will find 25 instructional video clips and the 15-page booklet. Follow the instructions and work your way through the videos one by one, at your own pace. You will have access to the Masterclass for the rest of the year!
Starting kit: I offer a starting kit if you don’t yet have all the tools that you need!
If you don’t order the starting kit you need the following: 8 tablets, a shuttle, and a tablet lock. I use wool yarn 20/2, 40 meters of each colour.
Other tools: scissors, pen, measuring tape, sturdy ribbon.
Online Masterclass: Masterclass pdf booklet. Access to the masterclass page with video clips + bonus clips. Access to my online community, chat with others and get feedback from me.
Online masterclass + starting kit: Masterclass pdf booklet. Access to the masterclass page with video clips + bonus clips. Access to my online community, chat with others and get feedback from me. +All tools you need to start weaving: 8 Paper tablets, tablet lock/pin, shuttle and weaving fastener. Wool yarn for your first project + more weaving. 400 meters of each colour, a total of 800 meters. Pick your 2 favourite colours or get a surprise mix (write a comment). Additional 12 tablets for future projects (20 in total). The starting kit will be shipped to your address.
This tutorial is made with the support of my Patreons. Support me to help me make more free tutorials!
The Skjoldehamn hood is a find from the 11th century, and because it is the only find of this type of garment (from Scandinavia) dated close to the Viking age period, it is often used as a Viking/Iron age garment by reenactors.
We don’t know who the garment belonged to; man or woman, rich or poor, or if the wearer considered themself a part of the Viking culture, the native Sami culture, or both. The clothing was found in a bog burial in northern Norway and the garment items resemble modern Sami clothing according to articles I found on the subject. But the hood also reminds us of the later medieval hoods, although it has square gores. Hoods with slits over the shoulders, or long cloaklike hoods can be seen from earlier periods in Europe.
Skjoldehamn in Norway
All considered, it is a good choice to make if you need a warm garment for iron-age clothing and want a hood, at least if you have a north Scandinavian-based outfit, a Birka-based Viking outfit might have had a hat instead. Overall, the hood is probably more common in reenacting than it was during it’s lifetime, but who does not want a practical garment when it is cold or wet?
Materials:
Most outdoor clothing that has been found from the period seems to be practical rather than decorative. Choose a warm and sturdy fabric, slightly fulled, and use wool or linen thread for sewing. The original has a seam on top of the head to give the hood some shaping, and a pair of cords on the side to pull it closer to the head. This tutorial is a simplified version without these elements, but feel free to add them if you like. And don’t be afraid of piecing together the hood if needed, piecing is very historical!
How to make the pattern:
The hood is constructed with two long rectangles (or one piece folded at the top) and two squares.
This guide give you a hood similar to the original, covering your shoulders but not your arms. You could also make a longer one by lengthening measure B.
A is the depth of the hood, measure from the face where you want the opening to be, around your head and back. Divide the measurement in 2. I like deeper hoods to get protection from wind and rain, I usually have 32 cm.
B is the length of the hood from the head down to the shoulder, measure yourself from the top of the head, following your body, to the shoulder point (where the shoulder ends). Mine is 60 cm.
Measurement C is the face opening, measure around the whole face, under the chin, to get an opening. Try pulling the measuring tape “on and off” the head so you know if the opening is big enough to be comfortable. I like a looser opening to accommodate hairstyle/veils. Divide the measurement you get by 2. Mine is 34 cm.
Measurement D is B-C; the length of the hood minus the opening, 26 cm on my hood. D is also the sides of the gores.
You can make a paper pattern with these measurements. If you want to include seam allowance while drafting the paper pattern, add 2 cm to all measurements before drawing the pieces. Otherwise, do it directly on the fabric.
How to make the hood: Put the pattern pieces on the fabric and add seam allowance by drawing 1 cm outside all paper pieces.
You may cut the long rectangle in one piece, or in two pieces that are sewn together on top of the head. Cut out 2 square gores, one for the front and one for the back.
If this is your first hood, basting it together is a good choice to try out the fit. if you like it, leave the basting thread in as a guide while sewing. If you want to adjust anything it is easier to remove basting than a sewn seam.
sewing order
Start with sewing the seam on top of the head, if you have one.
Sew one side of each gore to the rectangle, right side to right side.
After that, fold the rectangular piece at the top to make it look like a hood, and pin the gores to the rectangle. Sew the gores from the bottom and up.
In the back, you continue with the seam all the way up to the top.
Finish the face opening by folding in the raw edge, press it and whip stitch it in place.
Repeat with the bottom edge.
Tip: In the front, sew the hood together 1 cm above the gore for added durability, and then leave the face opening.
Seams:
Sew the hood with backstitching to make it sturdy, or use running stitches if you are in a hurry.
Finish the seams by pressing the seam allowance, cut one side down and press it to that side, and whip stitch it down for added strength. I like to fold the seam allowance toward the larger piece; in this case, I sew the seam allowance down to the main hood and not the squares. In the back seam you can fold it either way.
There are two cool finds of sewn mittens available at the National Museum of Iceland’s webpage and you can see them here and here. They are both sewn in wool cloth and constructed with a separate piece making the thumb. I adore the Garðar Mitten and decided to make a pair for myself.
My first thought was to make them as a type of over-mitten to be worn over my regular needle-bound ones, but then I got sidetracked while making the pattern and made the grey ones the exact size for my hands. So I made another pair in red, for really cold days.
The outside of the mitten is larger than the inside, meaning you will shape the outer side around the inner, creating a gathered effect that is both pretty and practical.
The tumb is inserted in a round hole in the hand, making it both fun to do and comfortable to wear.
Tips for working with the pattern:
Add seam allowance to the mittens, 1-1,5 cm. Remember to sew with the correct seam allowance, small garments really differ in size if you are lazy with the seam allowance.
The tumb seam can be made in different ways; by using a backstitch and sewing the pieces right side together, or:
If you find it difficult to make the thumb insertion seam, try treating it like an “inserted gore” from my tutorial, and press the seam allowance on the inside piece, before sewing it to the thumb piece. (I will show you how to do it below, on the red mitten).
Or go inspired and fasten the thumb piece from the outside as I did with the grey mittens, adding a decorative seam to protect the fabric edge.
Step by step instructions
Place the paper pattern pieces on the fabric with some space in between for seam allowance, and pin the paper in place.
Trace around with a fabric marker, 1 cm outside the pattern. Use a ruler/measuring stick to guide you.
In small projects, some extra seam allowance can make a big difference. To help yourself making the garment the right size, you can trace around the pattern pieces with a basting thread.
It is fast, and you will know exactly were to place your seam. Here the basting line is blue, and I moved the pattern piece for it to show better on the photo.
Cut out all your pieces (remember to check that you have a left and right mitten before doing this).
Tip: it is always easier to cut a sharp line if you have a sharp scissor, and cutting the fabric with the scissor resting on a table.
Pieces ready for basting and trying on!
Start with basting the tumb together at the top, down to the start of the semicircle shape.
Use your blue basting lines, pair them together and pin the tumb in place on the inside piece. Work from the right side of the mitten, the blue lines should line up on top of each other.
Variations: If you want to sew your mitten according to the seam in the original, use a backstitch and attach the pieces right side to right side. If you want to use the “attached gore method”, scroll down to the red mitten photos.
Bast the tumb in place, with the raw edge of the inside piece visible.
Baste the inside seam of the wrist, and continue up basting the tumb to the outside piece.
Before basting the rest of the mitten together, put in a gathering seam around the top piece to to gather it to match the inside. If you have already basted the seam allowance to guide you, you may use this thread and pull it gently to gather the top of the outside fabric together.
Gather the fabric so it fits to the inside piece, and distribute the folds evenly. Sew a basting seam holding them together.
Baste around the top and continue down to the gore. Put this in place, baste both sides, and then you are ready to try the mitten on!
Looks nice! Remember to try your mitten on with the right side out.
I chose a linen thread 35/2 and backstitches, to make the seam sturdy. I follow along the basting threads, and rip these out as I go along (or afterwards if you prefer). Place the seam 1 mm inside the basting seam instead of on top of it, to avoid sewing the basting seam to the mitten.
The tumb is secured with whip stitches, this is on the inside while felling the seam. You can see some red thread which is the decoration from below. I felled the seams to one side after sewing them, to make the mitten more comfortable and the seams more resistant to water.
To secure the raw edge of the inside piece where the thumb is, I chose to make a decorative stitching with wool thread, sewing on the right side. I used a blanket stitch for the edge, and then an embroidery stitch for added decor. Instead of doing this, you can whipstitch the tumb in place on the right side.
Decorating mittens are fun, but don’t show in the historical sources I used.
Soon finished, now I need to finish the embroidery and hem the bottom edge!
The historical red mittens
I made another pair of mittens to be used for medieval reenactment, big enough to be able to insert a smaller mitten or lining for added warmth. These are made without embroidery, and instead I made the thumb hole seam like this:
Cut the pieces out as above, and then fold the seam allowance in, but only in the tumb hole. Press with an iron to make it lie flat.
Work from the right side and pin the tumb in place. If the tumb seem a bit large for the hole, don’t mind that but just follow the seam allowance. This will create more space for movement for the tumb.
Whip stitch the tumb in place, from the right side. (This is what I referred to when I wrote that you can use the “inserted gore” method.)
Another round of whipstitching on the inside to secure the seam allowance. Make the tumb on the other mitten the same way, and finish the rest of the mittens as above.
Felling seams inside small garments: It is often easier to finish one seam before making the next one. Sew one seam, press and cut it, then sew it down with whipstitching. After that, take the next seam etc.
If you want to sew the mitten together first, I find it easier to work with my hand inside the mitten while felling seams. This way you can adjust the seam and seam allowance while sewing, and keep the fabric stretched out. You are also sure not to accidentally sew throught the next layer of mitten.
Stretching out the fabric and seam with my hand, while sewing with the other.
If you want to make a pair yourself, the pdf including a pattern, can be found on my Etsy and Patreon. If you have 2023 years Advent Calendar, you will find the pattern in there. If you have larger or smaller hands than size 9-11, you might need to make a mock up/test the mittens in cheap fabric to adjust the sizing (mainly the width and lenght of the front and back pieces).
Are you longing for that perfect iron age (viking) look of square awesomeness, yet still wanting to show off some womanly curves? Fear no more, this is how you make your apron dress fit really nicely! (Yes, we are going to be more serious real soon)
This apron dress is the same style as you can find in this tutorial, but back then I never guided you through the fitting, straps or stitching. Kind readers have asked for more details, so now this part 2 is here for you.
Ok, so let’s start with the dress already cut out and basted together (white machine thread). It looks something like this, hanging a bit boring…
Step one- try it on!
I pinned two pieces of ribbon onto the dress to be able to try it on easily. These will later be my guides for making the sewn linen straps.
In the back, I put the straps closer to the middle. I find them more comfortable and less likely to slip off my shoulders.
Now it is time to do some shaping! I like to wear my apron dresses higher up on my body, which means I get fabric bulk under my arms. To avoid that, I draft a curved line under my armpit and then cut away the excess fabric. You don’t have to make a full “arm hole”, just add some space for your arm.
Drafting the curved line in the armpit with a fabric marker.
The next step is to pin away fabric in the seam above the bust. Here the seam stood out a bit, so in order to follow the shape of my body, I pinned away a little fabric. As you can see in the photo it is not much, only to add a soft shape.
Marking the fitting with pins will allow you to feel the new fit.
Next are the side seams in the front. I pin away fabric under my bust, turn at my natural waist and continue out in a soft line to the basting line again. The goal is not to achieve a super snug fit, just to highlight that you have a body underneath.
Pinning the shape loosely.
Continue with the back seams and pin away fabric to add some shape to your waist here too. I hold my hand by my natural waist, and as you can see I did not aim to make the apron dress tight. Just removing a couple of cms to add shape.
My goal here was to be able to wear the apron dress with a woollen kirtle underneath, so I needed the fit to be loose. If you want a tighter fit you can try pinning away more fabric- just remember to try it on with new basting seams afterwards to make sure you can get it on and off. Apron dresses never have lacing or such.
Pinning the back seams by the waist.
Now it is time to check out the new fit! Mark the position of your pins on both sides of the seams, remove them to be able to take off your dress easily, and then bast along the drafted lines.
Basting can be done on a machine or by hand.
Here you can already see the added shape of the bust and waist, even without the seams properly finished. When you are satisfied with the fit, remove the old basting from places with double basting. This is needed to finish the dress by hand with a historical stitch.
Trying on the dress again to check the fit.
Press all seams with the basting still in place. (This step is important if you want to try out the seam below, but if you use a sewing machine for your dress you should first sew all seams on the machine, remove the basting thread and then press.)
Pressing the seam allowance to either side will make the sewing easier.
This is what the new shaping looks like after the pressing.
Sewing with wool thread.
Turn the apron dress so the right side is out (yes, we are sewing the dress from the outside) and start by the hem with a small whip stitch. Work your way up on the outside, fasten the thread on the inside of the garment as needed, and repeat with all four seams.
This is a sketch of how the seam looks, side to side with the actual seam.
The key to making this seam look neat is to make small stitches mainly running on the inside of the garment. I like to start from the bottom up, so I can try out the best thread tension and width between the stitches where it does not show so much. The pressing in the step before also helps a lot, as well as the basting on the inside, keeping the garment together while I sit comfortably on the sofa, sewing.
Close up on the seam. If you sew with wool thread, choose a thread with a high twist and 2-3 ply. Take shorter threads and a needle somewhat thicker than the thread. This will make the thread last longer when you work.
After the seams are closed on the outside, I remove the basting thread on the inside. Then I finish of the seams by cutting down the seam allowance on one side, and pressing the other seam allowance over this side. This way I just have to make one more whip-stitched seam for each long seam, instead of two.
Every seam is sewn two times with whip-stitching. This makes the seams sturdy and flexible!
Finish the dress with a double folded hem and whipstitches. Press all seams when you have finished.
When the dress is done, it is time to make some straps! Use the ribbons from earlier as your mockups /guides to decide how long your straps should be, but remember that the tortoise brooches will take some space too. Add seam allowance (3 cm) and extra for your loops. If you are unsure, make the strap 10 cm longer and then cut away the end you don’t need when you have made the loop and finished off everything else.
Linen fabric going to be apron dress straps.
The measure for my dress straps was approx 30 cm long and 4 cm wide. I made 2, and then 2 really short ones to make the loops attached to the apron dress above the front seams. Then I pressed the straps in the middle, folded them, and then folded in the edges. Very smooth!
Use waxed linen thread for sewing in linen fabric. Linen straps on wool dresses can be found in grave finds from the period.
Whipstitch the folded straps along the edge. When you have finished, press them again but with the seam in the middle. This way the stitching will be protected in the middle and the straps will be looking really nice and even.
Nice and even, I love pressing seams!
Making loops for the tortoise brooches.
To make the loop in the edge of the strap, finish the seam along the line and then fold the edge back and fasten it with some stitches. I like these loops, they keep the brooch in place and look neat. The small fabric pieces for the lower loops get treated in the same way. Double fold, press, whipstitch along the line and fold to a loop.
The loops are sewn to the inside of the upper hem, beside the front side seam.
Fasten the lower loops to the front, and remember to put them where you pinned your ribbons on in the beginning. The placement will help the shaping of the garment. If you wear a modern underwire bra, the placement of the loops is often towards the middle from the bra straps. Remember that your tortoise brooches should have a fairly even place to rest on your body.
Sewing the straps onto the back of the apron dress.
Before attaching the straps to the back, try the dress on with your tortoise brooches, to adjust the length needed for your straps. When you are satisfied, pin the straps in place on your back, and sew them with some waxed linen thread. I like to work my way around the strap and through the wool fabric to make them sturdy.
That’s it! We’re done with all the fitting and sewing, and owners of a splendid apron dress with a perfect fit! Did you like this post? Support me on Patreon to help me make more!
In Sweden, the historical camping season has begun, and with that lots of clever reenactors are sitting at home, working on their packing lists and piling their things in large heaps. For your convenience and enjoyment, I have asked around after the best packing tips, clever hacks and what-not-to-forget as a beginner.
Here it is, the Ultimate Packing List! Containing everything and more, just what you need to plan your event. Just adjust after your preference and need, and print it out!
swimwear historical or modern depending on the rules
socks, and extra socks. Some more socks.
shifts/shirts
middle layers for warm days
overlayers for cold and rainy evenings
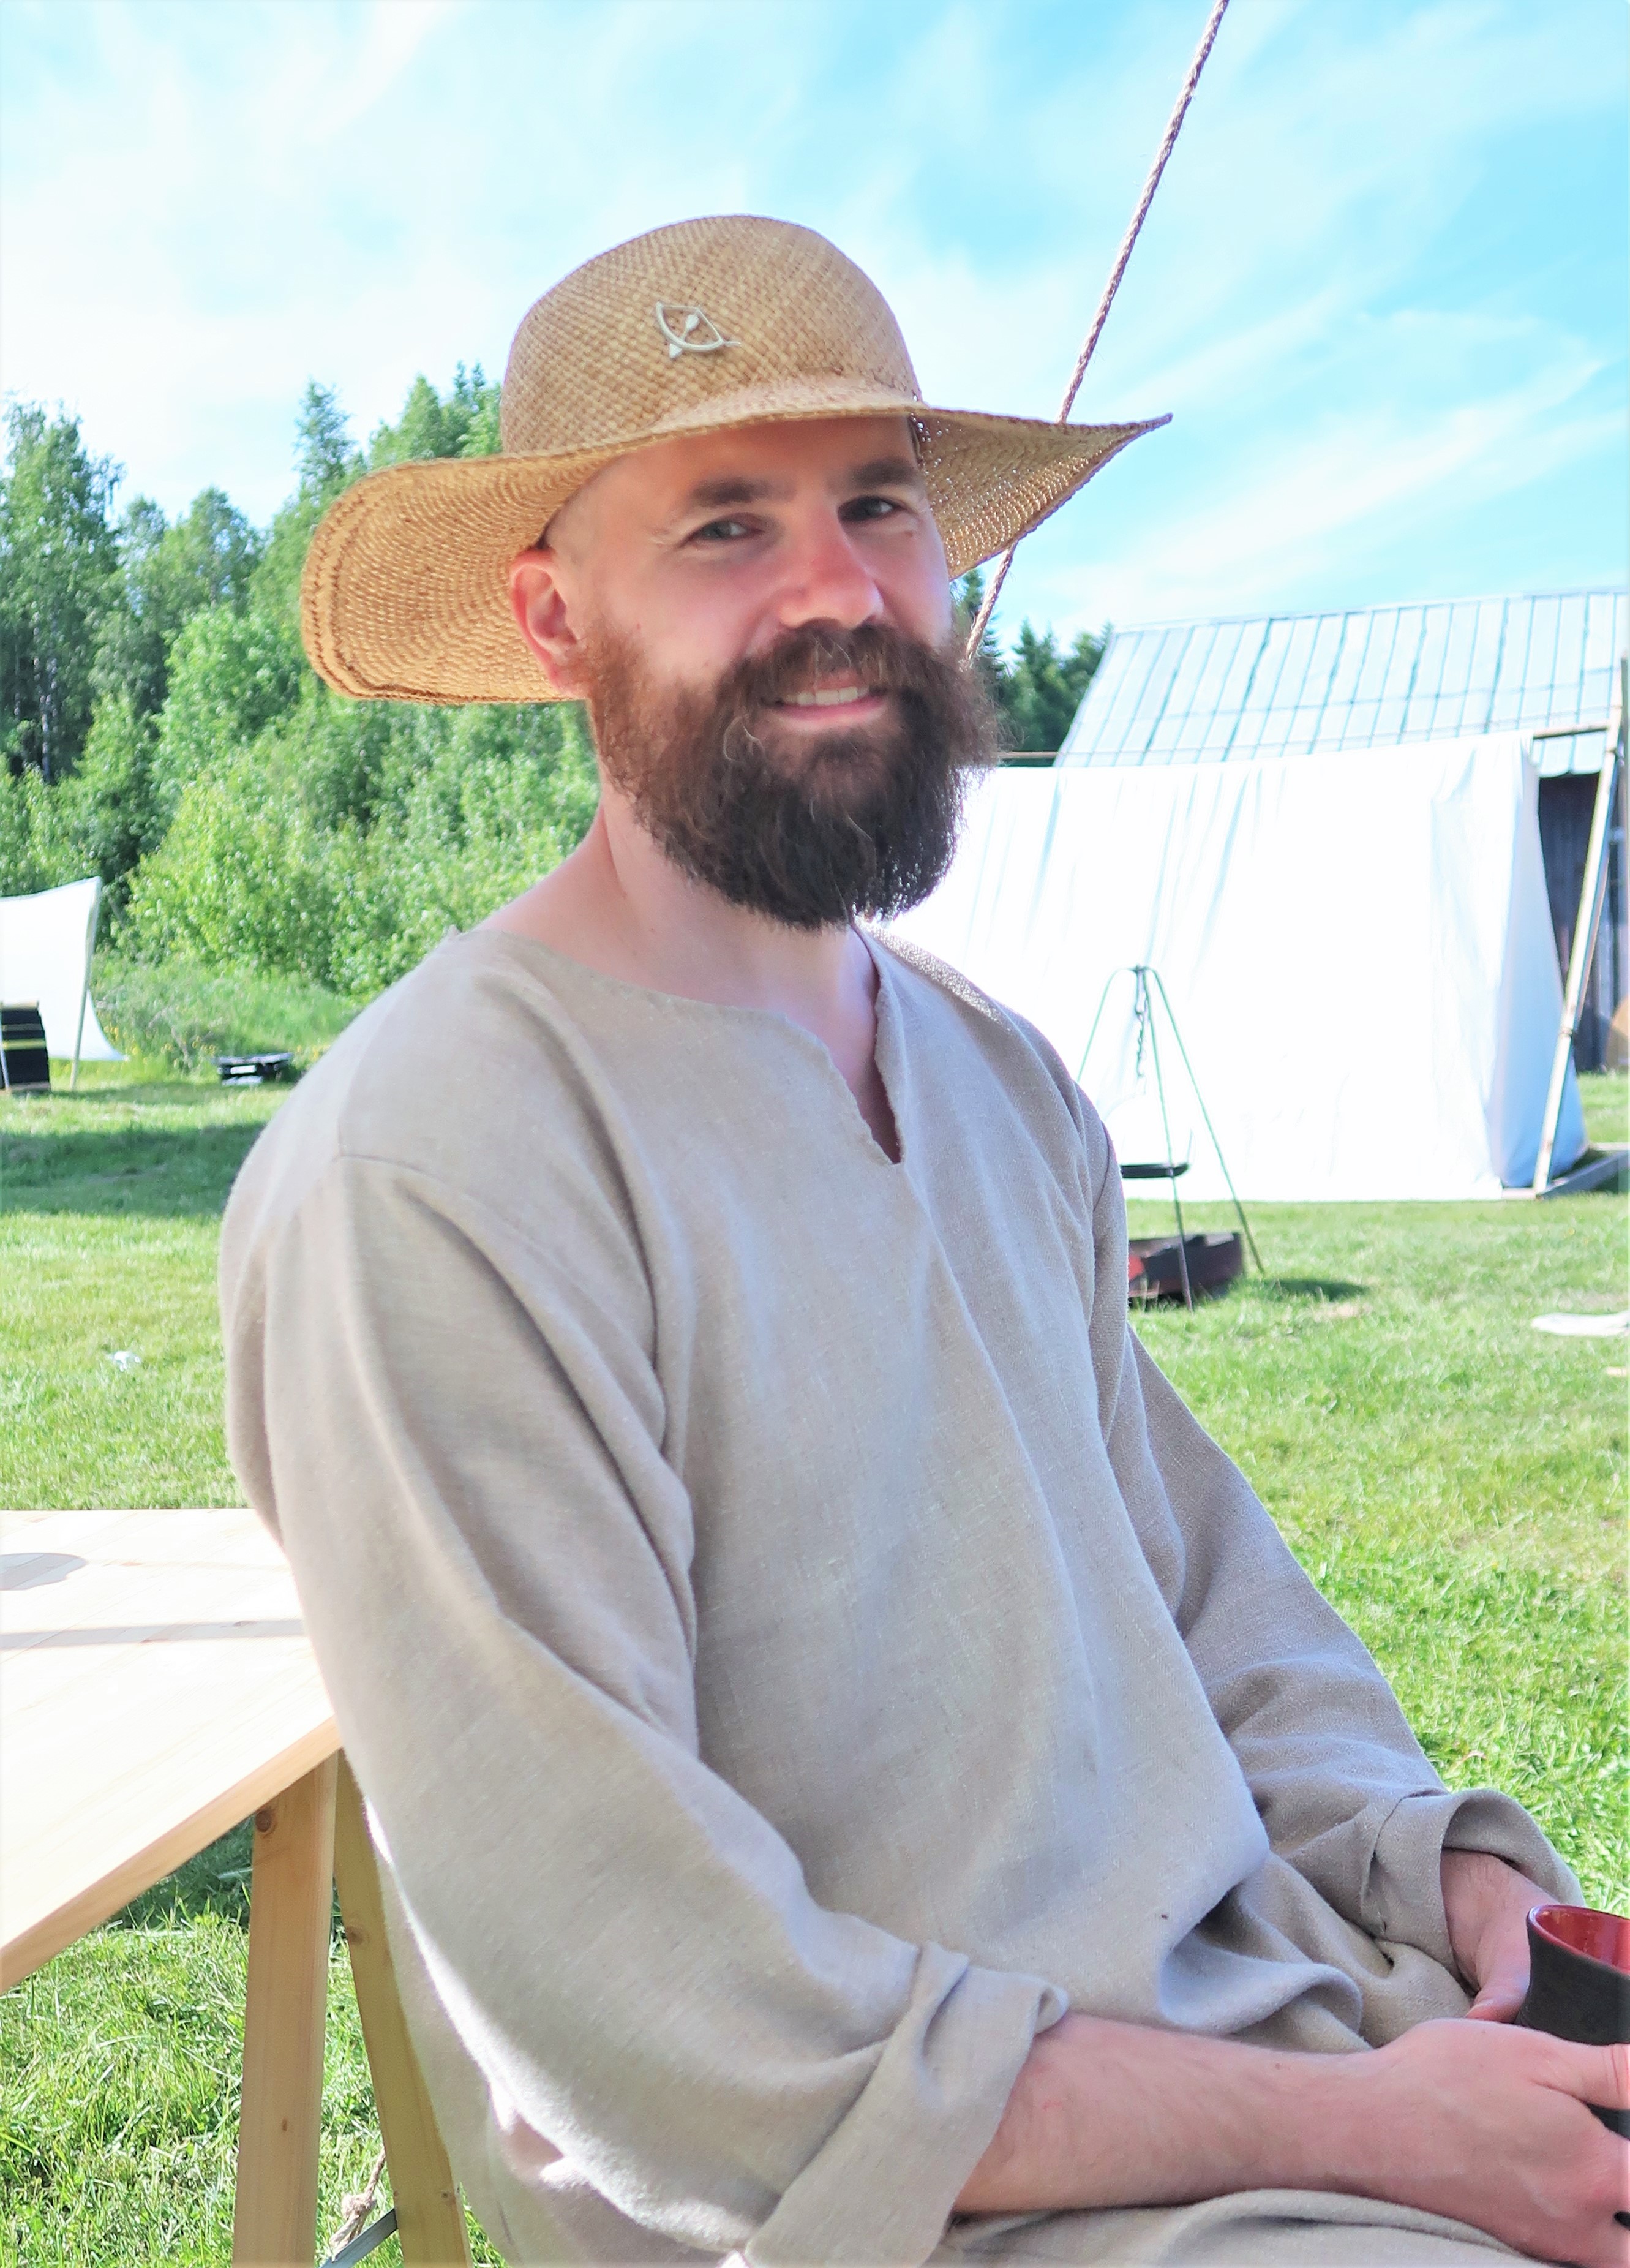
headwear that protects against the sun
Food, eating and cooking:
eating utensils: spoon, knife, pick/fork, plate, bowl, jug and glass
food storage: cloth bags, chests, plastic bags, cool bag with freezing blocks
water container to carry with you during daytime
fire maker (matches, striker etc)
towel/rags for hot kettle, table, dishes
fire extinguisher
fire pit/somewhere to make your food
tripod for your pot
firewood, coal
pot to cook in (frying pan or cauldron)
dish brush and dish soap
towel
tasty drinks
snacks
food for all your meals
trash bag or bin with a plastic bag inside for icky trash
Necessities:
toilet paper
towel
soap
hand sanitiser
plastic bags
wet wipes
your regular medicines and toiletries like toothbrush etc
menstruation pads
abrasion patches (band-aids for your feet)
Good Things to have:
power bank
extra socks
extra medicines (for cold, pains, band-aids etc)
extra blanket/sleeping bag for warmth
sunscreen
earplugs
mosquito repellent
snacks
first aid kit
cloth sacks to store things in
cloth sacks, baskets, fässing, bags to carry things in
mending/sewing bag
fluid replacement (to put in water if the event is very warm)
axe
small broom for the tent
To make the stay more enjoyable:
candles in lanterns, and/or led candles for lighting your tent in a safe way
heater for the tent + fuel for the heater
toys according to your hobby; sewing projects, swords, bow, armour etc
*Please be advised that some events have restrictions on fire and cooking or modern equipment etc so be sure to learn what rules apply to the event you want to visit!
Good luck with your packing and adventuring! I am going to pile some more “important-looking-stuff” now for my trip to DW next week.
I could call myself somewhat of a pro at living in historical tents, or more accurately, sleeping bad and freezing in historical tents… Therefore, I present to you a guide on how to choose your tent and live comfortable in that!
(This turned out to be a really long blog post- I have apparently missed talking to you. I marked all my personal thoughts and anecdotes with cursive, for easier reading)
Which period?
Different models are based on finds from different periods, so if you are going on viking adventures the Geteld or A-frame models are most often used. For medieval adventures, Getelds and Pavilions are good choices. Small shelters called “Soldier’s tents” are also often used.
When looking at websites selling tents, many will show you models that are not based on finds or pictures but called “historical” anyway. The openings could be placed in new ways, the seams made to save fabric widths or moved to be able to sew on a machine. The poles and ropes holding the tent up might be done in different ways that can not be seen in manuscripts and so on… These tents may still be good tents, but it is always good to know what you buy, and what it is based on for the future. If you are unsure about a model, ask!
A-frame tents at a viking market
What says finds and historical pictures?
Viking type tents are based on ship burials which have included a tent with a wooden frame and canvas. We don’t really know if people actually slept in these on land as well, and they probably did not bring them to different markets all summer… But what to do, when you are a modern person wanting some comfortable living?
Medieval type tents are seen in numerous manuscripts and paintings, both used by nobility and commoners. Brightly painted, large tents are used for festivities, tournaments and for avoiding that pesky sun, while small sleeping tents and shelters can be seen in military settings. A quick search gave me this board.
Round pavilions at Double Wars.
Where are you going?
Many events have lists or recommendations about what tent models are allowed on their events. Mostly, you can bring Getelds and A-frames to viking events, as well as small canvas pieces as simple roofs. To medieval events, Getelds are often allowed, as well as square, round and oval-shaped Pavilions. Materials may also be advised to be linen or wool.
Sleeping tent in the middle, and large pavilions in the background.
The event organizer will want to have as pretty a camp as possible, but at the same time, they know tents are really expensive and that guests will stay at home if their living investment is not allowed. The same is true with market tents; most of them are not strictly historical since a modern seller will need light loads to carry and transport, as well as a big enough tent to be able to bring enough products to earn a living. Not everyone can sell jewellery and candy, so some will need big, bright and roomy tents.
Other things to consider are the campgrounds; is it rocky and hard to put down tent pegs? Then an A-frame tent might be good. Is it often stormy and windy, then perhaps a smaller tent with a sturdy frame and long tent pegs is a good choice. Have you ever seen a jumping A-frame tent in a storm? I have, they can really get quite far…
Cotton, linen or wool?
Cotton is by far the most common tent canvas today since it is cheaper, lighter and easy to come by in the right thickness and waterproofing. I use cotton in my Pavilion to be able to lift the canvas pieces myself and to have a tent that is bright enough for customers to see my products, even if it is rainy outside. But oooh, my old linen pavilion was prettier!
Linen is heavier but more resistant to mold, and unbleached linen will keep your tent cooler and darker. Perfect for sleeping in, not so good if you are a market vendor selling fabrics. Linen gets bleached over time in the sun, giving the canvas a really good look.
Wool is mostly used in A-frames and a good, felted wool fabric will keep you dry, cool and comfortable in all kinds of weather. May be waterproofed with modern products, or with lanolin (wool fat) which is more historical.
Different types of fabrics; brown wool tent, white cotton tents and the unbleached linen pavilion in the background.
Consider this when choosing your model:
Packing space available (how much space do you have in your car for a tent canvas and wooden frame?)
Storing space (where will you keep the tent off season?)
How many people and how much stuff do you need to fit?
Is it important that you can put up the tent fast?
Is it important that the tent is easy to lift/carry? (consider a canvas in several pieces)
Should the door be big (welcoming/good shop) or small at one edge (more sleeping space)?
I have always been partial towards Geteld models since they are often economical, easy to transport and fast to put up and down.
With that said, after living for weeks in this model you will get really tired of the sloping walls, giving you almost no space to hang clothes for drying (except in the middle). Storing all your things around the base of the tent will save lots of space to allow you to walk around in the middle, but it will also mean you crawling around on your knees looking for things every day.
A-frame tents also seem very practical and I am slightly jealous of my friends when we are putting up camp at rocky, hard grounds. While I am sweating and swearing trying to put down the tent pegs in the ground, they simply fold their tent in place, secure the canvas by the frame and move in. I usually get my revenge when the carrying distance between car and camp is long since I can carry my poles in one go…
A-frame tents are practical, economical and if you have the storage and packing space for the frame it is a good choice. It is also considered the easiest tent to make yourself.
Pavilions often have a roof with separate walls, allowing you to open up different sections of the tent if you want the breeze to get in, or want a nice display area. Straighter walls with poles or wooden wheels mean you can place furniture along the walls, and hang clothing from the wooden frame, which is both practical and pretty. More sloping walls on the other hand might ride out storms better.
Round and square pavilions may be sensitive to hard winds and storms; during the Medieval Week in Visby you may see knocked down tents of these models, or tents laid down by choice before a storm. If the round pavilion has a sturdy roof frame, you can remove the middle pole, fold the walls and secure the roof down to the ground covering all your furniture and belongings while you wait for the storm to pass. You might not fit inside, but your tent will survive…
If you only want a sleeping place, tents called “soldier’s tent” or one-man tents might be the right choice for you. I would advise you to get a tent big enough to fit a bed inside, then you will always have a dry space, and can store your things under the bed.
Will I get wet?
A good tent will keep you dry even in heavy rains, as long as you can stay of the ground (in a folded camp bed or wooden bed for example). Also, never put clothes or bedding up close to the canvas, ideally, nothing should touch the canvas walls except the framework.
Our oval pavilions have kept out heavy rains on several occasions, with the single drop or two from a slacking corner joint between roof and wall. During one event, the rain was so heavy that small runlets formed and travelled through the tent. Everything above ground kept dry, but a turn shoe almost floated away…
Look for a tent construction that has sloping roof/walls, and a canvas that is thick, sturdy and treated with a waterproofing agent. Even so, after some years out and about the canvas may need to get additional waterproofing.
How to care for a historical tent:
Let’s start at the beginning; oil all your wooden poles upon arrival, and once a year after that (or when needed). When you put up your tent; find the right way to do so without adding unnecessary tension to the pole, canvas or ropes. The same goes for taking down the tent; do so slowly and controlled, and get some friends to help you in the beginning. Always mend loose ropes, or broken seams at once. Make sure the tent canvas is really dry before folding it away in the storage, and that it is reasonably clean since rotting mud, grass and insects may cause damage to the canvas over time. Brushing away loose bits before folding the tent is good. I also brush off the dirt from the tent pegs and ropes. The canvas should be stored in a dry space, outdoor sheds are not ideally. I can give you several examples of people having their tents destroyed by mold and rats during winter…
More tips to be comfortable in the tent:
Furniture like a bed, table and chairs (so you don’t have to sleep and sit on damp ground)
A heater for those chilly events (if you live in an area with cold nights and rains). We have a portable gasoline radiator (the same type you might have in a trailer van).
A mosquito net to drape over the bed at night
Look for opportunities to hang things inside the tent; a lantern and a rope for drying clothes make life easier.
Things to ask (or look for) when buying a tent:
What material is the canvas made of, and is it waterproof? Treated to withstand mold? Treated to slow fire down?
How much does the canvas weight? Does it come in 1 or several pieces?
How long are the frame/tent poles?
Are rope and tent pegs be included?
How should you take care of the tent?
If the tent canvas breaks, is it possible to buy additional fabric for mending?
Pricing?
Historical tents are expensive. Or at least, there is lots of money involved. The cheapest way is often to make one yourself if you have the time, space and skill. The second-hand market is also a really good choice, when people get tired of their small, practical tents and want to level up, they will often sell them for a good price. But try to inspect the tent yourself before you pay for it (ideally put up) to avoid bad canvas, mold, rips or a cracked frame.
A short sneek view over the camping ground at Double Wars; here you can see many different kinds of tents!
With this blog post, I am celebrating 10 years worth of blog posts on this blog. I had another blog before this, so I have been writing for a longer time, but when I moved here I decided to take with me the handcrafting posts, and the first one is dated to late October, 10 years ago.
So with this, I am sending a big THANK YOU to all of you who read and support the blog; by reading, sharing, liking, talking, supporting the blog on Patreon and doing business with me whenever we meet. It is thanks to you the blog still remains, without your support I would probably have lost the heart to continue writing here. Let’s hope we stay together for 10 more years to come!
This summer I visited the island Björkö again, where the viking city Birka flowered as a centre for trade and cultural influence during the Iron Age. Birka is such a magical place, and I can really see how people have chosen to live here for such a long time.
I wore my most recent viking outfit, I call it my Västerbotten Viking (which I explain in the blog post about the garments) and enjoyed wearing a comfortable and practical outfit as I strolled the pastures, enjoyed magical light and amazing sunsets.
One evening my friend Rand I enjoyed a nice view of the harbour when we got company from a friendly sheep and her lambs. Apparently, vikings give the best scratches, and handmade beads and bronze jewellery is great to nibble at. Yes, I now have lamb drool all over my things. Totally worth it.
We also enjoyed some adventuring; rowing out with this viking boat (…ship? Do you call it a boat or a ship? I know nothing about boat-things) which was fun, sweaty and a great experience.
In the viking harbour, several reconstructed boats were available for admiration and occasional trips around the island. Here another group of vikings set sail out into the evening sun. In Sweden, there are several viking groups specialising in maintaining and using these ships, and we met lots of friendly and knowledgeable persons that gladly shared their knowledge with us.
One evening we had a great feast in the village, with skilful cooks preparing a meal and festive-dressed vikings enjoying it. After a long time with pandemic restrictions, it felt almost unreal to meet so many other people at the same time and eat by the same table. But alas, some work was required to take nice photos without the hand sanitisers visible…
Pretty vikings with pretty flowers and glass replicas.
And even more pretty vikings up at the hill, enjoying a guided tour ending by the sunset. This year we got a guided tour by Max, who kindly shared all his knowledge and told us about strange finds from around the site.
Viking age clothing; linen sark, wool apron dress, wool shawl and a veil. From my brooches, my knife and needle case is hanging by chains.
Birka is one of my latest infatuations and I long to go back there. This is really one of the most amazing things with my work and hobby; getting to visit and live at these historical and lovely sites. It is also really hard, because I now harbour a deep love and longing to visit places all over Sweden such as Visby and Birka, but also Tällberg where the larping area is, as well as southernmost Sweden for Double Wars, and Hamar in Norway to mention a few… How will I have time for it all?
Do you also have a magical place that you keep in your heart?
Welcome to this step-by-step tutorial, perfect for beginners. It might seem long, but explains everything you need to know. Follow it as you go, or look up the section where you might need extra guidance.
This is a great project to begin with! Easy, straight forward and the fabric won’t be too expensive.
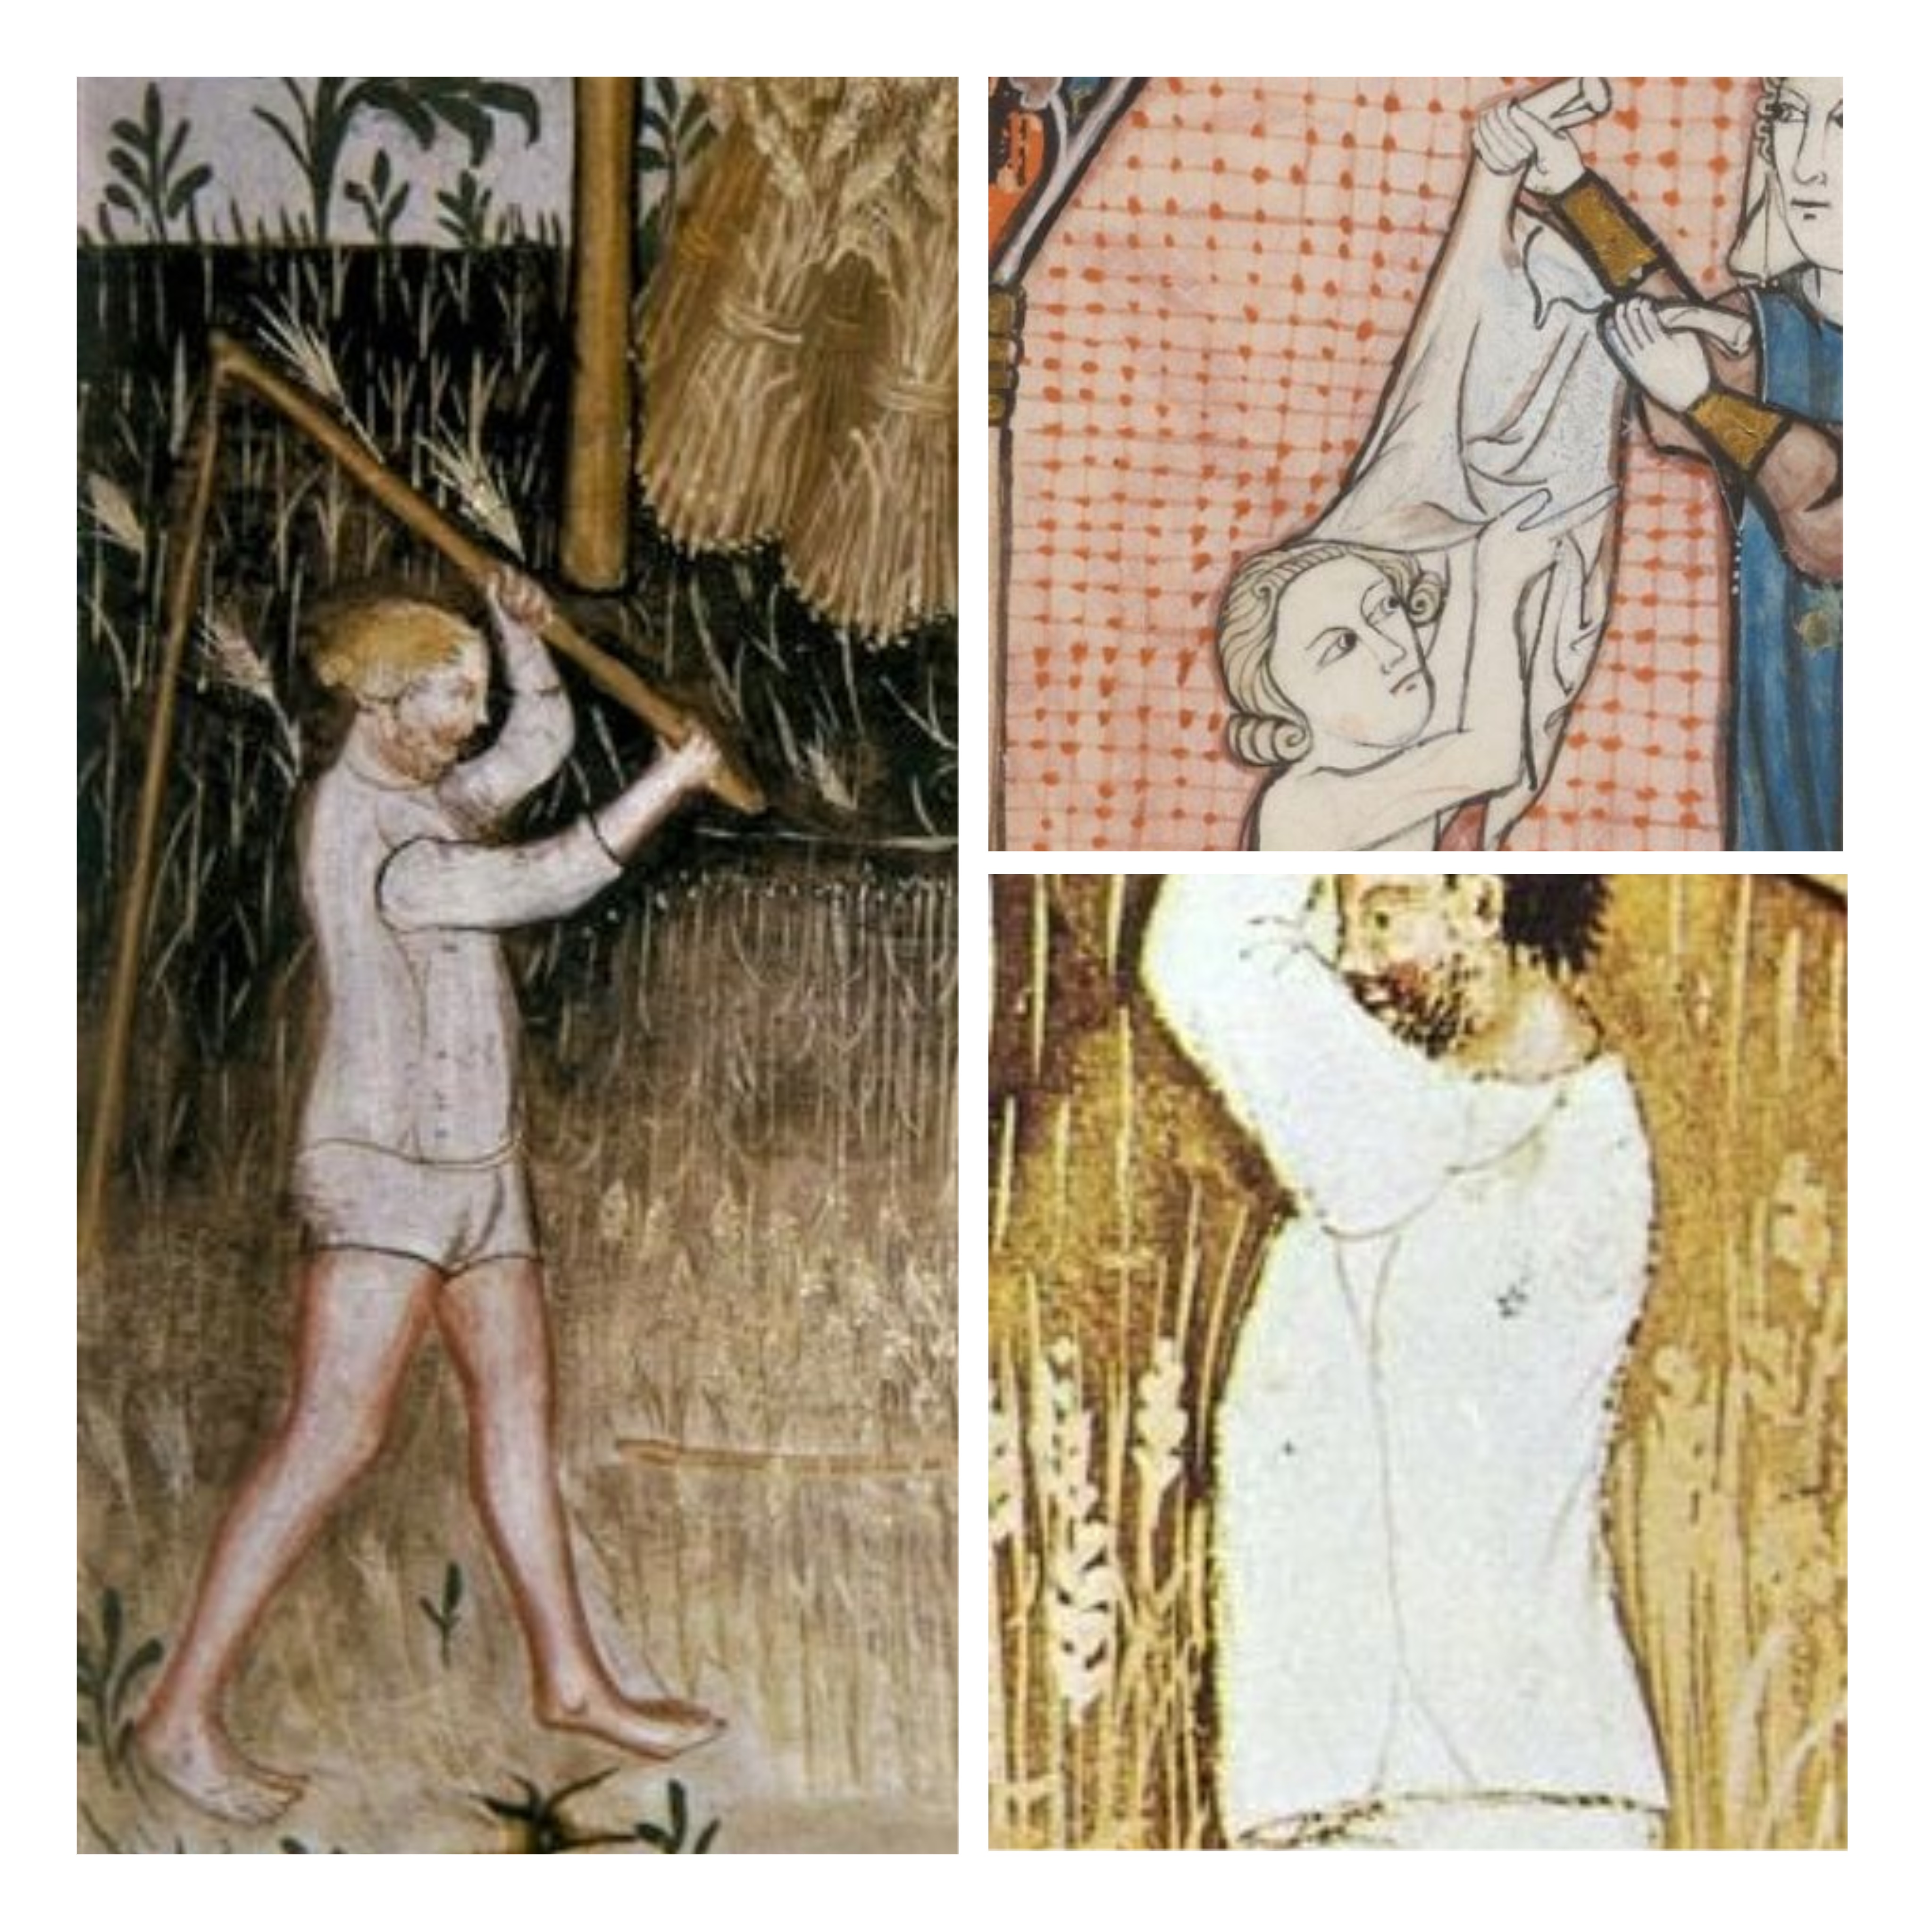
Examples of medieval shirts with slits, gores and seams.
Most people wore linen underwear during the medieval period, and a man’s kit was made up of breeches or a type of loincloth, and the shirt. While you are at it; make two shirts! It is really nice to be able to change and wash your clothes during longer events, and a pleasantly smelling shirt will make it easier to make new friends…
Linen shirt with a slit at the neckhole
Buying fabric:
The amount of fabric you need depends on your size and the width of the fabric. This example will use cloth 150 cm wide. To decide how much you need to buy, calculate the measures on your pieces and how much fabric you need for those, then add another 10% minimum to allow for shrinking or uneven edges. (Fast tip: just buy 2 meters up to XL, a bit more if you have a larger size. Extra fabric may always be used for other projects.)
Look for linen fabric of 120-180 gram, I prefer a thin and even weave. (That is more historical and comfortable than a coarse and lumpy weave.) Bleached or unbleached linen, according to the status you would like to aim at. Bleached linen was a bit more expensive, but don’t go for the super-white ones in modern stores.
Pick a shirt model of your choice
Preparing the fabric:
Zigzag the raw edges to prevent them from fraying while washing, or buy a bit of extra fabric if you don’t want to bother with machine work.
Pre-soak, wash and iron your fabric before starting to cut and sew your shirt. Washing will avoid future shrinkage, make the weave even and remove any pesticides. Pre-soaking the fabric will lessen the wrinkles and make it easier to iron. 40-60 degrees c machine washing, hang dry.
Things you will need:
Needle, linen thread, beeswax, scissor, measuring tape and something to mark your fabric with (fabric chalks or just a pencil). A ruler or straight piece to draw against is nice, but not necessary.
Tools for handsewing
Measure:
1. Lenght of finished shirt from shoulder to hemline.
2. Circumference around the widest part of your upper body, often the chest.
3. Length of sleeve from shoulder to wrist.
4. Circumference around your hand/wrist (make a loop with the measuring tape, and try to pull your hand through it, it should be big enough to be easy, in order for you to be able to take the shirt off.)
5. Armhole (measure around your should/arm as the picture shows, then make the measuring tape into a loose circle, and when you find it comfortable-check the measurement.) I usually add about 25% extra from my body measure, from 40 cm body measure to making the sleeve hole 50 cm.
Example (with measures) so you can see how I do this:
1. Lenght of finished shirt from shoulder to hemline: 100 cm
2. Circumference around the widest part of your upper body, often the chest: 100 cm.
3. Length of sleeve from shoulder to wrist: 70 cm
4. Circumference around your hand/wrist: 28 cm
5. Armhole: 60 cm. This means the sleeve base will be 60 cm, and the armhole on the body parts will be 30 cm on front and 30 on back.
Add ease of movement:
What is that? If you were going to cut out your pieces with the above measures, the shirt would fit tight along your skin, making it impossible to move, or take it on and off. Therefore, we will add extra space for movement. I usually calculate 6% of the circumference around your body, 10% if I want a loose fit.
Example: 100 cm + 6 cm (6% of 100 cm) =106 cm. Split this measure in 2 for front and back: 53 cm each.
That’s it! (we already added ease into the sleeve by making sure we could pull the hand through, and the sleeve base by adding extra room there)
Add seam allowance:
What is that? Seams always need to be a bit from the edge of the fabric in order to be durable. The space between seam and fabric edge= seam allowance. Short= SA. I will add 1 cm, between 1-2 cm is recommended.
Example: Add 1 cm to all edges around your pieces, like this:
Seam allowance can be added directly in your calculating and drafting the pieces, to paper pattern pieces, or drafted on the fabric outside the pattern. We use the first method here.
Example:
1. Lenght of finished shirt: 100 + 2 cm SA= 102 cm (I like to add another 1 cm to hems; so 103 cm)
2. Circumference around chest: 100 + 6 cm movement + 2 cm SA= 108 cm
3. Length of sleeve from shoulder to wrist: 70 + 2cm SA= 72 cm
4. Circumference around your hand/wrist: 28 + 2 cm SA= 30 cm
5. Armhole: 60 + 2 cm SA = 62 cm sleeve base. Armholes: still 30 cm *2.
Draft your measures into a pattern:
Now you are ready to draft your pieces! I like to do this on paper first, to save as a reference, for future projects, and to determine how to save on fabric. I draw my piece of fabric onto paper, making 10 cm=1 square:
Nr. 1 is the front and back pieces, nr. 2 sleeves. As you can see; if you would like to have side gores instead of slits in your shirt, nr. 3 would be excellent to use. This is just an example, do a draft with your measures and lay out the pieces in a way that suits you.
I recommend drafting the front, back and side gores either along or across the length of the fabric (do all these in the same direction) the sleeve may go along or across, depending on what is more convenient (the shirt will look better with this method).
A note on sleeve measures: this sleeve doesn’t sit on top of the shoulder when finished, it hangs on your upper arm (see photo at the beginning), which makes this measuring method work. When measuring for a fitted sleeve, always measure around your bent elbow.
Design your neckhole:
These are my general measures: small-medium: 1 = 18 cm. large-xlarge: 1= 20 cm. The back I cut out around 5-6 cm deep, the front (2) is cut 10-15 cm deep. If I want a slit at the front (3) I cut it around another 10 cm deep. If you don’t want a slit, you might need to make the neck opening a bit deeper/wider in order to fit your head. You can always draw it out, cut a little, try it on, draw a bit more, cut and so on, until you are satisfied with the look.
Shape your armholes:
If you feel that the shoulders are a bit wide, you may shape the armholes a bit (common if you have a large chest but narrow shoulders). Cut 4 cm (small/medium) to 6 cm (large/xl) from the shoulder top (4) and create a gentle curve to the armpit, or draw a straight line from the top (4) to the armpit (see photo further below). Then sew the sleeves as described. The seam should still be hanging slightly below your shoulder, not at the top of it.
Cut out the pieces:
When you have drafted all your pieces on paper as above, you are ready to draft them onto your fabric! Iron the fabric and lay it down on a flat surface, draft all your pieces and check the measures with a measuring tape. Use a piece of chalk suitable for fabric, or if you don’t have that; a pencil. A ruler, a large book or a straight stick can be used to make the lines even. Everything seems good? Cut the fabric pieces out! (you may also want to mark them Front, Back, Sleeves if you are unsure.)
Sewing time!
The order of sewing is as following, I will walk you through every step below: shoulder seams if any, sleeves to shoulders, side gores if any, sew together sleeves and sides. Adjusting neck-hole, adjusting sleeve length to your wrist, hemming.
1. Start with pinning the shoulder seams. Putting in pins alongside the fabric edge makes it easier to avoid stabbing yourself when handling the project.
2. Cut a piece of linen thread, the length of your arm. Coat it with bee´s vax by pulling the thread over the vax piece a couple of times. Thread a needle (the needle should be as small as possible, but thicker than the thread to make it easy to sew), and make a knot at the other end.
The needle is thicker than the thread
3. Sew the shoulder seams with backstitches. 3 stitches/cm is a good guide, and 10-15 mm seam allowance depending on what you drafted on your pattern. If you find it difficult to make the seam straight, draw a thin line with a pencil where you want it to be.
4. Press the seam allowances to either side. Use your fingernail, a pressing tool or ironing. Fold the seam allowances double, and pin down.
5. Use running stitches (or whip stitches) to sew the folded edge down to the shirt. The stitching should only be visible at the right side as small dots.
6. Try out the neck hole by pulling it over your head. Cut out more if you need, and check in the mirror to see if you like the look. When you are satisfied, hem the neck opening. Start with folding the edge twice and pin it in place. Make the folds as narrow as possible, to make it easier to sew nicely, mine is 5 mm. Sew the edge down with whip stitches.
7. Pin one sleeve to the armhole of the shirt, right side against right side (this photo show a shaped armhole). Sew it in place, using running stitches or back stitches. Pin and sew the other sleeve in place. Press the seam allowance to either side.
8. Now we are going to save some time with a folded over seam allowance! (photos below in 10.) Trim one side of the seam allowance down to approx half-width (5-6 mm) and then fold the larger one over this, press in place. To avoid fraying and loose threads, fold in the edge of the fabric under the seam allowance. Press down, and pin in place. Now you have a neat looking fold, ready to be fastened down. When sewing the seam allowance down like this, you save time and make the seam more durable since the fabrics will be sewn twice to each other. I prefer whip stitching for this seam, it is easy and durable.
Which way should you press the folded over seam allowance? I often go for pressing and sewing down to the biggest fabric piece. So for the sleeve seam, the seam allowance will be pressed down onto the body parts. On side gores, the gores will be pressed out onto the body piece. It makes it easier to sew and gives the garment a nice drape.
9. Time to sew the side seams and sleeves! Lay the shirt down inside out on a flat space, and pin the side seams and sleeves. Make sure the fabric is smooth and the edges lays on top of each other. Mark where you want the seam to be if needed, and then sew from the sleeve wrist, all the way down the side seam. I like to leave the bottom 10-20 cm open on the side seams to create a slit in the shirt, if I don’t have side gores. Backstitching will make the seam durable, but if you are in a hurry a running stitch with some backstitching in the armhole will also suffice.
Slits at the bottom
10. Finish of the side seams by pressing the seam allowance flat, and make a folded over seam allowance. Press, pin and sew this down.
Folded over seam allowance, above the side slit in the shirt
11. Now it is time to fold the edges and sew them down. On linen fabric, I like to make a double fold to avoid fraying threads from the fabric edges. Start with the hem around the bottom of the shirt. Fold two times, around 0,5 cm each (or the SA you choose), and press the fabric in place with an iron or your nail. Sew with whipstitching, travelling on the inside of the shirt, which will make small dots of threads visible on the right side of the shirt.
After that, finish the sleeves in the same way. I like to try the shirt on before hemming, to be able to adjust the sleeve length. If they are a little too long, just create a deeper fold, or cut off the extra fabric. If you have made them too short you can sew on another piece of fabric and make a hem on that one. Piecing is always historical.
How to fasten the thread:
When there is about 10 cm thread left (approx the width of your palm), it is time to fasten the thread and take a new one. Sew another stitch, pass through that loop before pulling tight, and repeat at the same place a couple of times. Then you can pull the rest of the thread down into the fabric before snipping off the leftover, hiding the thread inside the seam. Neat! Take another thread, prepare, and start sewing at the same place you stopped.
Uhm, this is a lot of steps for a simple shirt? Yes, it is. Can you cut the corners, get a bottle of beer and sew it all on the sofa? Of course you can, but each step may not be as easy, and it will be harder to have a nice view of the process. What I mean is- this is just my way of describing the process as easy as possible for you, to allow a handcrafting process where each step is straightforward, and where the sewing will be as fast as possible to do.
General advice:
Always pin on a flat space to make sure your seams will be even.
Be nice to yourself; sit comfortable, take lots of breaks, use tools to make your sewing easier.
Remember to actually try out the fit, the length, the neck hole etc before finishing sewing. It is very easy to just continue sewing once in a flow, but if you end up with a garment you don’t like, you will have to redo lots of work.
Is the measuring a bit off? No worries; in this project, a 1-2 cm difference will not matter. You can probably go on sewing. I sometimes have wonky measures. Medieval finds are full of uneven pieces, wobbly seams or piercings. Don’t worry!
Other types of shirt models:
Shirt with side gores: adding side gores is easy, and give you extra movement on a longer shirt. Sew them in place before sewing the side seams closed. Use the same stitches and folded over seam allowance as above.
Shirt with sleeve gussets: small square pieces of fabrics get stitched in under the arm, to add more movement and to save on fabric instead of making larger sleeves. I usually sew these after the sleeve, while sewing the sleeve and side seams closed.
That’s it on shirt sewing. These techniques will also do well on a number of different projects, and is somewhat of a basic go-to. Enjoy your sewing! Did you like this post? Support me on Patreon to help me make more.
The existence of an open coat for women during the viking age is not a sure thing. We don’t know enough about the viking woman outfit to say for sure that this was what it looked like, or that they even were a thing. Why are they so popular in the reenactment world? They are practical for the kind of reenactment we do! A coat is easily added or taken of as we move between cold outdoors to heated housing, and excellent to add to your viking summer outfit for those colder events, without having to make a completely new outfit.
Coat nr 2, super fun to make! Woollen twill that was woven in two layers, I remember. Decorated with wool tablet weave, silk and fur. Not very practical though…
With that said, here’s the tutorial- feel free to make one if you would like one! Also, as a bonus, you’ll get to see many different coats I’ve done during my years as a viking. Some more inspirational with freely designed decorations, some more historically believable.
(This description is shorter than for the Medieval Dress, since I skipped details and tricks that I describe there. So if you want a lot of extra tips, read that description too!)
I started with an inspirational sketch, very important. The sketch was four years older than the sewing project and not what I ended up with (I guess sometimes a project needs a really long thinking time, you know what I mean..?) On top of it are newly drawn pattern parts and a sketch of the coat when it is sewn together.
Sewing this coat is not so different from sewing a typical dress, with the difference that it is open in the front, of course. Since the coat is an over garment I also want a slightly looser fit, since I usually have two-three layers underneath.
When I took measurements for the coat I based them on the ones below, changed “klänningens längd” (dress length) to the length of the coat. I also added 2-4 cm around the armhole/sleeve insertion to get more movement, as well as the circumference around the upper body. 4-6 cm extra will give you room for more clothes underneath.
The coat also has wider front pieces than half of the total circumference, since I wanted to be able to overlap the front pieces when it’s cold and rainy. I seem to recall that I added 6-8 cm for each front piece after I had calculated the circumference the finished garment would have, divided it into two for back and front pieces. The front pieces are thus a fourth of the total circumference + about 6 cm.
¤ Coat length is measured from the highest point of the shoulder “klänningens längd”
¤ Gore length = coat length – from shoulder to natural waist “från axel…”
¤ Coat width = the widest point of the upper body + extra width for clothes underneath “överkroppens…”
¤ Armscye is measured loosely around the arm/shoulder joint “ärmhål”
¤ Sleeve length is measured from the shoulder, past a bent elbow, to the wrist “ärmlängd”
¤ Measure loosely around the wrist to be able to easily take the coat on and off
¤ Add 1.5 cm seam allowance on all sides
Draw the pieces and write down all measurements on a piece of paper. The base of the gore (C) depends a bit on your other measurements, but don’t be afraid to make wide gores. 60-80 cm is needed to be able to wear the coat over several layers of dresses, and have a nice drape. If you have a larger size; choose the larger measurement to avoid having a square-shaped garment with little body form. Generously made gores will give you a nicer drape and more shaping to the garment.
The sleeve (D) has a sleeve cap/shaped sleeve and the seam is underneath the arm. The sleeve cap is about 6-10 cm high, depending on your size and measurements. If you don’t have a sleeve pattern, make a mock-up sleeve in cheap fabric to try it out. My sleeve (size small-medium) is around 46 cm around the top, 60 cm long, and the curve of the sleeve cap is around 6 cm higher than the edges.
The little square gore (E) is called a sleeve gusset and is in the middle of the armhole under the arm. It is sewn to both the sleeve and the front (A) and back piece (B) and gives width and mobility. It is a way to save fabric as the sleeve can be cut more narrow, and then gain width in the armhole with the help of the gore. You can also sew the coat without a gusset, just make the sleeve a bit wider.
Sew the coat together in the following order:
1. Start by sewing the side gores to the front piece, cut up the back piece and attach the back gore, or sew the gore in a split-back piece. Press seams.
2. Sew the shoulder seams, press.
3. Sew the sleeve gussets to the sleeves along one side so they are attached, press.
4. Pin the sleeves to the front and back piece while they are on a flat surface (no sewn-in sleeve is needed here), sew them together and press.
5. Baste (or sew everything at once) the sleeves together into two sleeves, baste the gussets into the armhole and then baste the side seam (straight piece to side gore). Try it on, and if it feels good- sew it. If you are new to the square gusset underarm thing- it can be easier to insert that one first, basting it into place before you close the sleeve and the side seam.
6. Sew the coat together in the sleeves and sides, press.
7. Try the fit of the neck-hole and cutout in the front, fold the fabric first until you’re happy with form and fall, then cut away the excess fabric on the front pieces.
8. Hem edges, fell seams ( nowadays I usually fell the seams at the same time I sew them together if I hand sew the garment) and decorate your coat if you feel like it.
Simple and practical coat made in woollen twill
Tips:
All these coats are made based on the same pattern, with some variations. With or without sleeve gussets, with or without the back gore, and with different lengths, widths and hemlines. The fabric also matters a lot; a loosely woven twill will drape differently than a sturdy thick twill or tabby woven fabric. If you want a warm and practical coat; choose a heavy, fulled fabric that will protect you from rain.
The gores in the coat are wide, it gives a nice fall and makes it possible for me to wrap the coat around me even if I have several dresses underneath.
I cut the neck-hole/neckline in the front piece when the coat is sewn together, before hemming. This way I can put it on and draw out the opening as I want it.
Don’t make the coat all the way to the ground, it will just get wet and dirty.
I think this was my first viking coat, green woollen twill with fantastic wool embroideries made by my friend Kim, inspired by viking age decor elements
This was the finished coat that I made for the blog post. It has been sold since then, and I now own a similar blue coat made in warm wool twill, with rabbit fur in the neck and hand openings. I use it as my go-to cosy, warm coat on events, for keeping warm when I don’t want to get dressed properly, and on larps as a middle layer. So practical!
Today I just wanted to show you some of my new viking age glass beads that I bought this summer, and tell you a little about viking age beads!
There is plenty of finds from the viking age of glass beads of various colours and types. The most common way of wearing them seems to have been on a string between the tortoise brooches on a woman’s outfit, but the have also been found in necklaces, in small metal circles and loose in grave (also in men’s graves but I have no notion as to how many).
The world of viking era glass beads is big and interesting, but I am not an expert in any way. There are those who are though, and there is research going on about the subject. Glass beads were both imported by the hundreds and made in viking workshops, with different styles and quality from different geographical areas and time periods. This makes it possible to trace them back to their original area, and tell an estimated time they were created.
You can also find lots of free information on Historiska Museets database (The Swedish historical museum) and here is a search ready-made for you on viking age glass beads, with pictures on the finds; http://mis.historiska.se/mis/sok/resultat_foremal.asp
I like glass beads because they are one of few materials that withstand the turning of time and looks something like what they used to be, even after 1000 years in the earth. They are of course also pretty, and the handcrafting behind each bead are often outstanding.
I have tried to make some glass beads myself with the same technique used during the viking age, but with modern tools (such as gas, safety glasses and an oven for slower cooling) and find it difficult but very interesting. This summer I also, kind of accidentally, bought some beads from other makers, and now I have put everything together in new strings and necklaces for my outfit. These are not identical with specific finds, but more inspired by several different finds and graves. I will probably not keep everything, but they are so lovely I just had to experiment with them.
All the beads you’ll see in this post is handmade, by me and others. The blue-themed set will be used for festive occations I think, along with my new blue apron dress.
And for fun, this is one of the earliest strings of beads I made for my viking outfit. The photo is crap, half of the beads are modern, I used a thread that broke and didn’t know much about historical beads at all. Everything from this picture is sold or given away by now, but the brooches I still have and use since they are based on a find from the area of Sweden were I live.


 Fancy blue coat in thick woollen twill, with silk decorations and woollen tablet weave


