I made love a new pair of summer hose, in really thin wool twill. The hose got some though love during the summer and come autumn the soles looked like this:
Not much left. When your soles are this worn, it is easier to just change them for a new pair. This round, I choose a thicker and more sturdy wool twill, hoping they would last more than one summer. I ripped the old soles out, and traced around them on a new piece of pre-washed fabric.
Tracing the old soles to new fabric. Remember to add seam allowance if that is worn away.
The top fabric was in pretty good condition, but worn thin in some places. I reinforced those spots with patches on the inside, sewn with running stitches and wool thread.
Soft fabric and a thin wool thread will make the mended areas comfortable. This is the right side of the hose.
All worn areas mended; horizontal and vertical running stitches to secure the patches to the hose, and backstitched soles in place. I did not bother felling the seams, I predict these will soon need to be ripped again…
Beeswax cloths are a really simple way of storing food or a picnic snack during your historical event, and they are also nice to cover bowls and jugs!
After this year’s Double Wars event when our encampments got overrun with aphids/lice, I really had it and promised myself to make some protective cloths for next year. And here they are! It was so easy and practical so we use them as everyday items at home, too.
To make some for yourself, start with measuring the sizes you want to have; I made two for covering jugs, a couple for bowls and some bigger ones for wrapping cheese in. I prewashed the linen fabric, cut it in squares, and hemmed the edges with linenthread and a whipstitch before waxing. (To be fair, I used scraps from earlier projects.)
You can wax cloths in different ways; by melting beeswax in a pot and scooping it over the cloths, or by distributing small pieces of wax on the cloth and then melting it in your oven or with an iron. The important thing to know is that beeswax tends to get sticky and may be hard to remove from your favourite pot, oven tray etc. Use baking sheets to protect your kitchen as well as your oven and iron. An apron might be good too, it is hard to get beeswax stains off your clothes.
I chose to melt the wax in a pot that I have already used for beeswax, this was quicker and allowed me to just dump in a big block of beeswax at once. I melted the vax on low heat and scooped it from the pot over the cloths with a spoon.
To save time, I stacked all the cloths on top of each other, poured over a generous amount of wax, and then covered everything with a baking sheet and used an iron on middle heat to help distribute the wax over and through all the cloths.
As soon as the wax is melted into the fabric your first layer is ready- remove it, put it on a baking sheet to cool, and continue down through your stack. You can do this task on your oven too, just make sure you protect surfaces with baking sheets. The cloths gets darker with the wax on, and while they are hot they look shiny and smell nice!
Don’t use too much heat- you want a generous layer of wax to remain in your cloth rather than soak through. Too much heat or too much time in the oven/under the iron will not give you enough wax in your cloth. If this happens, the waxed cloth will look uneven, and won’t stay in shape after cooling down (try to fold it or make a shape with the cloth, it should stay in place and stick to itself). If this happens, just repeat the procedure; pour on more wax and melt it down.
If you have to low temperature, the wax will not melt in properly but lay in cakes/lumps on your fabric. Try to add a little more heat! Beeswax is nice to work with because nothing gets destroyed if you don’t get it perfect the first time, it will just take a bit longer time.
I calculated 2-3 tablespoons of melted beeswax for a 40*40 cm cloth, but this depends on the thickness/weight of the cloth. In retrospect, I would have liked my fabric to be a bit thicker (around 180-250 grams/meter) than this 120 grams/meter linen. It was so fine it had problems holding enough beeswax, but turned out ok for this round of cloths. Next time, I will make them from other scraps.
If you want to make lids for jars, jugs etc. from leather you could also use this process much the same way. Make sure your leather piece is vegetable-tanned and undyed, and get some extra wax since it often takes more to wax a leather piece than a fabric piece of the same size.
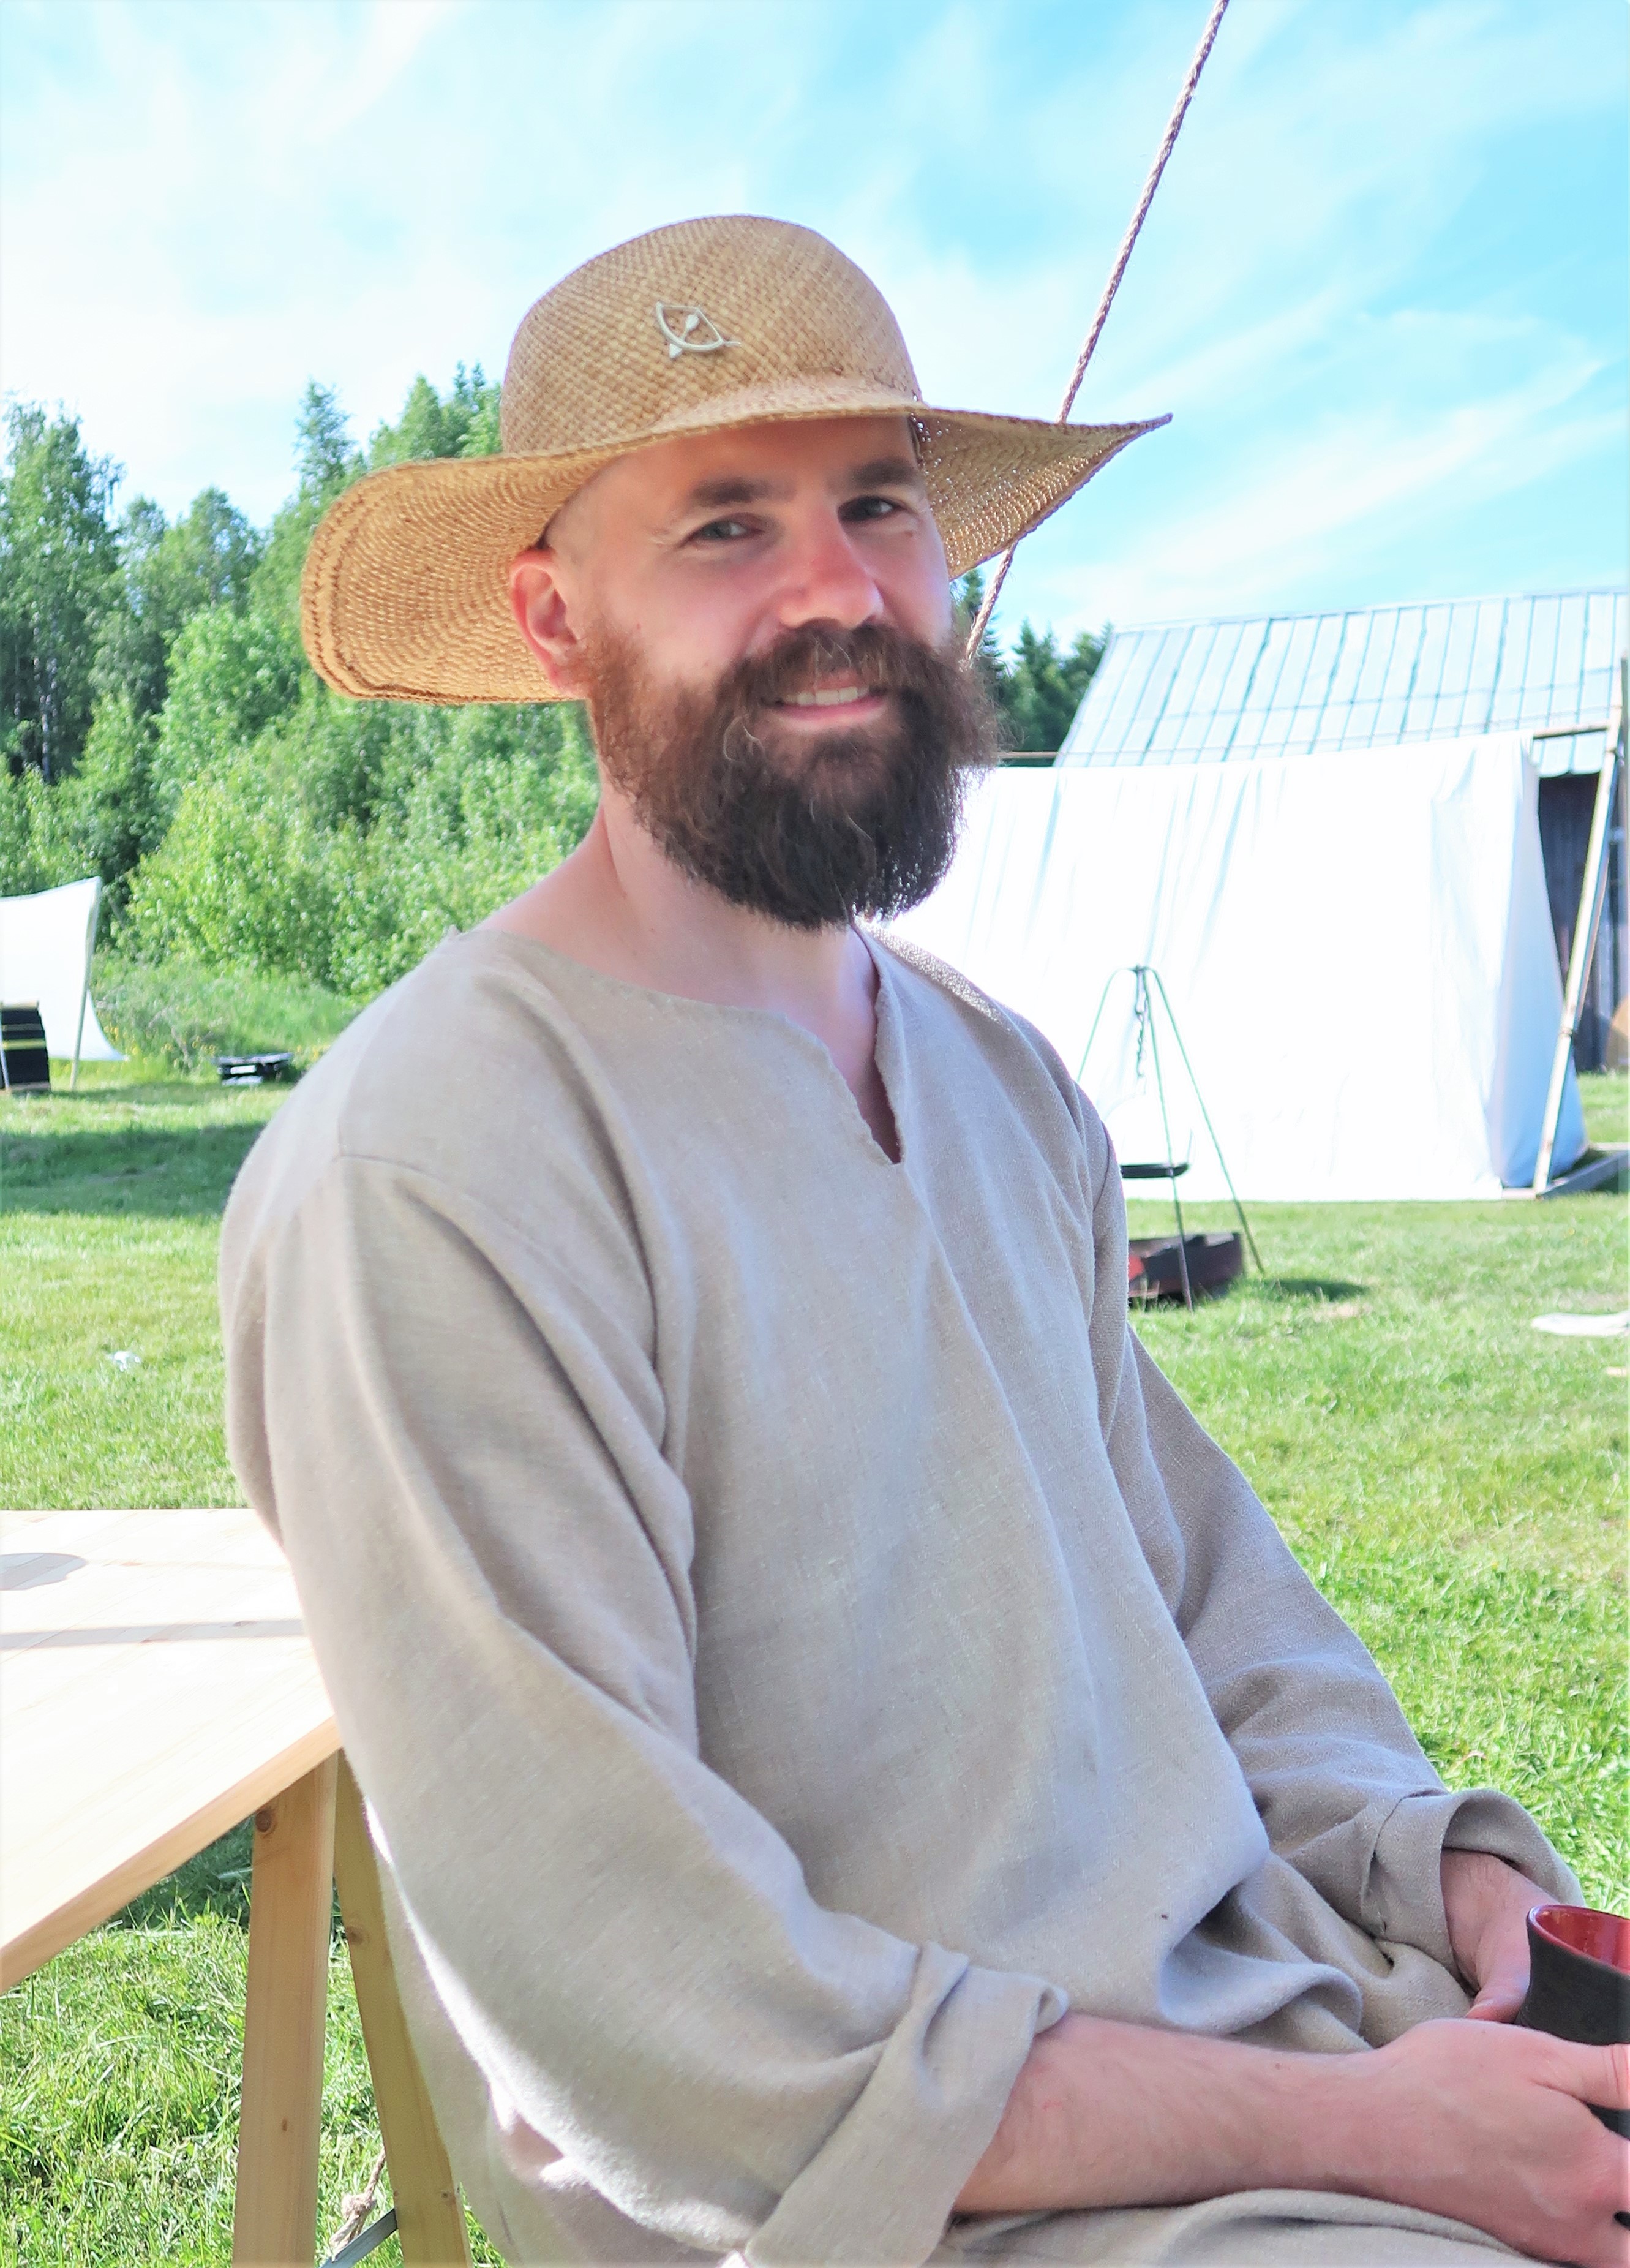
Welcome to this step-by-step tutorial, perfect for beginners. It might seem long, but explains everything you need to know. Follow it as you go, or look up the section where you might need extra guidance.
This is a great project to begin with! Easy, straight forward and the fabric won’t be too expensive.
Examples of medieval shirts with slits, gores and seams.
Most people wore linen underwear during the medieval period, and a man’s kit was made up of breeches or a type of loincloth, and the shirt. While you are at it; make two shirts! It is really nice to be able to change and wash your clothes during longer events, and a pleasantly smelling shirt will make it easier to make new friends…
Linen shirt with a slit at the neckhole
Buying fabric:
The amount of fabric you need depends on your size and the width of the fabric. This example will use cloth 150 cm wide. To decide how much you need to buy, calculate the measures on your pieces and how much fabric you need for those, then add another 10% minimum to allow for shrinking or uneven edges. (Fast tip: just buy 2 meters up to XL, a bit more if you have a larger size. Extra fabric may always be used for other projects.)
Look for linen fabric of 120-180 gram, I prefer a thin and even weave. (That is more historical and comfortable than a coarse and lumpy weave.) Bleached or unbleached linen, according to the status you would like to aim at. Bleached linen was a bit more expensive, but don’t go for the super-white ones in modern stores.
Pick a shirt model of your choice
Preparing the fabric:
Zigzag the raw edges to prevent them from fraying while washing, or buy a bit of extra fabric if you don’t want to bother with machine work.
Pre-soak, wash and iron your fabric before starting to cut and sew your shirt. Washing will avoid future shrinkage, make the weave even and remove any pesticides. Pre-soaking the fabric will lessen the wrinkles and make it easier to iron. 40-60 degrees c machine washing, hang dry.
Things you will need:
Needle, linen thread, beeswax, scissor, measuring tape and something to mark your fabric with (fabric chalks or just a pencil). A ruler or straight piece to draw against is nice, but not necessary.
Tools for handsewing
Measure:
1. Lenght of finished shirt from shoulder to hemline.
2. Circumference around the widest part of your upper body, often the chest.
3. Length of sleeve from shoulder to wrist.
4. Circumference around your hand/wrist (make a loop with the measuring tape, and try to pull your hand through it, it should be big enough to be easy, in order for you to be able to take the shirt off.)
5. Armhole (measure around your should/arm as the picture shows, then make the measuring tape into a loose circle, and when you find it comfortable-check the measurement.) I usually add about 25% extra from my body measure, from 40 cm body measure to making the sleeve hole 50 cm.
Example (with measures) so you can see how I do this:
1. Lenght of finished shirt from shoulder to hemline: 100 cm
2. Circumference around the widest part of your upper body, often the chest: 100 cm.
3. Length of sleeve from shoulder to wrist: 70 cm
4. Circumference around your hand/wrist: 28 cm
5. Armhole: 60 cm. This means the sleeve base will be 60 cm, and the armhole on the body parts will be 30 cm on front and 30 on back.
Add ease of movement:
What is that? If you were going to cut out your pieces with the above measures, the shirt would fit tight along your skin, making it impossible to move, or take it on and off. Therefore, we will add extra space for movement. I usually calculate 6% of the circumference around your body, 10% if I want a loose fit.
Example: 100 cm + 6 cm (6% of 100 cm) =106 cm. Split this measure in 2 for front and back: 53 cm each.
That’s it! (we already added ease into the sleeve by making sure we could pull the hand through, and the sleeve base by adding extra room there)
Add seam allowance:
What is that? Seams always need to be a bit from the edge of the fabric in order to be durable. The space between seam and fabric edge= seam allowance. Short= SA. I will add 1 cm, between 1-2 cm is recommended.
Example: Add 1 cm to all edges around your pieces, like this:
Seam allowance can be added directly in your calculating and drafting the pieces, to paper pattern pieces, or drafted on the fabric outside the pattern. We use the first method here.
Example:
1. Lenght of finished shirt: 100 + 2 cm SA= 102 cm (I like to add another 1 cm to hems; so 103 cm)
2. Circumference around chest: 100 + 6 cm movement + 2 cm SA= 108 cm
3. Length of sleeve from shoulder to wrist: 70 + 2cm SA= 72 cm
4. Circumference around your hand/wrist: 28 + 2 cm SA= 30 cm
5. Armhole: 60 + 2 cm SA = 62 cm sleeve base. Armholes: still 30 cm *2.
Draft your measures into a pattern:
Now you are ready to draft your pieces! I like to do this on paper first, to save as a reference, for future projects, and to determine how to save on fabric. I draw my piece of fabric onto paper, making 10 cm=1 square:
Nr. 1 is the front and back pieces, nr. 2 sleeves. As you can see; if you would like to have side gores instead of slits in your shirt, nr. 3 would be excellent to use. This is just an example, do a draft with your measures and lay out the pieces in a way that suits you.
I recommend drafting the front, back and side gores either along or across the length of the fabric (do all these in the same direction) the sleeve may go along or across, depending on what is more convenient (the shirt will look better with this method).
A note on sleeve measures: this sleeve doesn’t sit on top of the shoulder when finished, it hangs on your upper arm (see photo at the beginning), which makes this measuring method work. When measuring for a fitted sleeve, always measure around your bent elbow.
Design your neckhole:
These are my general measures: small-medium: 1 = 18 cm. large-xlarge: 1= 20 cm. The back I cut out around 5-6 cm deep, the front (2) is cut 10-15 cm deep. If I want a slit at the front (3) I cut it around another 10 cm deep. If you don’t want a slit, you might need to make the neck opening a bit deeper/wider in order to fit your head. You can always draw it out, cut a little, try it on, draw a bit more, cut and so on, until you are satisfied with the look.
Shape your armholes:
If you feel that the shoulders are a bit wide, you may shape the armholes a bit (common if you have a large chest but narrow shoulders). Cut 4 cm (small/medium) to 6 cm (large/xl) from the shoulder top (4) and create a gentle curve to the armpit, or draw a straight line from the top (4) to the armpit (see photo further below). Then sew the sleeves as described. The seam should still be hanging slightly below your shoulder, not at the top of it.
Cut out the pieces:
When you have drafted all your pieces on paper as above, you are ready to draft them onto your fabric! Iron the fabric and lay it down on a flat surface, draft all your pieces and check the measures with a measuring tape. Use a piece of chalk suitable for fabric, or if you don’t have that; a pencil. A ruler, a large book or a straight stick can be used to make the lines even. Everything seems good? Cut the fabric pieces out! (you may also want to mark them Front, Back, Sleeves if you are unsure.)
Sewing time!
The order of sewing is as following, I will walk you through every step below: shoulder seams if any, sleeves to shoulders, side gores if any, sew together sleeves and sides. Adjusting neck-hole, adjusting sleeve length to your wrist, hemming.
1. Start with pinning the shoulder seams. Putting in pins alongside the fabric edge makes it easier to avoid stabbing yourself when handling the project.
2. Cut a piece of linen thread, the length of your arm. Coat it with bee´s vax by pulling the thread over the vax piece a couple of times. Thread a needle (the needle should be as small as possible, but thicker than the thread to make it easy to sew), and make a knot at the other end.
The needle is thicker than the thread
3. Sew the shoulder seams with backstitches. 3 stitches/cm is a good guide, and 10-15 mm seam allowance depending on what you drafted on your pattern. If you find it difficult to make the seam straight, draw a thin line with a pencil where you want it to be.
4. Press the seam allowances to either side. Use your fingernail, a pressing tool or ironing. Fold the seam allowances double, and pin down.
5. Use running stitches (or whip stitches) to sew the folded edge down to the shirt. The stitching should only be visible at the right side as small dots.
6. Try out the neck hole by pulling it over your head. Cut out more if you need, and check in the mirror to see if you like the look. When you are satisfied, hem the neck opening. Start with folding the edge twice and pin it in place. Make the folds as narrow as possible, to make it easier to sew nicely, mine is 5 mm. Sew the edge down with whip stitches.
7. Pin one sleeve to the armhole of the shirt, right side against right side (this photo show a shaped armhole). Sew it in place, using running stitches or back stitches. Pin and sew the other sleeve in place. Press the seam allowance to either side.
8. Now we are going to save some time with a folded over seam allowance! (photos below in 10.) Trim one side of the seam allowance down to approx half-width (5-6 mm) and then fold the larger one over this, press in place. To avoid fraying and loose threads, fold in the edge of the fabric under the seam allowance. Press down, and pin in place. Now you have a neat looking fold, ready to be fastened down. When sewing the seam allowance down like this, you save time and make the seam more durable since the fabrics will be sewn twice to each other. I prefer whip stitching for this seam, it is easy and durable.
Which way should you press the folded over seam allowance? I often go for pressing and sewing down to the biggest fabric piece. So for the sleeve seam, the seam allowance will be pressed down onto the body parts. On side gores, the gores will be pressed out onto the body piece. It makes it easier to sew and gives the garment a nice drape.
9. Time to sew the side seams and sleeves! Lay the shirt down inside out on a flat space, and pin the side seams and sleeves. Make sure the fabric is smooth and the edges lays on top of each other. Mark where you want the seam to be if needed, and then sew from the sleeve wrist, all the way down the side seam. I like to leave the bottom 10-20 cm open on the side seams to create a slit in the shirt, if I don’t have side gores. Backstitching will make the seam durable, but if you are in a hurry a running stitch with some backstitching in the armhole will also suffice.
Slits at the bottom
10. Finish of the side seams by pressing the seam allowance flat, and make a folded over seam allowance. Press, pin and sew this down.
Folded over seam allowance, above the side slit in the shirt
11. Now it is time to fold the edges and sew them down. On linen fabric, I like to make a double fold to avoid fraying threads from the fabric edges. Start with the hem around the bottom of the shirt. Fold two times, around 0,5 cm each (or the SA you choose), and press the fabric in place with an iron or your nail. Sew with whipstitching, travelling on the inside of the shirt, which will make small dots of threads visible on the right side of the shirt.
After that, finish the sleeves in the same way. I like to try the shirt on before hemming, to be able to adjust the sleeve length. If they are a little too long, just create a deeper fold, or cut off the extra fabric. If you have made them too short you can sew on another piece of fabric and make a hem on that one. Piecing is always historical.
How to fasten the thread:
When there is about 10 cm thread left (approx the width of your palm), it is time to fasten the thread and take a new one. Sew another stitch, pass through that loop before pulling tight, and repeat at the same place a couple of times. Then you can pull the rest of the thread down into the fabric before snipping off the leftover, hiding the thread inside the seam. Neat! Take another thread, prepare, and start sewing at the same place you stopped.
Uhm, this is a lot of steps for a simple shirt? Yes, it is. Can you cut the corners, get a bottle of beer and sew it all on the sofa? Of course you can, but each step may not be as easy, and it will be harder to have a nice view of the process. What I mean is- this is just my way of describing the process as easy as possible for you, to allow a handcrafting process where each step is straightforward, and where the sewing will be as fast as possible to do.
General advice:
Always pin on a flat space to make sure your seams will be even.
Be nice to yourself; sit comfortable, take lots of breaks, use tools to make your sewing easier.
Remember to actually try out the fit, the length, the neck hole etc before finishing sewing. It is very easy to just continue sewing once in a flow, but if you end up with a garment you don’t like, you will have to redo lots of work.
Is the measuring a bit off? No worries; in this project, a 1-2 cm difference will not matter. You can probably go on sewing. I sometimes have wonky measures. Medieval finds are full of uneven pieces, wobbly seams or piercings. Don’t worry!
Other types of shirt models:
Shirt with side gores: adding side gores is easy, and give you extra movement on a longer shirt. Sew them in place before sewing the side seams closed. Use the same stitches and folded over seam allowance as above.
Shirt with sleeve gussets: small square pieces of fabrics get stitched in under the arm, to add more movement and to save on fabric instead of making larger sleeves. I usually sew these after the sleeve, while sewing the sleeve and side seams closed.
That’s it on shirt sewing. These techniques will also do well on a number of different projects, and is somewhat of a basic go-to. Enjoy your sewing! Did you like this post? Support me on Patreon to help me make more.
Lacing is a really easy solution when you would like to make a tightly fitted garment and need an opening to be able to get in and out easily. During the medieval period, lacing comes and goes as a popular fashion and practical solution choice, so if you aim for a historically believable garment make some research first to determine if the lacing is the best option!
Historical garments may also be closed with fabric or metal buttons, hooks and eyes, pins or a regular whip stitch.
spiral lacing with a lucet woven wool cord, on a 14th century dress
Lacing can be seen on male and female clothing, but today I wanted to show you how I make lacing on a dress. The most common lacing method is spiral lacing; one cord for closing the open space by going through lacing holes spaced a little uneven from each other. This is easy and quick, and you only need one cord.
Fastening the lacing; a double round at the top prevents gaping.
To unlace; thread the point back again, or as below: use a loose knot at the start of the lacing (at the bottom) and unravel the lacing from the bottom up.
Use a knot at the start of the lacing, on the inside of the dress.
Spiral lacing up close, and on the finished dress.
I place the lacing holes like this; the first two and the last two are aligned but the rest is spiralled. This gives you a tighter lacing, that looks better and is historical. By making the first and last pair even you will get the front panels even to each other. This kind of lacing can be seen in paintings by Weyden for example.
Lacing holes needs to be quite close to each other; between 1,5 to 2,5 on one side, depending on the fabric and the amount of support you need. A tighter gown supporting a heavy bust needs a closer lacing, while a looser garment might have more space between the holes.
To make lacing holes I use a sharp awl to make a small hole, and then a fitting thicker awl in metal, wood or bone to make the hole bigger. I do have real awls, but since they seem to always be “somewhere else” a bunch of different objects has been used; needle binding needles, hairpins, chopsticks… You don’t need anything fancy, was my conclusion. Yeah…
After the hole is made the right size, I sew around it with a buttonhole silk thread or a waxed linen thread (depending on social status, period, colour etc) I never bother with any fancy stitch, just sew around like this, and cover the hole equally with thread. Practise makes perfect; don’t bother if your first holes are a bit uneven, if you start from the bottom and work your way up they will look really nice by the time you reach the area others actually look at.
A tip for making the hole more even is to first sew one round of stitching around the hole, and then another turn, dense enough to cover any gaps.
On the inside of the lacing, you can see a thin strip of tabby woven, sturdy linen fabric. I always use a piece of fabric on the inside (if I don’t have a whole lining in place) to strengthen the edge and make the lacing look better. You can use linen fabric scraps: cut it in a straight piece, fold in the raw edges and sew in place with whip stitches or slip stitches.
I prefer to make the cord in either wool or silk thread. The wool thread is cheaper, flexible and will stay put. The silk one gives a nice shine, is very strong and easy to lace with. Decide based on your project. To finish the cord (this one is done with a lucet but they could also be braided or tablet woven) I like to use a point. That will make it easier to lace the dress, but if you don’t have one a thick needle will do the trick too! Just thread the cord on a needle, and use that to lace yourself in. Another option is to make a cord long enough to just loosen up, without having to lace up the whole garment.
I decided to make another sleeveless middle dress to wear under my velvet houppelande. The other one (similar to this one, also in black silk taffeta) I made before apparently shrank on its own in the wardrobe during the winter, and come spring was a little too small over the waist. Can’t imagine how this could happen..?
This style of dress may also be worn on its own with sleeves, in the Italian style. The amount and choice of fabric and decorations does all the difference in placing this dress on the fashion timeline, as well as the waist seam is a clear indicator of region and time. I fancy the waist seam placement in the natural waist so I took inspiration from these paintings, as well as the Italian examples further down the post.
This kind of dress may also be made in wool or cotton, depending on the area you would like to get your inspiration from. Cotton was more common in Italy, while wool is much more common in Northern Europe. (For more information about cotton dresses, I recommend “The Italian cotton industry in the later middle ages 1100-1600” by Mazzaoui.)
I used a black silk taffeta, because I wanted a cool dress, matching the silk and velvet outfit and taking as little room as possible in my event packing. If you are going for silk fabric, taffeta is more similar to historical fabrics than, for example, uneven dupioni or raw silk. Medieval dress silk should be shiny and evenly woven as far as I have seen.
I also have a similar one in amber wool twill, recreated to be worn by a woman not as high in social status as this black silk one will belong to. I took photos from both processes to be able to show you some different techniques.
Want to see how I made it?
1. This is a basic sketch of the pattern pieces. Really simple; a front and a back upper body + linings. Also, 2 different ways to make the skirt; the black one are made of a rectangle and gathered in the waist. The wool dress is made of panels (opt 2) to create more width in the bottom hem, but wide enough in the waist to gather.
2. Upper body pieces: I started with a front and back, loosely based on my toile/mock-up pattern, and added 5 cm in each side to be able to adjust the fit and have some extra fabric to fold to the inside for support. If you go for side lacing you can have a whole front piece, and the curve from the front seam will instead be moved to the sides. I will show you later!
3. Cut two of the outer fabric, and two lining pieces. Then baste them together to be able to work with the pieces without risking any movement.
You also need to decide if you are going to have lacing on both sides (seems to be usual in Italian portraits and handy if you often change your size) or on one side (faster to sew, allow you to get the dress on quickly).
4. Pin or baste the body pieces together and try them on. Having a friend to help you will be really helpful! Adjust and take in the side seams to create a smooth fit. You can also adjust the shoulders by gently pulling the front upwards if necessary. The fit doesn’t have to be all smooth, if you have lots of curves there will be some room in the dress (just decide on wearing a bra or not, or making the dress supportive before you finish).
Basting the skirt into place for the fitting is really good if you want to see how the fabric falls, and where the waist is going to be placed. Skirts usually “hang down” the bodice and make it look longer. Not the silk though- silk is such a light fabric.
5. Here is the body, inside out, after the fitting above. The line is really curved to make a good fit, and support the bust thanks to the stretch in the fabric and lining (lining is really important, don’t forget the lining!) If you are going to sew one side, use backstitching to create a durable seam.
Or if you are going to lace both sides, press the fabric to the wrong side of the body so you have 4 layers of fabric to sew the lacing holes through (if you work with a medium to thick wool this might not be necessary, you may instead trim some fabric down and whip stitch it into place. Remember that all the sewing allowance needs to be pressed down- don’t be tempted to leave “a little extra” as this might lead to a little bit too loose dress.
6. The bodice during the sewing phase. I closed one side seam with backstitching but left the sewing allowance. It is nice to have if you need to adjust the size or fit in the future. To keep it from fraying you can baste or whip it loosely to the lining of the bodice. The other side gets folded and pressed down.
7. The neck opening and arm openings I fold down (once for thicker fabric and twice for thin and fraying fabric) and whip stitch into place. To make it both pretty and durable, you can then press the openings and sew them one more time with a stab stitch.
Or you may finish the openings with a separate strip of fabric on the inside, as a reinforcement. Here I overlocked the lining and the outer silk fabric together after basting and fitting and finished it off by sewing a fabric piece to the outside around the opening. That one I then folded and pressed down on the inside. This technique is good for sensitive, fraying fabrics and machine stitching.
Here you can also see the clamps; some silk fabrics get small marks by pins, and I, therefore, use clamps when working on visible places like the neckline. But they are very handy for all kinds of fabrics, so if you are not a fan of pins- try them out! (Search for sewing clamps or fabric clamps on an internet or sewing store of your choice)
8. The skirt part of the dress I usually sew separately from the bodice when I make garments with waist seams. Sewing the skirts together with running stitches, occasionally locked with a backstitch every needle lenght or so, will give you a fast and good seam. Press the seam allowance to one side, trim, and whip stitch it down. This is my favourite way of making long seams faster by hand. Or use a sewing machine, it is your choice!
9. After that, I hem the upper lining of the skirt, before gathering it (see the tiny stitches at the top of the skirt below?)
10. There are several different ways to gather or pleat a skirt to a bodice. I use different methods depending on the look I want. The wool skirt got gathered in soft pleats and then sewn onto the bodice. I used a waxed linen thread, to make the seam steady. Silk would have been another option, but as I wanted to create a working-class garment I mainly used linen thread.
The black silk dress got a pleated skirt instead. The skirt part is simply made out of two rectangles that I have stitched together in the sides, leaving the seam at the top open for around 15 cm, to be able to get inside the skirt when it is attached to the bodice (if you have side lacings on each side, leave both side seams open a bit)
I use something to measure with, and then mark the pleats with a pen, or make them at once with pins or clamps. You could also calculate the amount and size of pleats if that is to your taste, but I usually just roll with it. There might be an extra pleat or some unevenness- but it won’t be visible.
In the front, the folds are sewn towards the side of the body, while in the back the folds meet in the back. By arranging them this way you create a flatter front, with more volume at the hips and back. After the entire waist is gathered/pleated, I often secure the folds with a basting stitch, or pins before I sew it to the bodice. (See the photo of the wool dress above, I use this method for most waist seams.)
11. Lacing: if you are a bit unsure, you could save the lacing holes to last and do them after one last fitting with the dress on, with the right shift/chemise under. Otherwise, I like to sew them before attaching the skirt, I feel it is easier to sew with less fabric on my knees. I use a spiral lacing and finish it off at the waist seam. Often my skirt will stay closed enough without any further closure, but if I have a more narrow skirt that fits snugly over my sides I might need to add a fastening like a hook and an eye, to keep it closed.
Spiral lacing on another project, just to show you what it looks like. If you need lots of support from your dress, make the lacing holes tighter together. If you have a looser dress style, you don’t need as many. I usually have 2-3 cm between each hole on one of the sides.
12. Last; finish off the bottom hem. Check to see if it is even and adjust if necessary (a friend is good to help here but modelling yourself and adding pins might work) I usually just finish the hem with a single or double fold and a whip stitch. After that, just try on your new dress!
This blog post was made with the support of my Patreon supporters, thank You for helping me bring more free tutorials into the world!
This post also contains a collaboration advertisement for Crafty Hangouts. They do what I do not have the patience for: writing lots of guides about sewing machines.
Wool hose was worn by both men and women during the medieval period, with the difference that the men’s was higher and usually tied to the belt/to the waist in some kind, and as the fashion developed became higher until joined to a pair of pants. Get it? A pair of hose- a pair of high hose- a pair of joined hose- a pair of pants. (I have never understood the English saying of a pair of pants but this make so much sense!)
Anyway, the women’s hose was usually tied under or above the knee. Here’s a quick view of some, but there are lots of different models, colours and designs from the period. If you wish to reproduce a garment for a specific time and location, you’ll need some more research to choose what you need, this tutorial is more of a “here, let’s make a garment!”
I wanted to show you how you can make a pair yourself, using your body’s measures for drafting a pattern or constructing the fit directly onto yourself. Hose isn’t very difficult to make, not even to get a pair of closely fitted ones. It just takes some practice and patience to pin them on your body and adjust the fit until you are happy with it.
First, you need some wool fabric, preferably a twill with a nice stretch to it. Not too thin but neither fulled into a bulky cloth, a medium weight slightly fulled twill, or a regular tabby weave would do the trick. To calculate the amount you need you can either first make a mock-up/toile or you can take measure 1 + measure 3 (as shown below) and draw them as a square on the fabric. Add some extra material around. The most stretchy part of the fabric should go diagonal over the hose. I usually make mine from leftovers from other projects and fit smaller pieces together.
You can start with a ready-made pattern, or make your own. Either way, you will have to adjust the pattern to your body, by fitting your hose onto your body for the perfect fit. Each wool fabric you use may be different, so if you are making several pairs in different fabrics adjustments might be needed for each pair.
Also, note that I make my hose right and left-sided, you don’t have to do this but I find that the overall fitting is nicer when I mirror the pattern I have.
If you decide to make your own pattern from start rather than buying one readymade, I prefer to draw some straight lines on a piece of scrap fabric and then drape this directly to the body. Of course, a friend to help you is great but not necessary.
You can also create a pattern on a flat piece by measuring and draft lines.
Start with taking the measurements:
1. Length of hose.
2. Width just under the knee.
3. Width around the calf (thickest part of the leg).
4. Width around the ankle (thinnest part of the leg).
7. Measure around the heel like shown in the picture.
(5 + 6 will show up later)
To make a flat pattern, also take measurements between the numbers above. Take the measure along line 1; what is the measure between 2,3, 4 and 7? Then you can use this to draw up this starting pattern for your hose; draw line 1, and then horizontally draw the lines 2,3,4 and mark the placement for 7 with just a dot.
This is my ready-made hose pattern. Yours will have the straight lines now, but lacking the sole and the form of the foot as well as the triangular gore.
Make the sole by drawing your foot on a piece of scrap fabric/paper. Make sure you stand straight while doing this. Add 1 cm of seam allowance around. This is piece number 5, and you make it the same way for both methods.
Now you can either try drawing the upper foot part on the flat pattern or cut out what you have and continue draping the hose directly on your body. If you want to draft the shape, line 7 is the width you need to fit your heel inside the hose. Draw that in a curved line like shown in the picture above. Then loosely draft the form of the foot and add some space needed for fitting around your drafted pattern. Don’t make any gores or slits yet (number 6) do these while you are trying on your pattern instead.
The measure of line 7 is worth taking into consideration while trying on your hose. You may pin it perfectly close to your body, but if you have a thin ankle you might not get the hose off because that measurement (4) is smaller than that around your heel (7). Remember to check this measurement while drafting the pattern or when trying on the mock-up. The hose should just go on and off your foot.
Draping rather than drawing
I prefer the draping method and use it in my beginner’s workshops because I think it is effective and easy. If you would prefer to drape the whole pattern, just mark line 1 on scrap fabric and then pin it to your body (use stockings, leggings or shorts but nothing bulky like jeans). To use the fabric’s stretch, you should draw line 1 horizontally over a piece of tabby weave or along the edge on twill fabric. The stretch should go across the leg of the hose, not alongside line 1.
Step 1 of the draping method. A piece of scrap fabric pinned above the knee, hanging loose. Line 1 will go from the pinned point to the toes, straight down on the middle front of the leg.
Steg 2: Loosely pin the fabric to the leg, following the natural shape of the leg. Make sure you don’t pin in fabric folds. The pins (the future seam) should be at the backside of your leg, running straight down over your heel. When you have an approx fitting; cut away the excess fabric leaving only a 2 cm seam allowance. Stand with the leg straight, foot on the floor when fitting the fabric.
Or you could get a friend to pin you in, while you stand on a table…
Step 3: Pin the hose more closely to the body. Pin on the sole from toe to the middle of the foot. To make the fabric lie smoothly on the body, stretch it gently in the directions of the darts. Toward the toes, down the side of the foot, towards the heel. Above the ankle, you change the direction and smooth the fabric out upwards. Every little crease will not disappear yet.
Step 4: When the general fit is good, it is time for the heel and the slit with the gores (number 6). Cut this one while the hose is on the body, from where the heel meets the sole, straight up on each side of the foot. Cut a little at a time, and check how the fabric behaves.
Straighten out folds and creases by stretching the fabric and pinning it more fitted to the body. This step is a process, and your personal foot shape will decide how long you will have to cut before all fabric lies smoothly. When you are satisfied, pin the rest of the sole to the upper fabric, leaving the new slit open.
Step 5: Now you have the overall shape of your new hose. You can baste it together if you want, and try the fit by taking it on and of.
This step with cutting the slit and inserting gores I do on every pair of hose I make when trying out a new fabric quality. If I work with a piece of fabric I am used to, I still make the gores while fitting the hose on the body. Note; I don’t make two mock-ups for left+ right, I just have one and then I will mirror that when laying it out on the wool fabric to get a left and a right hose.
Step 6: I find it easiest to just pin or baste a piece of fabric (generally triangular) to the hose while wearing it, and then cut off excess fabric. Then I can use that as a pattern for the other gores (notice that inner and outer gores might be slightly different in shape, which is normal depending on the shape of your foot and how you work with the fabric).
Step 7: When I have come this far I am content with my pattern, and take it apart (removing basting or needles) I also cut it clean, add seam allowance and label it with size and date. I also like to add some notes on the pattern for remembering things or if I lend them to friends;
Sewing the hose from wool fabric
Draw your hose pattern on wool fabric, laying line 1 horizontal across the fabric if you have a tabby weave (making the most stretch across the width of the hose). Cut the hose out with 2 cm seam allowance, 1 cm around the sole. Baste your pieces together; leg first, then the sole to the foot from the toes and back to the heel. Try the hose on, make adjustments and cut out the slit + fit the side gores.
Then you can sew your hose with back stitches, and fold down the seam allowance with whipstitching, or sew it on the sewing machine if you prefer. The gores I set in last, on the inside with whipstitching. Fold the edge at the top, stitch it down, and add garters to hold the hose up.
Other designs on the medieval hose.
The pattern with slits and gores are one of several finds on hose designs. You can also adjust your hose pattern to another design with a sole and a separate part for the foot, and one part for the leg. This saves you a bit of fabric and is quite easy to make. On the photo above I have marked this design with a dotted line straight over the hose. The grey hose below is made with that pattern.
There is also variations with the gores as parts of the sole piece (shown above in the photo of a find), a hose with the foot and sole joined, and several examples of patching, mending, and seams for joining small scrap pieces when making hose.
You can also add a second sole made out of thin leather to be able to walk without medieval shoes on dry ground. Avoid adding a thick sole, that will only rip your hose and be uncomfortable.
Want to make this project on a sewing machine? Check out this guide and more at Crafty Hangouts.
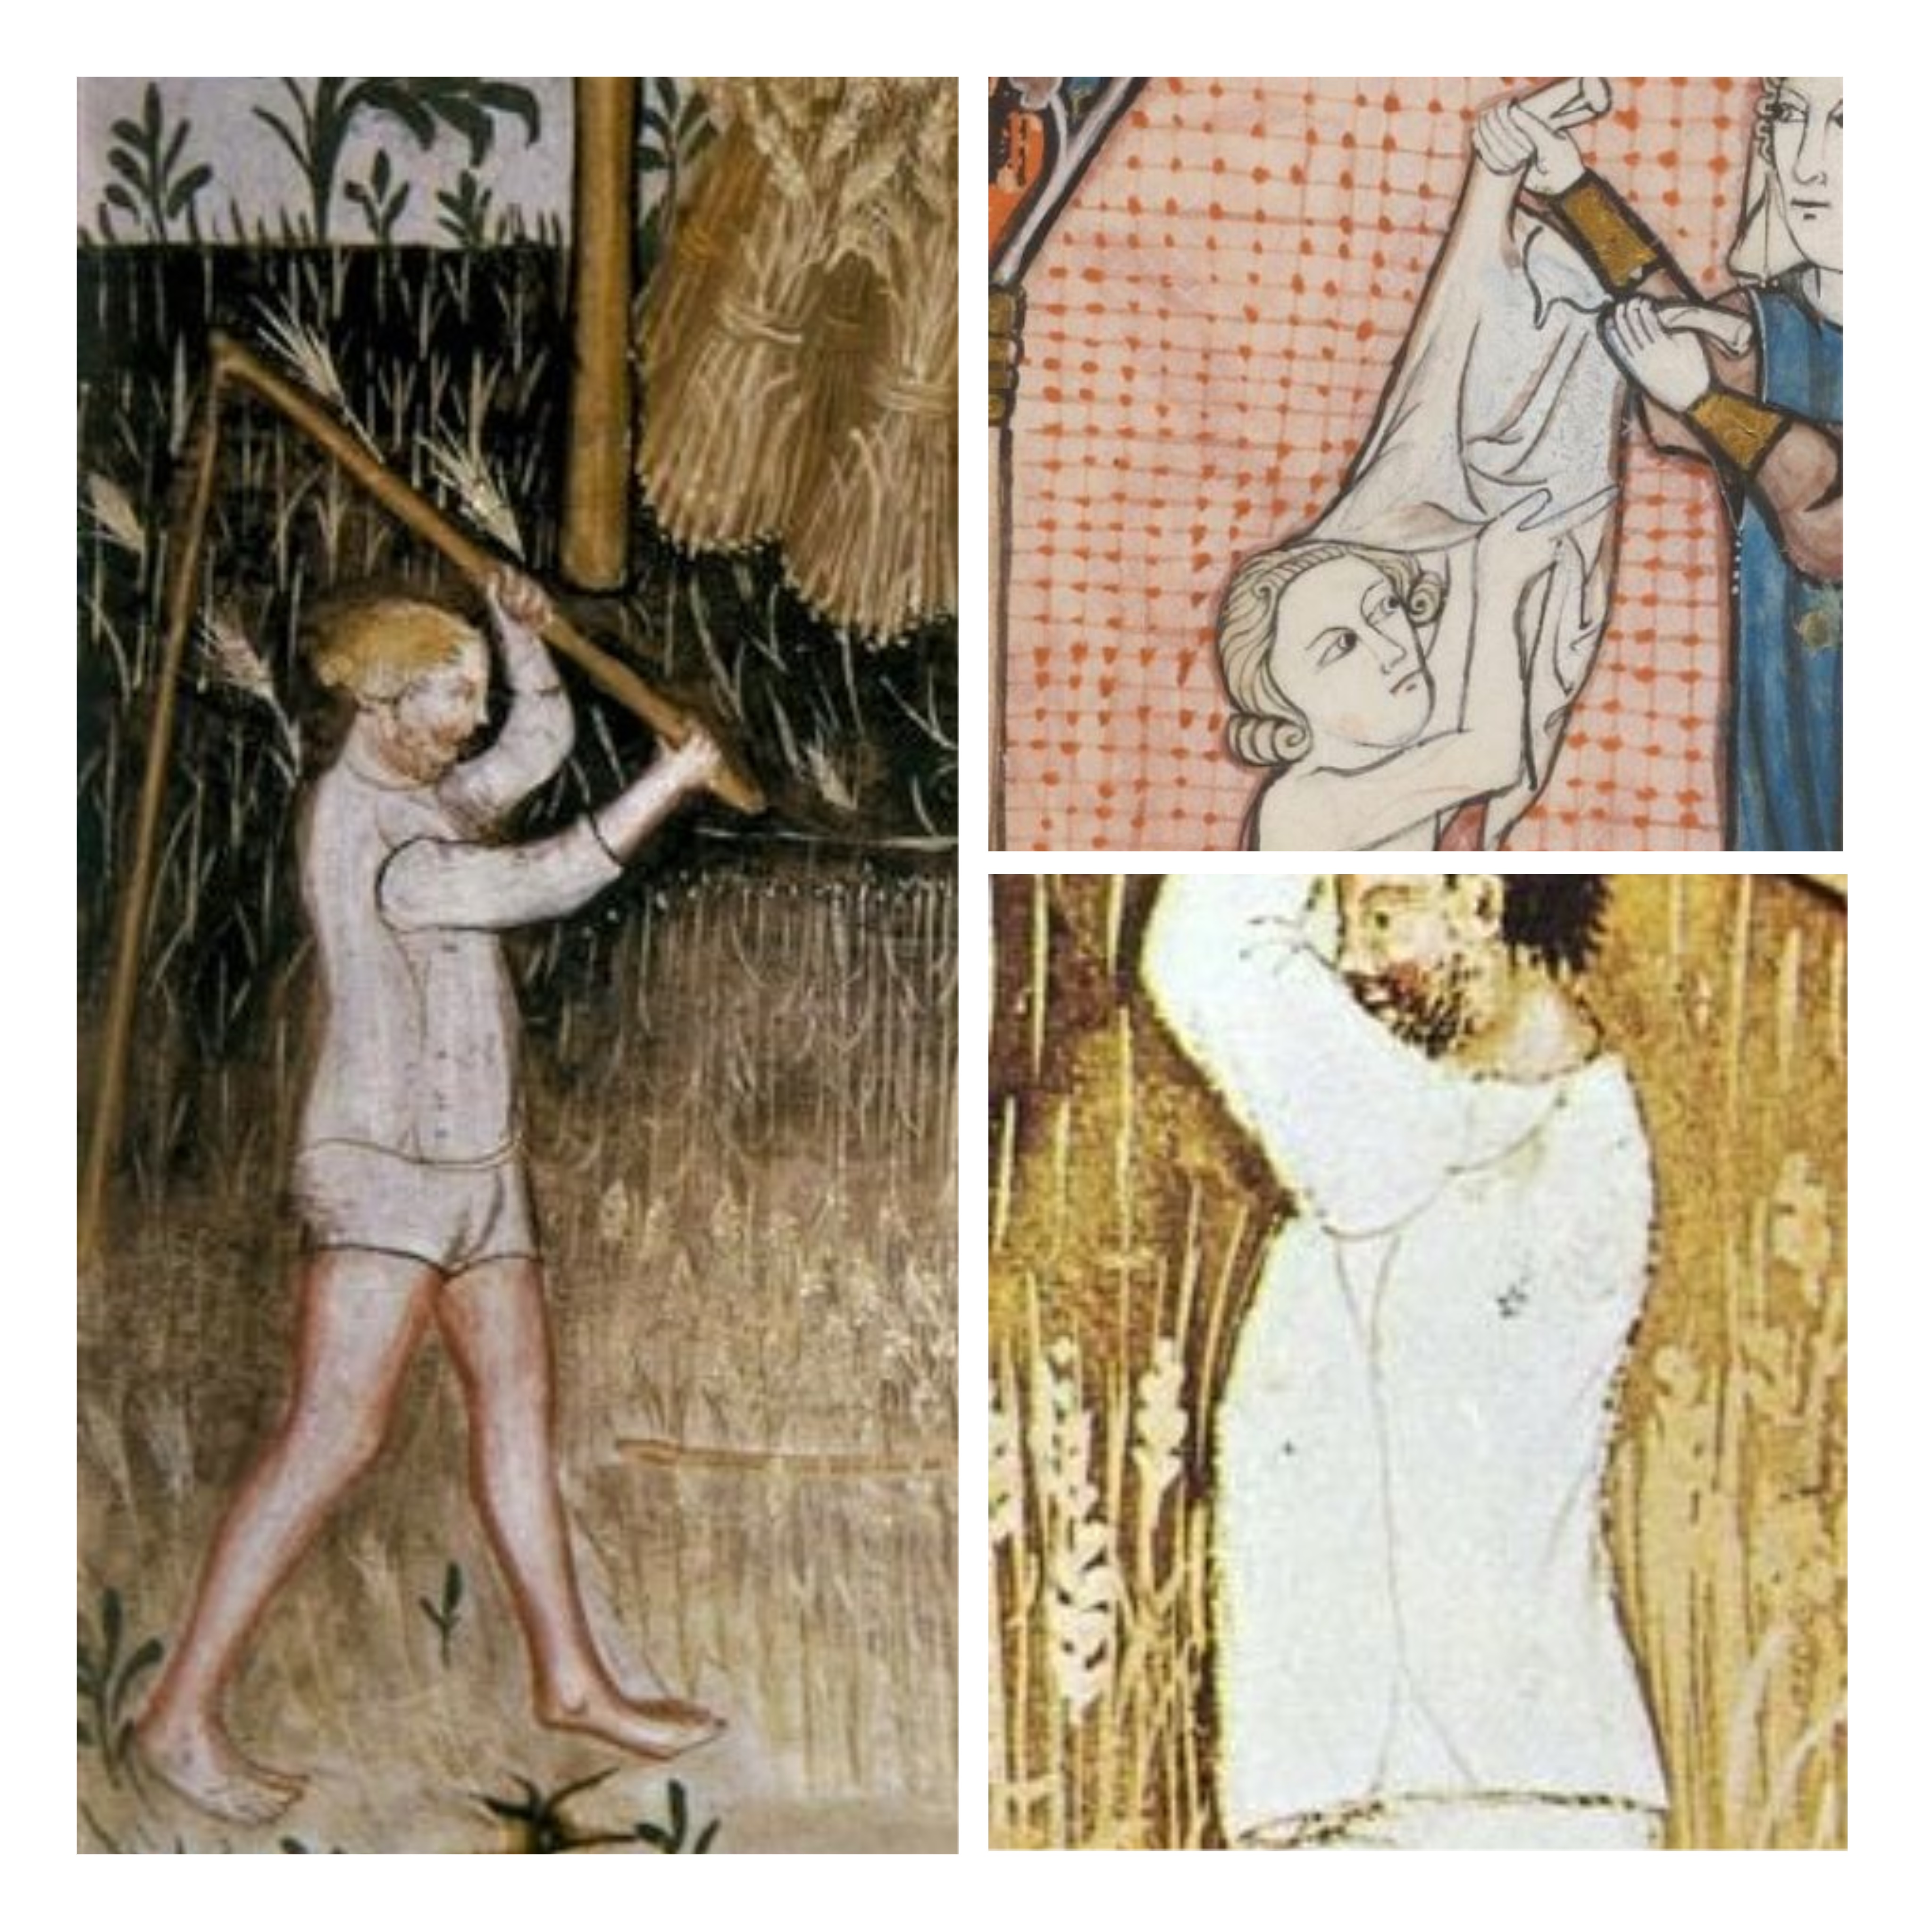
Some time ago I made a medieval bathing dress in unbleached linen, and I wanted to share it with you. It is a simple project, perfect for an evening or if you want to practice hand sewing. There are plenty of bathing dresses in paintings from the late 14th to 16th century in Europe, they can also be seen in different cuts and models, and some are clearly supportive shifts that you could wear under your medieval clothing. Mine is very simple but with an intake under the bust to allow some support, but still being easy to get in and out from. No lacing is acquired.
Left; Bohemian, Codices vindobonenses 2759-2764 in the Osterreichischen Nationalbibliothek, in Vienna, Austria. Right: The Bathhouse Attendant, Bible of Wenceslaus IV. 1389.
This find is from A History of Costume, Kohler and is dated 14th century and described as a lady’s chemise or undergarment, the photo is old but you get the general idea.
Most of the pictures I have found seems to be dated to the late 14th to early 15th century, there are lots on the internet and I have a Pinterest folder on Medieval underwear so I won’t go into more historical sources today.
The cutting out; prewash your linen, fold in double in the length you would like, and then cut the A shape. I used the leftover fabric for gores in the sides (and at centre front + back if you like, it is optional) but this of course depends on your measures.
The first pictures show the general cut, the second the additional front and pack gores, the third the intake under the bust that give me the support. Do not take in too much, because then you won’t be able to get in and out of the dress.
About measures: The length of the dress measures from armpit to hem. The width is your measure around your bust divided in two (for front and back) add seam allowance but nothing more. Start the gores at your natural waist (if you are unsure, rather place them higher than lower) and pin the intake under your bust while wearing the dress with gores and side seams sewn/basted. Add shoulder straps last, mine is just double-folded linen cloth, whip stitched together and then fastened at the same position as I would have worn bra straps.
If you sew your dress by hand, use waxed linen thread and running stitches, and then fold the seam allowance to one side and whipstitch in place. This gives you a sturdy seam that is also quick to make. Hem the dress with running stitches or whip stitches, after your choice.
Making the dress in unbleached linen made it opaque even when it was wet, good for modesty. In artwork the dress seems to be white, may be visible nipples was a thing, or you would have to pick a very dense fabric. In some pictures, it is very clear that the fabric is transparent, but I chose the more sturdy and practical look. (update spring 2021: I have found that if you start with unbleached linen fabric, and sun bleach it yourself you will get an almost white fabric that is not as transparent as the modern bleached options in stores.)
The result? All considered, I am satisfied with the cut, sewing and look of the dress. It is also easy to swim in. Historically, being out in public in a bathing dress was not a thing, they can be seen on bathhouse attendants or in rare cases during the dressing/undressing at home or during dirty labour. Wearing it to the beach was certainly not a thing, but I liked to have a more historical dress instead of wearing a modern bikini when going for a swim at events.


 There are plenty of bathing dresses in paintings from the late 14th to 16th century in Europe, they can also be seen in different cuts and models, and some are clearly supportive shifts that you could wear under your medieval clothing. Mine is very simple but with an intake under the bust to allow some support, but still being easy to get in and out from. No lacing is acquired.


