Just wanted to give you all a quick update about some of my plans this spring!
Between 8-10 of March I will be holding a workshop in medieval clothing in Norway; check out this event for a weekend of fun, new knowledge and lots of sewing!
I also have a weekend of tablet weaving in my hometown; https://hemslojden.org/activity/keramik-2-2/ were we will be doing lots of practical handcrafting, look into some historical finds, have fika and meet new friends.
Both workshops have their own way of booking by their site- just wanted to show them here for you!
I also have some free time yet before the summer for weekend workshops with your group or at a location of your choice. Just send me an email if you are interested, to linda.handcraftedhistory @gmail.com. I also have time to make a couple of outfits for customers, so are you planning to order some clothing for yourself before summer now is a perfect time to do so! (waiting time is now until early May)
Then my main market season will start, and am I looking forward to that! Medieval tents, summer winds, lots of happy people, swimming in lakes… Yes, please! Let’s hope the spring and summer will arrive soon here!
Follow me on one of my historical adventures and take a look inside our medieval pavilion, to find out what I do in the morning to get ready- medieval style! (Yeah, just like a regular blog person I post getting-ready photos and todays-outfit. I just do it in my way… super serious, promise!)
When the sun rises it gets bright, and during summer it also gets quite warm in the tent, if the sun shines on the roof. Our new tent is a little better; you can easily sleep until 9 if you don’t have to rise early for breakfast duty. We have curtains to create a sleeping area in the tent, and here I sit on the bed, dressed in a linen shift.
Combing out my hair before braiding it. I could say that I get pretty every morning before going out for breakfast and coffee, but the truth is that most often I just put on a simple kirtle or my brown coat over the shift to have my breakfast as soon as possible. But let’s pretend this is a morning with plenty of time…
Then I put on my woolen hose, my medieval shoes, and the garters that holds the hose in place.
After that it is time to put on the dress or kirtle. This is my green woolen 15th c dress, fastened with hooks and eyes at the front. An apron is good to protect the clothes and to finish of the outfit. Under the shift I sometimes wear a lengberg bra, a modern bra or a sports bra to get the support I need. They all work well, but the lengberg bra or a balconette model will give you the 15th c silhouette. If you have smaller breast, going natural works well too!
Then I usually braid my hair, and/or pull a cap and veil over it, or a cap and straw hat if I am working outside in the sun. The hairdo I will post in a separate blog post, with a DIY guide. This photo is from Double wars, being out in the forest in really nice and warm weather.
This came to be a more personal blog post, so if you want to join one of my adventures from the summer, here we go!
Cudgel Wars is a SCA event in Finland, situated at a lovely site with saunas, beach, small boats for exploring the lake, and all the usual SCA activities like archery, fighting, workshops and more.
I traveled alone for once, and the long journey made me a bit tired even if most hours was spent on the ferry with food, apple juice and lots of sewing.
Finally on site, I was super tired and needed to put up my camp before it got dark, so I asked some friends for a little help…
And in no time the whole tent was up, R put together the wooden bed and I was moved in. Think everything was done in under an hour, comparing to Double Wars when our camp took three hours with three persons to finish. Thank you!
Here is my home during the market season! It is so cozy! The tent is from Tentorium and I am very satisfied with the quality and all details in it, it feels sturdy, well done and is easy to handle even though the wooden poles are heavy to lift. The poles, pegs, ropes and linen canvas all fits in the car along with basic camping gear, clothing and three boxes of shop things, if I put down the back seats in the car.
Breakfast inside the tent one morning; coffee and chocolate soft cheese on bread. Tired, in need of some alone time but overall happy. Sometimes the best thing is just to hang inside your tent, watching all the fun things happening outside and being able to feel contentment.
My friend B dressing her son in viking clothing for the cooler evening
Parts of the Frostheim group that I lived with, hanging in the kitchen area. Well, actually none of the persons in the photo lives in Frostheim, but having the best group makes for new friends…
In my tent, having some wine and wearing the 15th century outfit with the dress I finished sewing during Hamar, and the necklace I bought there.
And meeting lots of new friends and amazing people in the Purple Dragon household!
Taking some nice photos by the lake in the evening
M in two of her outfits
The Mörk family
R by the lake in his viking gear
The site was situated by the lake, but if you wanted to take a small walk the forest was just above, with pine trees and a nature that felt very close to my own home.
Trying out my bathing dress in the lake, and it worked well for both swimming, modesty, looking medieval and avoiding some sun. It was harder to get it of after when it was wet…
The ferry took about 8-9 hours, traveling through beautyful archipelagos with small island, mixed with boats and longer stretches of sea.
All considered, it was a very nice event and I really recommend it to anyone searching for a SCA event that feels like a vacation.
There are many looks on headwear during the late 15th century. Everything from maiden hair hanging loose with soft waves, to several layers of linen veils wrapped around the head, with wimples or jewelry worn. There is both visible and hidden hairdos, fake hairpieces, caps, hairbands and circlets, as well as decorations such as pins, jewelry and braids.
In this post, I wanted to show you a few of my favourite looks and how to achieve them in simple ways.
This is a great veil, and it is simply a very long veil wrapped in layers about the head. The result gives you a turban, or if you prefer, a layered look with a loose end hanging. To keep the veil in place, add pins.
Fabric: thin linen 52*250 cm (or longer; up to 4 meters would be doable I think)
The short side should reach from forehead to neck, the long side wraps around your head in several layers. Cut out a square piece of fabric, and hem it around all sides with a small double folded or rolled hem. Use waxed linen thread, and whip stitch or tiny running stitches.
Put the long side over your head, drape the veil around your head and pin it at the neck (do not make a knot, that will be too bulky and doesn’t look right in the end). Wrap the veil several times around your head, and secure it with more dress pins. Alternatives; wear it on top of a cap, headband or hairband. Let the end hang loosely, over one shoulder.
You can also wrap the veil folded, to achieve a more smooth look. The “secret” with making the look hold and look nice? Practice, mostly. I like to wear a base, like a version of the Birgitta cap, and then pin the veil to this one. When I wrap the veil around my head, the layers will go a little different each time, to cover the whole head in a good way.
In this look, the layers are wrapped from behind and then from the ear, over the forehead and a little back, to achieve the V shape at the forehead. This looks need some more pins at the top of the head to stay in place.
Veil with sewn layers. This veil is an experiment to achieve the look seen on many paintings from the period, in very easy means. A more historically accurate way would probably be to use a very long great veil, or the “strip with sewn folds” with a veil on top. But if you want to look the 15th century part easy and fast; this is it!
Fabric: thin or medium-thin linen 64*250 cm
Cut out a square piece of fabric, and hem it around all sides with a small double folded or rolled hem. Use waxed linen thread, and whip stitching or tiny running stitches. Then measure and mark folds on one short side, as many as you would like (between 6-20 folds). Make the folds by hand, press them down, and sew them with running stitches. At the ends (the long sides of the veil) you can make the folds go together to add some shape to your piece.
Put the veil over your head with the folds at the forehead, and pin it at your neck. The veil should hang over the pin and hide it. Then twist the veil fabric around your head until you have used the whole length. Tuck the end in under some layers, and pin everything in place.
Strip with sewn folds
Fabric: thin linen 64*20 cm (64*30 cm for more folds)
This is made either to pin on a cap or fasten on your head with pins or ribbons at the neck. On top of it your wear one or more veils. A practical way to style your existing headwear into the 15th century style.
Cut out a square piece of fabric, and hem it around all sides with a small double folded or rolled hem. Use waxed linen thread, and whip stitching or tiny running stitches. Then measure and mark folds along the long side, as many as you would like and can fit (between 6-20 folds). Make the folds by hand, press them down, and sew them with running stitches. At the ends (the long sides of the veil) you can make the folds go together to add some shape to your piece. At the ends, you can make the folds go together to add some shape to your piece. Use two thin strips of linen or silk ribbon to fasten the piece at your neck, if you don’t want to pin it.
Here is the strip, pinned down on a cap, and covered with layers of veils.
I have been experimenting with some other veils too, but I’ll have to come back to them another time when I have put together my experience and drafted some patterns for you.
For the Golden Egg challenge, I made a warm, woollen coat. The purpose of the coat was to make an over-garment from sources that would be warm, practical and fitting for the period. After using it for half a year I am very satisfied; it is such an easy garment and yet it looks great, is comfortable and versatile. I use it as part of the outfit, when the weather is cold or wet, as a robe when visiting the bathroom early in the mornings, as a picnic blanket…
I drew you a basic pattern outlay if you want to try it out for yourself.
The small gores F1 and B1 are just to save fabric, so the main pieces are 2 fronts, 2 backs and 2 sleeves. If you have a toile or mock-up that works for you, you can use that as a base and then just draw out the lines from the sleeve/neck as I did on the pattern.
The fabric I used was 310 * 150 cm, if you are taller or need a size large or above, consider adding some extra fabrics for lengths and sleeves. You don’t really need as much width as I have, but it will give you a very nice drape and look.
The cut and pattern are based on paintings and what pattern instructions I have found from the period. I think it is a possible take, though I have seen outer garments with S-sleeves, sleeve gores and more intricate patterns and constructions. The side seams can be found in some pictures, as well as in patterns of outer garments from later periods.
When you have cut out the pieces needed, pin/baste and sew the coat together in the following order:
back seam
shoulder seams
side seams
sleeves
insert the sleeves in the coat
hem the coat
put in a closure at the front neck.
I used unbleached, waxed linen thread and a running stitch, folded the seam allowance to one side and fastened it down with whip stitches. The hems were finished with whip stitching too.
I also trimmed the neck and sleeves with fur, since that seems to be common in contemporary art. To avoid dipping the sleeve hems in food, I made the sleeves wide enough to be able to fold the fur inside the sleeves when working- this turned out very practical!
Materials:
The coat is made in warm, thick wool twill, with a rich, deep brown colour that would have been quite expensive to dye. Other good colours could have been walnut brown, red or black.
Linen thread for sewing, since this seems to be common in most finds from the period.
Rabbit fur for trims, because that was the only fur I found that was up to my ethical standards about how you should treat animals (eco, small family garden breeding, killed and tanned in the area without chemicals). White fur to match the paintings. If you don’t want to use fur a folded down hem would do just fine!
The clasp is based on a find from the period and is made in bronze
You can wear the coat loose, or close it with a belt. I often wear it with a belt, as it is more practical. If you want tips on sewing a fur trim on a garment, check out my tutorial on the subject!
Historical sources and why I did a coat
The outer garment could be a dress as well, as there are lots of warm dresses lined with furs or fabric in sources. I chose the coat as I wanted a practical garment, and know from experience that the second layer of wool dress would not be versatile enough for what I needed. The sources I have used are from the second half of the 15th century, in today’s Germany. The Golden Egg outfit is based mainly on the period 1470-1490, but the coat belongs to the end of this period rather than being the “choice of all women”. So now you can decide if you should go for the practical coat or the more common dress when making your outfit!
OLYMPUS DIGITAL CAMERA
Sources: if you want to check out some sources on 15th century clothing, I recommend some of these links:
I took some quick pictures to show you how I make my braids for the 15th century outfit. I do not make them to all events, and they end up looking a bit different each time, but this is the basics for the look! (this is not a historically accurate way, but it is one that really works for me during work and camping events so I wanted to share)
You will need:
Longer hair, or hair extensions.
Brush, comb, hair wax (optional), rubber bands or thread, 2 bobby pins.
First, I divide the hair into two sections and brush them out. Then I usually add some natural hair wax to get the hair a bit easier to work with. The hair is pulled to the front, and the braid is a regular 3 strand braid that begins over the ear.
Look at the start of the braid, it is really high up and almost at the front of my hairline:
Braid both sides, finish them off with a small rubber band or thread. I always use rubber bands, because I am lazy…
After this, it is time to fasten up the two braids in loops. I usually do this by pulling a bobby pin through the rubber band, so the pin hangs at the end of the braid. This is the hair from behind; you don’t have to make it perfect, but try to pull the braids tight from behind to avoid the hair falling down your neck.
After that, grab your bobby pin, fold the braid back and put in the bobby pin at the start of your braid. If you have extensions, you can pin it through the base of one of these for extra firmness. Make sure the pin is secure, give it a small “twist” to secure it inside the braid.
Then it should look something like this. The loose hair ends lies against my head, behind the braids and under any cap or veil, I will wear. The bobby pin and rubber band is also hidden. Note the lenght of the braid in different paintings when deciding how long yours should be. I like them to reach the line of my nose, it makes my face look cute.
And from behind
There, all done! I have discovered that the best way to hide the loose hair and the small hairs at the neck is to use a modern, thin hairband in fabric, that I pull over my head and smooth away the hairs with. I didn’t use that this time, and you can use hair spray, wax, bobby pins or whatever you fancy to hold your hair in check.
The result? This is what it looks like when styled with the 15th c great veil.
This weekend we traveled north to visit friends at our old hometown Umeå. The local SCA group had an event, se we had a great weekend with a mix of old and new friends, medieval archery, feasts and a bit of work, since I brought my small shop with me.
Thank you everyone who came by to shop; thanks to your support we get to visit all lovely events!
During Saturday we were outside practicing archery, it was a little below freezing, with a cold wind blowing. I though I brought enough clothing, with a thin woolen dress, a wool jacket, and my brown wool coat, but the wind managed to sneak inside the layers of clothing and I soon became chilled.
This really got me thinking, since I plan to go to medieval Christmas in Visby in the middle of December. Maybe I need to make a warmer coat with a lining and closure at the front? I am also going to bring my hood, better socks, and a woolen layer of underclothing. And woolen veils. Yeah, that will probably do the trick!
Are you going to a medieval or historical event during the winter season too? Here is some tips I have for keeping warm (they were published 4 years ago in a Swedish version then) I also wrote this post in Swedish about keeping warm.
Layers are really nice, and loose layers will create isolation thanks to the air between them.
The choice of materials; silk and wool will warm you even if wet, while cotton and linen will cool you. Wear you wool dress or tunic against your skin, or add a thin modern layer of wool underclothing.
Fur is very warm, even a trim will keep the warm air inside the garments and warm you.
Leather is not warm at all (don’t trust the fantasy movies) but protects against wind if worn over woolen layers.
Do not let the weather chill your skin, protect hands, face and head. You lose lots of warmth from the head, chest and shoulder area, so a hood can make quite the difference! Use it as a way to adjust your temperature; take of when indoors, put on if cold.
Isolate your feet from the ground. Cold ground or wet feet will make you cold. Use woolen socks, and if you have medieval shoes a pair of pattens (wooden soles) will protect you. I often wear modern shoes to winter events to be sure I will stay warm enough.
If standing still in a market something on the ground will help you keep warm; straw, a woolen blanket, a sheepskin, a wooden board. Anything is better than nothing!
Wind chills you down; if it is windy or rainy another layer will help you keep warm, like a thick cloak, coat, shawl or a wool blanket.
As a woman it is the right time to be fashionable; headwear like veils and wimples will keep you warm. Even silk and linen veils will warm you and protect you from winds.
Eat and drink lots to get energy to warm yourself. Tea, hot chocolate, snacks; whatever you fancy!
When going indoors; remove some layers of clothing to get warm, but not too warm. To go in and out without undressing will only chill you further.
Already cold? Go on a brisk walk to make the movement warm you, do a little dance, or just jump up and down. Movement and energy intake (snacks!) makes your body produce heat.
Thats it- with some more planning I think I will do great during this winter!
This is my method for attaching pewter buttons to a garment. It is easy, simple and makes it doable to remove the pewter buttons before washing or to use on another garment, and then re-attaching them quick afterwards. Another great thing with this method is that you will not lose your buttons as easily as if you sew them onto the garment one by one, since you will have a secure ribbon to hold them in place.
Here is where I start; the sleeve at the top is finished, and the sleeve at the bottom already has its buttonholes and hems. You will need to make S-sleeves (with the seam at the back of the arm, going just over your elbow) and then fit them snugly over your underarm. I recommend doing a mock-up sleeve first in a cheap fabric to try it out. Do you notice the curved edge of the bottom sleeve? That will create room for the wrist and the start of the hand which are also inside the sleeve.
Start by marking out where to place the buttons, use a pen and compare with the already made buttonholes. Work on the inside of the sleeve. Depending on the size of your buttons you will need different seam allowances, I had small buttons and used 1 cm, but recommend that you use at least 1,5-2 cm.
Use an awl and make small holes in the fabric, for the buttons to go through. If you have a thin or sensitive fabric, you need to reinforce the sleeve before you begin, otherwise, the buttons may rip through the fabric when put under stress, such as moving or lifting when wearing the dress. A simple piece of fabric would do the trick, like on the sleeve above where the buttonholes have a strip of silk (sturdy linen is better to work with). Sew it into place before making the holes.
Do you see my trick now? I do not sew each button in place separately, but pull them through the holes I made with the awl. When I have them in the right place, I thread a sturdy ribbon (this one is in linen, but a braid, twisted linen threads or anything similar will go) through each buttons loop, to keep them in place.
The ribbon makes the buttons stay in place, and makes it impossible to lose them. Note that the ribbon is twisted from left to right to pass through each button from the same direction, this will give you a smoother seam later. The buttons are placed with the flatter side towards the sleeve.
When the whole set of buttons are attached and the ribbon threaded through them, fold the ribbon back, and leave a piece of it lying under the loops to keep it in place.
Final step! Fold the seam allowance over the buttons stem, loop and the ribbon, and whipstitch it in place. To remove the buttons, you will just have to rip the whip stitch open, remove the ribbon and take out the buttons to wash the dress in the machine, or use them elsewhere on another garment. To replace the buttons, repeat the steps above (the marking and holes should be left so you don’t have to redo them).
It takes me about 30 minutes to reset a sleeve, so quite doable instead of having to buy new buttons for each garment you make. This also works on bronze buttons of course, but fabric buttons I usually sew onto the garment one by one as is visible in finds from London (Dress Accessories 1150-1450). Also, note that you need the typical medieval button with its long stem, most modern buttons are flat and don’t work with this technique.
Some time ago I made a medieval bathing dress in unbleached linen, and I wanted to share it with you. It is a simple project, perfect for an evening or if you want to practice hand sewing. There are plenty of bathing dresses in paintings from the late 14th to 16th century in Europe, they can also be seen in different cuts and models, and some are clearly supportive shifts that you could wear under your medieval clothing. Mine is very simple but with an intake under the bust to allow some support, but still being easy to get in and out from. No lacing is acquired.
Left; Bohemian, Codices vindobonenses 2759-2764 in the Osterreichischen Nationalbibliothek, in Vienna, Austria. Right: The Bathhouse Attendant, Bible of Wenceslaus IV. 1389.
This find is from A History of Costume, Kohler and is dated 14th century and described as a lady’s chemise or undergarment, the photo is old but you get the general idea.
Most of the pictures I have found seems to be dated to the late 14th to early 15th century, there are lots on the internet and I have a Pinterest folder on Medieval underwear so I won’t go into more historical sources today.
The cutting out; prewash your linen, fold in double in the length you would like, and then cut the A shape. I used the leftover fabric for gores in the sides (and at centre front + back if you like, it is optional) but this of course depends on your measures.
The first pictures show the general cut, the second the additional front and pack gores, the third the intake under the bust that give me the support. Do not take in too much, because then you won’t be able to get in and out of the dress.
About measures: The length of the dress measures from armpit to hem. The width is your measure around your bust divided in two (for front and back) add seam allowance but nothing more. Start the gores at your natural waist (if you are unsure, rather place them higher than lower) and pin the intake under your bust while wearing the dress with gores and side seams sewn/basted. Add shoulder straps last, mine is just double-folded linen cloth, whip stitched together and then fastened at the same position as I would have worn bra straps.
If you sew your dress by hand, use waxed linen thread and running stitches, and then fold the seam allowance to one side and whipstitch in place. This gives you a sturdy seam that is also quick to make. Hem the dress with running stitches or whip stitches, after your choice.
Making the dress in unbleached linen made it opaque even when it was wet, good for modesty. In artwork the dress seems to be white, may be visible nipples was a thing, or you would have to pick a very dense fabric. In some pictures, it is very clear that the fabric is transparent, but I chose the more sturdy and practical look. (update spring 2021: I have found that if you start with unbleached linen fabric, and sun bleach it yourself you will get an almost white fabric that is not as transparent as the modern bleached options in stores.)
The result? All considered, I am satisfied with the cut, sewing and look of the dress. It is also easy to swim in. Historically, being out in public in a bathing dress was not a thing, they can be seen on bathhouse attendants or in rare cases during the dressing/undressing at home or during dirty labour. Wearing it to the beach was certainly not a thing, but I liked to have a more historical dress instead of wearing a modern bikini when going for a swim at events.
This is a post about (one of) my 16th century outfits; and due to several years of research, work and sewing experiences it will probably be more than one post, with different subjects. In this, I will give you an overview and some background research. The outfit is already finished, worn, mended and in line for some redoing, so I will be able to share the whole process with you; both good and bad outcomes and what I could have done differently.
My aim was to make a good recreation of a whole outfit for a woman from early 1500s German (or possibly southern Scandinavian area, since this was influenced by German fashion at the time). She is not poor but works for her living, maybe on a larger farm or in a smaller city. She is well dressed; as is the ladies on all the art I have studied, but like other working women, she owns practical clothing with a skirt short enough to stay out of her way, and a cut to the clothing that is both economical and practical. Contrary to the trossfraus (the women who follow the mercenary armies) she does not wear slashed and mismatched clothing, but items that belong to each other and to a certain class in society. She follows sumptuary laws and does her hair in the braided fashion, or covers it with a simple cap and veil while working.
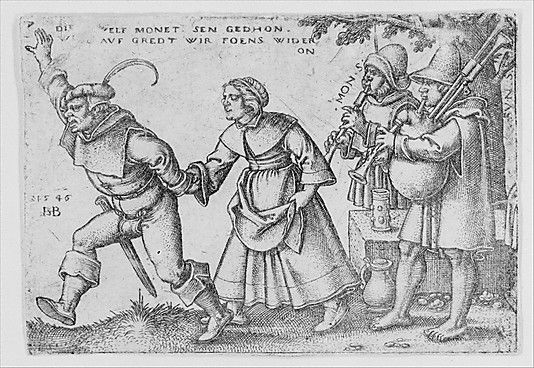
I wanted to show you some interesting images of 16th century women in art so I put together some examples for you;
A painted glass piece showing the milking and making of butter. A (probably) younger woman has her hair in two braids, and a covering apron to protect her clothing. The older woman has a veil, a jacket and a dress hiked up in her belt.
This lady is described as a dancing farmer and has probably done her fine dress for a festive occasion, with her hair braided in a nice updo and what looks like a headband around the head. She wears a dress and a gollar that looks fur-edged or with a whole lining in fur.
This piece shows the women working with flax, the process from plant to fabric demanded both time and hard work in numerous steps. The sitting lady wears a cap or veil around her head, with hair showing at the front. Her jacket is fastened at the front and is cut in the fashion of the time; low and square. The standing lady has her hair in braids around her head and has rolled up her sleeves while working. The dress has a decorative guard at the front, and is hiked up at the waist. Clearly, she is doing some heavy work!
Dressed for cold weather? She has done her veils around her head, chin and neck, and wears a short cloak against the cold. She wears both shoes, socks and hose, and a bag at her belt.
Ah, time for cutting some fleece! The sheep does look dead but is probably just laying at a convenient working pose for the woman, who use a shearing scissor for the work. She wears a simple cap or tied veil over her hair, and a dress with decorative guards at the front. It is hard to say if the brown skirts are part of her yellow dress, discoloured by time, an apron or a piece of cloth.
Festivities again! Do peasants and workers anything else than working and dancing? This lady has the common braids, a gollar and a dress. What is so interesting with this picture is that you can see the back of her dress, which is clearly denser pleated than the sides. Uneven pleating in the skirts is visible in more pictures and seems to be the result of tailored work.
Summertime, and work in the fields this time. Now we can see her shift; a plain linen shift with a long sleeve, and either a high collar, or more believable, a thin gollar/linen cloth to protect her against the sun, as is seen on the woman with the red dress. She wears a straw hat, and her dress is sleeveless; it is a tight-fitting middle kirtle or underdress that gives you the bust support you need, without being in the way for hard work. This layer can be found on other women too; plain, sleeveless and intended to be worn under the woollen overdress. It is only during heavy outdoor labour such as fieldwork, washing and shovelling it is openly worn, older women and richer women always have their overdress on.
Based on my research, I have found that I needed the following items for a whole outfit:
linen shift
kirtle or underdress
wool dress as an overdress
apron
belt
purse (and maybe a rosary too, it is mentioned in some written sources but doesn’t appear on peasants often)
cap, veils, a straw hat and/or a braided hairstyle
hose
shoes
gollar
jacket
cape/cloak
This much? I wanted to make a whole outfit, that would be practical during different kind of events with both cold and warm weather. I also wanted to try to make all the pieces of clothing and accessories that I have found during my research, to better understand how they worked together.
For more research, I have a Pinterest board on the theme if you want to learn more!


 And meeting lots of new friends and amazing people in the Purple Dragon household!
")
")
")


")


")


")
")
")

 There are plenty of bathing dresses in paintings from the late 14th to 16th century in Europe, they can also be seen in different cuts and models, and some are clearly supportive shifts that you could wear under your medieval clothing. Mine is very simple but with an intake under the bust to allow some support, but still being easy to get in and out from. No lacing is acquired.


