I am sooo behind writing about my different projects. I kind of have a bad conscience about it too, and I really try to work through all of my drafts, notes and old photos. I guess it has been quite the autumn and winter here, I really never post about those parts of life, but I like everyone else have tough periods in life. Life, dead and bills happens to everyone, as the saying goes. I am not going to talk about that today; I am going to show you my wedding dresses!
I made three different layers for the wedding outfit. A linen shift, a cream-white silk dress and the velvet silk over dress. The linen shift is made tight fitted, with thin shoulder straps and a supportive body, and then a loose skirt. Over that I also wore a linen petticoat with a strengthened hemline. It never shows, but it adds important stability to the cream silk dress so the skirt drapes the correct way.
Over these I have the silk dress, cream-white and lined on the inside with a really thin wool muslin fabric. The silk fabric is a taffeta, and even if that quality is a lot sturdier than other silks, it still needed to be lined for a better draping skirt and a smoother upper body. Here you can see some of the effect the petticoat has; making the dress skirt stand out a bit instead of hanging down. The taffeta also helps a lot.
The sleeves are unlined, instead I have the thin silk sleeves that is shown underneath. I didn’t want another layer underneath the silk dress, so the thin silk sleeves are just lose sleeves, attached by the arm hole on the dress. The lacing is made with silk thread, the same as I did the lacing holes with, and also the white freshwaterpearl belt. Around the wrist small pearls are fastened, kind of like a bracelet but easier to wear.
For these dresses I made full mockups in cotton fabric to get a feeling for the pattern drafting and models. Usually I like to improvise a bit, but now I somehow was patience herself while drafting… The skirts in both dresses are based on a full circle of fabric, that is what gives the dresses that magical drape and the deep folds in the fabrics. The mock-up was then taken apart and used as a pattern, here is half the skirt on the cream silk. Yeah, I actually cut out my fancy white silk dress on the floor, with heaps of fabrics laying everywhere. Creativity, you know…
More fabric, this is the other half of the skirt.
To prevent the silk fabric from fraying I sew all edges with a overlock. You can use a zigzag as well, but it is good to prep them in some way. I would have liked to sew all our garments by hand, but neither time nor my fingers allowed for it, so edges and some inside seams were made with sewing machines. The overlock really was my best friend when it came to the fraying silk fabrics.
I also reinforced the hemline of the dress with a thin fabric strip. This was pinned around the hem, and then sewn with a machine stitch. After that the lining was added so the strip was hidden on the inside between outer and inner fabrics.
Here is a nice close up on the silk lucet cords, the lacing holes and the matching silk belt with freshwater pearls. I really liked how the cream-colored fabric, the silk thread and the pearls matched each other
The dress has a waist seam, so it really is a circular skirt, a regular body with side seams/side lacing and set in sleeves, all in all a simple dress. Here you can see the waist line, the seam done by hand to get a good drape of the skirt and because the different layers of fabrics really liked to slip against each other.
A good view of the laced up sleeves from the side
And a view from the back, while walking in to get married.
This actually became quite the long blog post, so I’ll get back to you with the velvet over dress in a post of its own!
This was a very spontaneous project with no customer commissioning it, and not for my own wardrobe either. I just wanted to try out how the velvet would work in a full circular houppelande (late medieval over dress) and experiment a bit with pattern construction, seam techniques and silk fabric. I am actually very satisfied with the result; for a cotton velvet the fabric is in a nice quality and with a good drape, the pattern turned out very well, and the silk lining in the sleeves add that extra touch I wanted.
The materials in the dress is cotton velvet (black) viscose/rayon velvet (moss-green) and silk (sleeve lining) with a total of about ten meters for the whole dress. The cotton velvet is really affordable comparing to silk velvet, and is very easily maintained; I actually just put it in a washing machine, air dried it and it came out as new; no shrinkage, no creasing and no sad silk velvet after water washing… If you want to learn more about velvet fabrics, I have a guide about the subject under “tutorials”.
I finished the dress during our brewer’s guild meeting in early December, and would usually iron the silk lining first before wearing it, but it was such a good opportunity to take good photos in gear so the sleeve lining is a bit bulky still. But soon to be fixed!
The skirts are really full; the pattern is based on a circle and the houppelande is also called a full circular houppelande. Lots and lots of fabric.
I have some tutorials about making your own houppelande if you are interested (and also makes them on order by your measures). To make them dramatic, historical and with this massive draping of skirts, it does take more meters of fabric and patience than difficult sewing techniques…
I fell in love with the colour combo of black, moss-green and bright grass-green in the dress. Under is my late 14th century dress, going historical there shouldn’t be a visible lacing underneath this kind of over dress. The gloves are also modern, but was so very nice to avoid freezing my fingers of.
The last tutorial was about how I made my first Houppelande (medieval overdress) that was an early houppelande, with a pattern layout that saved in on the fabric.
Now we move on to the opposite; a full circular houppelande dress that was the high fashion during the 15th century, and were worn by both men and women (with different lengths and fashion details of course) The construction method for this one is open for discussion; there might have been gores and more pieces according to different fabric widths during the medieval period. This layout is practical and simple if your fabric is 150 cm wide and you want the houppelande to be of as much fabric as possible, the small pieces allowing you to save in on the fabric a little.
The construction idea is from an article I found ages ago (that is now lost on the internet?) And later tailor’s books which shows very full dresses for women and coats for men. The shape, style and drape of this method also look similar to paintings of houppelandes.
First, you need a lot of fabric! How much depends on your length, in this example, I make a pattern that gives you a dress around 150 cm long; good for the shorter woman or for a man (since houppes for men usually leaves at least the shoes visible) That means you will need 5,2 meters of fabric for the dress itself, and then another 1,5 to 3 meters for the sleeves. Oh, and maybe a full lining too?
The pattern is basically 4 quarters of a circle; forming a full circle when put together. The small pieces save you some fabric, but you may cut out the full quarter circles if you prefer. If you go with the pieces, then sew them together with the quarters the first thing when you have cut them out, so you have 4 whole quarters.
Then, sew the shoulder seams together, that is the short straight seams above the arrows. Leave the armholes (on the pattern they are cut out as half-moons) and sew the sides together. To know how wide your armholes should be; measure yourself loosely around your armpit, or use a previous pattern. Add extra cm for movement; at least 5-6 cm.
The seam length of the shoulder should follow your shoulder; between 10-14 cm depending on how long shoulders you have. The armholes should be laying on the body, not falling down from the shoulder to your upper arm. Cut away what you don’t need, a little at a time if you are unsure.
When you are satisfied with the shoulder, armholes and side seams, sew the back and front together with each other, front to front, back to back. In the front, you leave an opening big enough so you can dress and undress easily. On paintings, some dresses are open almost to the hip. In the back you need to leave an opening big enough for your neck, try it on and you will understand! The open seam will give you the neckline on the back, and can then be cut for a rounder style if you like, or you could add a collar.
So, that was it- quick and easy yes? Now the dress should look something like the sketch above, and you can attach the sleeves to the dress. Sleeves? Well, that is for the next part of the Houppelande tutorial series. Stay tuned!
During the 16th century it became high fashion to slash or cut fabrics in a decorative manner, and this was taken up by mercenary landsknechts and women working and living in the armies as well. Being a fashion for richer or high-born persons, it was quite the dare for mercenaries to wear, but such a good way to show that you were a high earner with lots of status and gold on your pocket…
So, I wanted to share with you all my best tips for getting that slashed and cut look that you may want for your outfit!
But first, some good things to know:
The most important thing is the material to work with; wool is by far the easiest. In finds and manuscripts, you will also find garments made by silk or silk/linen and silk/wool blends, but those garments will have very small cuts (also called pinking) made with a specific tool and is a whole different story. So; chose a wool fabric. A felted, dense and tightly weaved wool is the best, this will give you a sturdy garment that won’t fray easily.
The slashing is not hemmed. I know many people do this because they chose a sensitive fabric, they are afraid it will fray and tear, or they have just been told that all raw edges should be hemmed or sewn. The standard is to not hem or sew the slashes, they should be raw, made with a very sharp tool, and yes- they might wear out faster than a garment that is not slashed. There are garments made with other techniques, for examples doublets with sleeves that are being made out of strips of lined/hemmed fabrics. These might look similar to cut garments, but the making is different.
Slashed and cut garments may not last as long as more sensible ones, or look very pretty after using for a while, that is the point with this fashion! You’ll have to be rich enough to order fine materials, pay a tailor to sew it for you, pay even more for the slashing and cutting, and then don’t mind that you will have to exchange the garment once it looks worn. If you are a more economically laid modern person, pick a wool fabric for your outfit, since this lasts longer than silk or linen.
Almost all slashed garments that I have seen have been lined with a second layer of unslashed fabric. This could be a regular lining or a whole garment that holds together the one laying over, providing stability and fit. I often use a linen fabric lining for wool and silk fabrics, but in the case with slashed guards (strips of fabrics) I place the guards on top of the main fabric, to make it visible through the slashing.
Feeling ready for some slashing now?
The pictures are mostly from my trossfrau dress project, this from a woodcut that I have copied and coloured to get a feeling for the dress to be.
I usually wash my wool fabrics, iron them and then cut out the pieces I want for the garment. Before I sew them together I draw out my slashes on the wrong side with a fabric marker and then cut them before I put the garment together. If you are not sure about the fitting, it is good to baste the garment together and try it on before this, since it is difficult to adjust fitting after the slashing is made.
I usually also draw out helplines during this stage; everything that helps you make good sharp lines placed exactly where you want them is good. A ruler, some mathematics and a marker go a long way. I also like to make a template to use while drawing out the slashes.
Do not slash all the way to the edges, remember the seam allowance and leave 2-3 cm along the edges to make it easier to sew the pieces together.
This is a larping outfit (only inspired by historical fashion) as an example of a durable slashed garment. The arms have slashes, but not the armpits or body, and the slashes ends some cm before the seams. Sewn in a medium-heavy twill, slightly felted.
If you want the garment to be sturdy and hold together, slash less along the armpits, side seams and crotch; all areas where the fabric gets more wear. If you look at historical woodcuts and painting, you may notice that tight fitted pants have no slashes at the backside of the legs near the seams, neither over the butt (there might be exceptions, as always)
The finished dress, a hot day in Visby a couple of years ago
Last year I made a woolen dress, based on the cut, sewing technics and seams from the finds from Herjolfnes, Greenland. I really didn’t plan it, I just had this sudden burst of creativity and had to make a plain, undyed working dress… The fabric is from Medeltidsmode, and it is an undyed natural wool that was just lovely to work with, the seams went very well, and the drape of the shirt is really good to. It is based on two different models, but with my measures- so it is a historical reconstruction with a practical use in mind.
Cutting out the pieces
And sewing them together with running stitches in wool thread
Sewing gores from the right side of the dress, with a whip stitch
The hems are made by a single fold, whip stitched and then sewed with another seam according to the finds. To finish of the hems two times was a bit tiring, but the result went very well, with especially the neckline and wrist coming out nice and stable for wear.
All inside seams are felled and whip stitched down, to make them more durable and the inside smooth and pretty.
There are several gores in the dress, both in the shirt and in the sides, that goes up to the arm holes. This gives the dress lots of hem line, as well as a nice drape. If you would like to make a dress more modern flattering, you could begin the width in the side seams by the waist. My dress is lose almost under the bust, which makes for a warm dress, that is easy to get in and out of, and probably good for medieval pregnancy if you are interested in trying that out…
The dress is so comfy, and despite a rather smooth fit over arms and shoulders it is easy to move in it.
On these photos I have rolled up my sleeves a bit and you can see the linen shift, a good way of keeping your sleeves dry when doing dishes.
Definitly one of my favourite dresses right now, it being so simple and yet pretty!
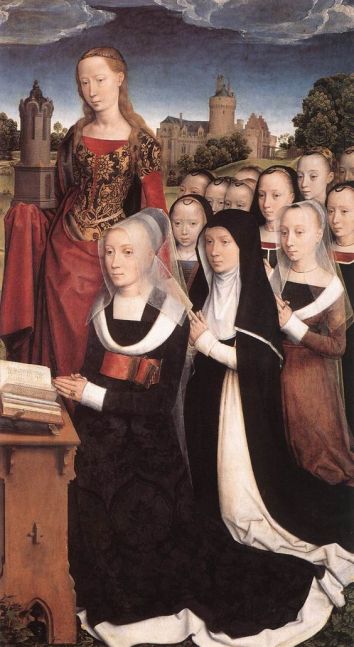
The last 1- 1 1/2 year the 15 century has been one of my main interests. It is a really interesting period in history, with lots of changes in both politics, society and how trade, money and people moved. My main interest has been the clothing in middle Europe, around what is today Germany, Belgium and the Netherlands (more or less, influences and fashions spread and you can see similar styles in areas boarding to these ones).
From these areas came several great artists, there are lots of paintings and artistic work left, and Scandinavia were greatly inspired by the clothing and fashion movements from the German area.
To both challenge and inspire myself I decided to make a Golden Egg challenge on the topic of 15th century clothing. The Golden Egg is a household in the SCA; you can read more about it here. My goal is now to research and make a whole outfit from the late 15th century for myself, and the timeline is one year between start and presentation.
I wanted to share some of my research, as well as some good sources for you to read for yourself. My main interest is the clothing for women, but you will find lots of good inspiration for men’s fashion as well.
Some important points to remember when studying 15 c fashion (or any historical fashion really) is:
The diversity of the period. Fashion shifted over a certain time, and during the 15th c it shifted quite fast. It also differed over areas (such as towns, countries) as well as social classes. It is not possible to sum up the period by stating “a women wore this and this, in such a way” but some things are similar, like wearing a linen shift, middle kirtle and over dress of some kind. How these looked, what materials they were made in and how you wore them differed greatly, as did the accessories.
The art and paintings of the period is a really good source, since there’s a lot of them, and the fashion of art suggested a natural, realistic reproduction of the people living during that period, with lots of details regarding seams, models, fashion and materials. This was also the period when portraits became popular for others than the nobility, with the ever-increasing burgher class economy as a base for portraits. This give us a source of good depictions of people of the time, and also gives a good clue on what kind of clothing and headwear was in fashion. It is important to note that there also were sumptuary laws regarding what you could wear, and how you were to be portrayed according to your status in society, making the understanding of art and symbolic meanings very important.
Religious art was also very important, and great artworks were often the result of a whole workshop with different painters, studies and sketches from different areas and periods, as well as saints depicted with biblical clothing and symbolic tokens. This means that you can find different styles in one and the same painting, both considering fashion and the style of the artist, even though the master overlooked the work on each artwork. It also means that flowing robes and cloaks that appear might not be the fashionable items like the gowns and doublets right beside them, but more some kind of biblical clothing.
Colours, technics and styles regarding painting developed greatly during this century, with the use of different mineral sources etc as a way of getting vibrant, expensive and fashionable colours. But this does not mean that the colour tone on a painting was the same as the depicted garment from sketches and models; the colour was foremost the result of the client’s budget, where vibrant reds, dark blues and golden inlays were important for the fashionable and rich client. Does this mean that paintings can’t be the source for fashion studies? No, of course you can look at art for getting an idea of the clothing of the time. Just keep in mind that the colour that you see on your computer screen is the result of both a computer screen setting, the photography of the painting (with editing) how well the painting has withstood time (mineral paint tend to change over time) as well as the idea of what a really expensive colour looked like in art versus fashion.
Artists of the time was more handcrafters and less artists in our modern use of the word. They trained for masters, belonged to workshops and worked with paintings as a team, not as one expressive personality. The money came from churches, rich nobility and the burgher class who commissioned art pieces (or bought ready-made pieces) such as piety paintings, portraits and, later on, everyday scenes from their home. This means that art was the result of society, fashion, study and individuals, greatly inspired by the ongoing social development as well as other painters. Of course there were room for personal style; compare Rogier van der Weyden to Durer and you will find style differences, even if you are not a trained art historian.
The artist had knowledge about the fact that fashion shifts; and that what was worn everyday when the paintings was made, was not the clothes of the time depicted in them. So in a painting of Christ’s birth; you can se both people dressed in the high of 1470’s fashion, as well as mythical and religious figures dressed in cloaks and robes that were meant to be seen as “some kind of long time ago clothing”. This might be pretty obvious, but to make it a bit trickier there is also paintings with 14th century fashions depicted (in a rather loose style) in 15th century paintings.
Dress for your age; as for society today, people tend to dress after their age, with the young girls and women of that time preferring high fashion dresses, loose hairstyles or flowing hair for the unmarried (or soon to be crowned queens) while older women seems to be more covered, with additional layers and more elaborate veils. Older women can also be seen in “unfashionable” garments; what was the thing 10-20 years ago at their prime seems to hang along.
Having this in mind, you can clearly se that if you aim to make an outfit as historical accurate as possible (…possible for your means, skill etc) an important start is to choose a certain time and period. The social standing is also important, so a good starting point could be a woman from south Germany (or a city of your choice) from the wealthy burgher class, who lived during 1450-1470.
I have chosen to focus on the area of Germany, the Netherlands and the Flemish region. This because there were some great artists living there that I want to study further, but I also enjoy the fashion of that area and how the geographic areas and countries influenced each other. If you compare this areas to (for example) Italy or France, you will find that both style in art and fashion differs greatly.
Another thing to consider, is to search for sources besides art; like finds, surviving clothing items, sketches, written documentation etc. This will give a depth for your understanding of the period, where the beauty ideals and painting technique might touch up certain details to the point of it being difficult to interpret (like, how did all the women have those small round breasts sitting high up on the body?)
These are some important painters and artists from the German/Netherland/Flemish (Belgium)/Burgundy region during the century that I have chosen to study in more detail:
(About the dating: Sometimes it is difficult to find the year of birth/death for individuals, so the dating in uncertain, but it will provide with a overview of when they lived and were active)
Limbourg brothers (1385-1416) Germany
Hubert van Eyck (1366-1426) Flemish
Jan van Eyck (1395-1441) Netherlands
Rogier van der Weyden (1399-1464) Netherlands
Petrus Christus (1410-1476) Netherlands
Hugo van der Goes (1440-1483) Netherlands
Hans Memling (1430-1494) Netherlands
Hieronymus Bosch (1450-1504) Netherlands
Gerard David (1460-1523) Netherlands
Hans Holbein the Elder (1460-1524) Germany
Albrecht Durer (1471-1528) Germany
If you are interested in this period and want to learn more about the art, there’s some good books about different artists, and this really good (and free) article at Wikipedia about the subject.
I have also studied books on different artists, the Prestels “Masters of Art” series have been very interesting. There you can find both Van Eyck, Durer and many more.
Want to see more artwork from the time? Check out my Pinterest folder!
Sometimes I get the feeling that I never get anything done, or that I haven’t made a piece for sale in like, forever. So I made a list of some of the things I have done this year, both for customers and for myself and love, and then I felt that yes- maybe I have been quite productive after all!
In the beginning of the year, I think I accidentally started this Herjolfnes recreation, all hand stitched.
I made our wedding outfits for our Midsummer wedding:
Supporting linen dress, white silk dress, velvet over dress, purse, belts and for love; silk shirt, silk brocade doublet and under west, woolen hose, bag and belt. Also, I remember sewing some tunics and dresses for our families for the wedding.
Did I sew this houppelande also, or did I finish it the year before? It is also all hand stitched, on wool, silk and rabbit fur.
During autumn, I apparently needed to redo my apron dress, make a whole new viking coat by hand and put it all together to a new outfit, along with some tablet woven bands.
Also, some commissions took place, like this coat…
… as well as a number of hoods, shirts and tunics (here’s some of them along with the silk cotehardie)
I also remember some viking hedeby trousers (baggy pants)- four of them i think.
As well as some hand sewn viking clothing…
I updated my shop and market stall during the spring with cloths, small flags and my own logo hand painted on a linen fabric.
Made a whole bunch of veils in linen and thin wool for different outfits;
I studied 16th century tailoring manuscripts and sewed two jackets for women, in wool fabric (one for my friend Linnea and one for myself)
Oh, and rosaries were totally a thing- I have read a lot about them, made a whole bunch of drawings, some pieces for sale and a folder about how to do them yourself, as well as holding some workshop on the subject.
This is far from everything I have made, and some pieces have not even made it to being properly photographed though I have been wearing them on several occasions. Also, quite a few items and commissions also are just on fb or my Instagram accounts, otherwise this post would be far to long.
All in all, I think I have; 1. made quite some things and 2. need to be even better at documenting them and writing about them here on the blog.
Recently, I was at the SCA event Kingdom University, and there I met lots of really good handcrafting persons. As a result, I got lots of inspiration, new knowledge and good tips on where to read and look for new inspiration. I wanted to share some tips with you, so here is some really good links to other people’s research and blogs;
Textile time travels is such an excellent blog by Annika where she generously shares her knowledge and projects.
Historical textiles have a very interesting blog about different historical finds and such, and a completely awesome dictionary with textile terms in different languages; perfect for reading blogs or books in a foreign language!
Anna/Renika has a nice blog about 15th century clothing, full of both research and sewing tips.
Eva/Aleydis has a blog about her costuming work, apart from some really cool silk dress projects, you can also read some more about Kingdom University there!
Right now, I’m working with the photos from Kingdom Univ, sewing on some projects, and trying to stay alive in the cold, dark November of Sweden. When I have worked through all the pictures I will show you them, along with some really great paintings ans sculptures from the Rijksmuseum. See you!
This post is in Swedish, since I made a sketch for it really long ago, but never came around to finish it. It is about how to use modern patterns in an easy way, and some good (swedish) clothing patterns that I like.
Har du precis köpt ett fint nytt mönster, kommer hem, packar upp det och inser att du nog är världens mest ointelligenta person? Jag tror vi alla varit där, men att tyda köpesmönster så som Burda behöver inte vara omöjligt svårt.
Tips:
Bestäm dig för vilken modell du vill göra och vilken storlek du har. Kontrollmät på din egen kropp och anteckna om dina mått inte verkar stämma med mönstrets (mönstret är trots allt bara gjort för en modellkropp och sen beräknad i olika storlekar).
Du får klippa, rita och kludda på ditt mönster. Jag lovar! Klipp ut de instruktioner du vill ha (om möjligt) så slipper du råka läsa spanska tips mitt i allt… Tejpa ihop viktiga texter med varandra. Markera med en penna de ord och ställen som du tror är viktiga.
Inte allt på en gång. Mystiska teckningar och instruktioner du inte förstår? Det är inte meningen att du ska förstå allt på en gång! Börja från steg ett och arbeta dig igenom beskrivningen så kommer det vara mer logiskt när du kommer fram till punkten och har ditt arbete i handen.
Fuska. Inte sugen på att lära dig sy passpoalfickor just nu? Hoppa över dem då och sy det du är sugen på. Personlig design kallas det att göra mönsterändringar.
Mönsterpappret från helvetet. Sömnadsindustrin vill gärna att det ska vara så svårt som möjligt att sy, eller så är alla mönsterutvecklare snåla- jag vet inte. Grejjen är att mönsterarken är gjorda i världens tunnaste skräpkvalité, och om du frågar på tygaffären så kommer de sälja dig en rulle mönsterpapper i samma tunna skräpkvalité. Gå inte på det! Köp istället byggplast, sådant som du har för att skydda golvet när du målar väggar, eller köp non-woven mönsterpapper som är lite mer som ett tunt tyg i kvalitén. Bägge är genomskinliga, går bra att rita på men går inte sönder lika lätt som vanligt mönsterpapper. Nu kan du rita av alla delar du behöver på bättre material, och skratta medan du gör det.
Svårt att veta vilken linje du ska följa? Fram med en markeringspenna igen! En glad röd linje längs med alla rätta linjer i din storlek på originalmönsterarket kan verka tråkigt att göra, men gör det så himla mycket lättare att rita av bitarna sedan. Lätt är rätt.
Sist men inte minst; välj vilka märken du köper dina mönster ifrån. Vissa märken kan vara svårare att förstå än andra, och vara gjorda med olika standardmått (ja, det finns olika) beroende på var de är producerade. Ett av mina favoritmärken är Svenska Mönster, vars ägare Stina jag träffade på en Symässa. Svenska Mönster har storlekar anpassade efter svensk (europeisk) standard, lätta mönster och beskrivningar på svenska som är enkla att följa. Men framför allt är grundaren en sån himla cool kvinna som gör allt själv, driver sitt företag på svensk mark och är både kunnig och trevlig. Jag rekommenderar!
I bilderna ovan har jag använt ett mönster från Burda som exempel, de är internationella men har svenska översättningar på sina mönster, och ett enormt utbud. Det finns också många små mönsterutvecklare som säljer via internetbutiker på tex Etsy, och där kan du hitta formgivare och designers som utgår från speciella mått, kroppsformer, stilar, nivåer på sömnadskunskaper… Allt du kan tänka dig, och sjukt mycket mer.
This is my latest just-because-it’s-nice project. I wanted to make a viking outfit on a certain theme; so I chosed my amber necklace and worked from that one to create a whole outfit.
Some pieces you might recognise from before; the shawl is my first handweaved project, and the apron dress is in fact the orange dress that I have cut out and redid into an apron dress since my shoulders and back have become a bit bigger (hello gym!) To make straps and a supporting band around the upper hem I made a tablet woven band and sewed it into place.
I also made a bit extra to wear as a headband, looks kind of cute, and is practical for keeping your hair in place and for pinning a veil to it. It is tied in the neck with a knot. I got the idea from a grave in Birka/Björkö were there was a find of the same band on both clothing and skull, though I didn’t read how the band on the skull was arranged or if it was sewed onto something.
The hairdo is inspired from an Iron age find of a woman having her hair in plaited buns (aka Leia buns almost) but to achieve a more historical look, a bit of fake hair could be applied (women seem to have had more and longer hair when washing and chemicals weren’t the thing). It is also a bit messy from having a rest in the tent earlier.
The jewelry is based on findings from mostly Sweden, the brooches from Öland, and some of the bronze items like the needle case is from Historiska Fynd. The glass beads I have made myself, the amber necklace and some other jewelry is bought on different viking markets. Amber beads is found in several graves; if you want to use amber in your viking outfit look for big, regularly shaped beads, or faceted ones. The small nuggets are very modern, the viking lady seemed to prefer her beads big and luxurious.
About the layers: the linen shift is barely visible and over that is a hand stitched woolen dress of uncoloured wool from Medeltidsmode. The apron dress is made of thin wool and have tablet woven bands on it. The coat is made of a wool, also from Medeltidsmode, and hand stitched with woolen thread. Wearing several woolen layers is a good way of staying warm in the autumn season, but they get a bit heavy, so for comfort I used my tablet woven wool belt to fasten the skirts at the waist, so my hips could carry some weight from the outfit.
To keep the shawl in place I fastened it with the brooches; in this way my neck stays warm but you can still se the rest of the outfit and the jewelry at the front. For a warmer look, I use a small brooch to fasten it at the front beneth my breasts.
Historically? There is sometimes a different amount of loops or fabric underneth the tortoise brooches in finds, indicating that several layers of clothing was held in place by the brooches, and sometimes more layers on the bottom or the top of the brooches. But there is also several graves with clasps or brooches at the front of the body with fabric in them, suggesting that the woman wore an other garment that fastened at the front, like a cloak, shawl or coat. But really, there is much we doesn’t know for sure- so this is a “suggested way of wearing viking clothes” and not a “we now this for sure-outfit”.
Without the coat and with the shawl pushed back. Still comfy and warm, without having to hold the shawl in place by myself.
Putting on the shawl. Here you can also se the knot at the neck for the head band.
Dramatic and cool viking woman! Yeah! (I was having a bad cold at the moment, but you can always pretend)


")


")