HANDCRAFTED HISTORY


Leave a comment

2020 in review

There’s a lot to say about this year, but at least I’ve been having plenty of time for sewing. Unfortunately, a bad shoulder gave me some pains, but with rest and a training program, I think we are mostly friends again!

I thought it would be fun to share some projects with you here, as an inspiration and a kind of journal to myself: I always forget what I have been sewing, and find myself longing to finish yet another personal “small project” but not understanding why I don’t make any progress…

72 garments finished during 2020; both for customers, friends and myself. I am not going to write about them all, and many have not been photographed yet. I also have a whole bunch of things not yet ready; commissions, old projects known as UFOs (unfinished objects) and some rather new ideas I have been working on.

Easy, simple and comfortable blue Viking dress. Want to make a similar? Use the Shift-making tutorial and the Insert a Gore-tutorial to make a long shift with 4 gores.

It was time to make some new viking clothes and I managed this blue dress, the red apron dress and some matching items, like the handwoven and woad plant-dyed shawl. I am really pleased with how the outfit turned out, even if the outfit might not be sexy to the modern eye… I love experimenting with different historical cuts that could have been in use, trying out how they look and feel when I make and wear them.

Later I made this early 14th century outfit as I finally, after a long period of 15th century-romance, have laid my eyes on new conquests. The 13th and 14th centuries are very nice, and I want to get to know them a little more. The next project will be something from the Maciejowski/Morgan Bible.

I have made several complete outfits for customers based on viking age and medieval clothing, and this was the year when I only met GOOD CUSTOMERS! I kid you not! Everyone has been polite, fun to work with and sent their payments. For those of you working regularly in customer service; you know my feeling here! How did I get to be so lucky? And, will this continue during 2021?

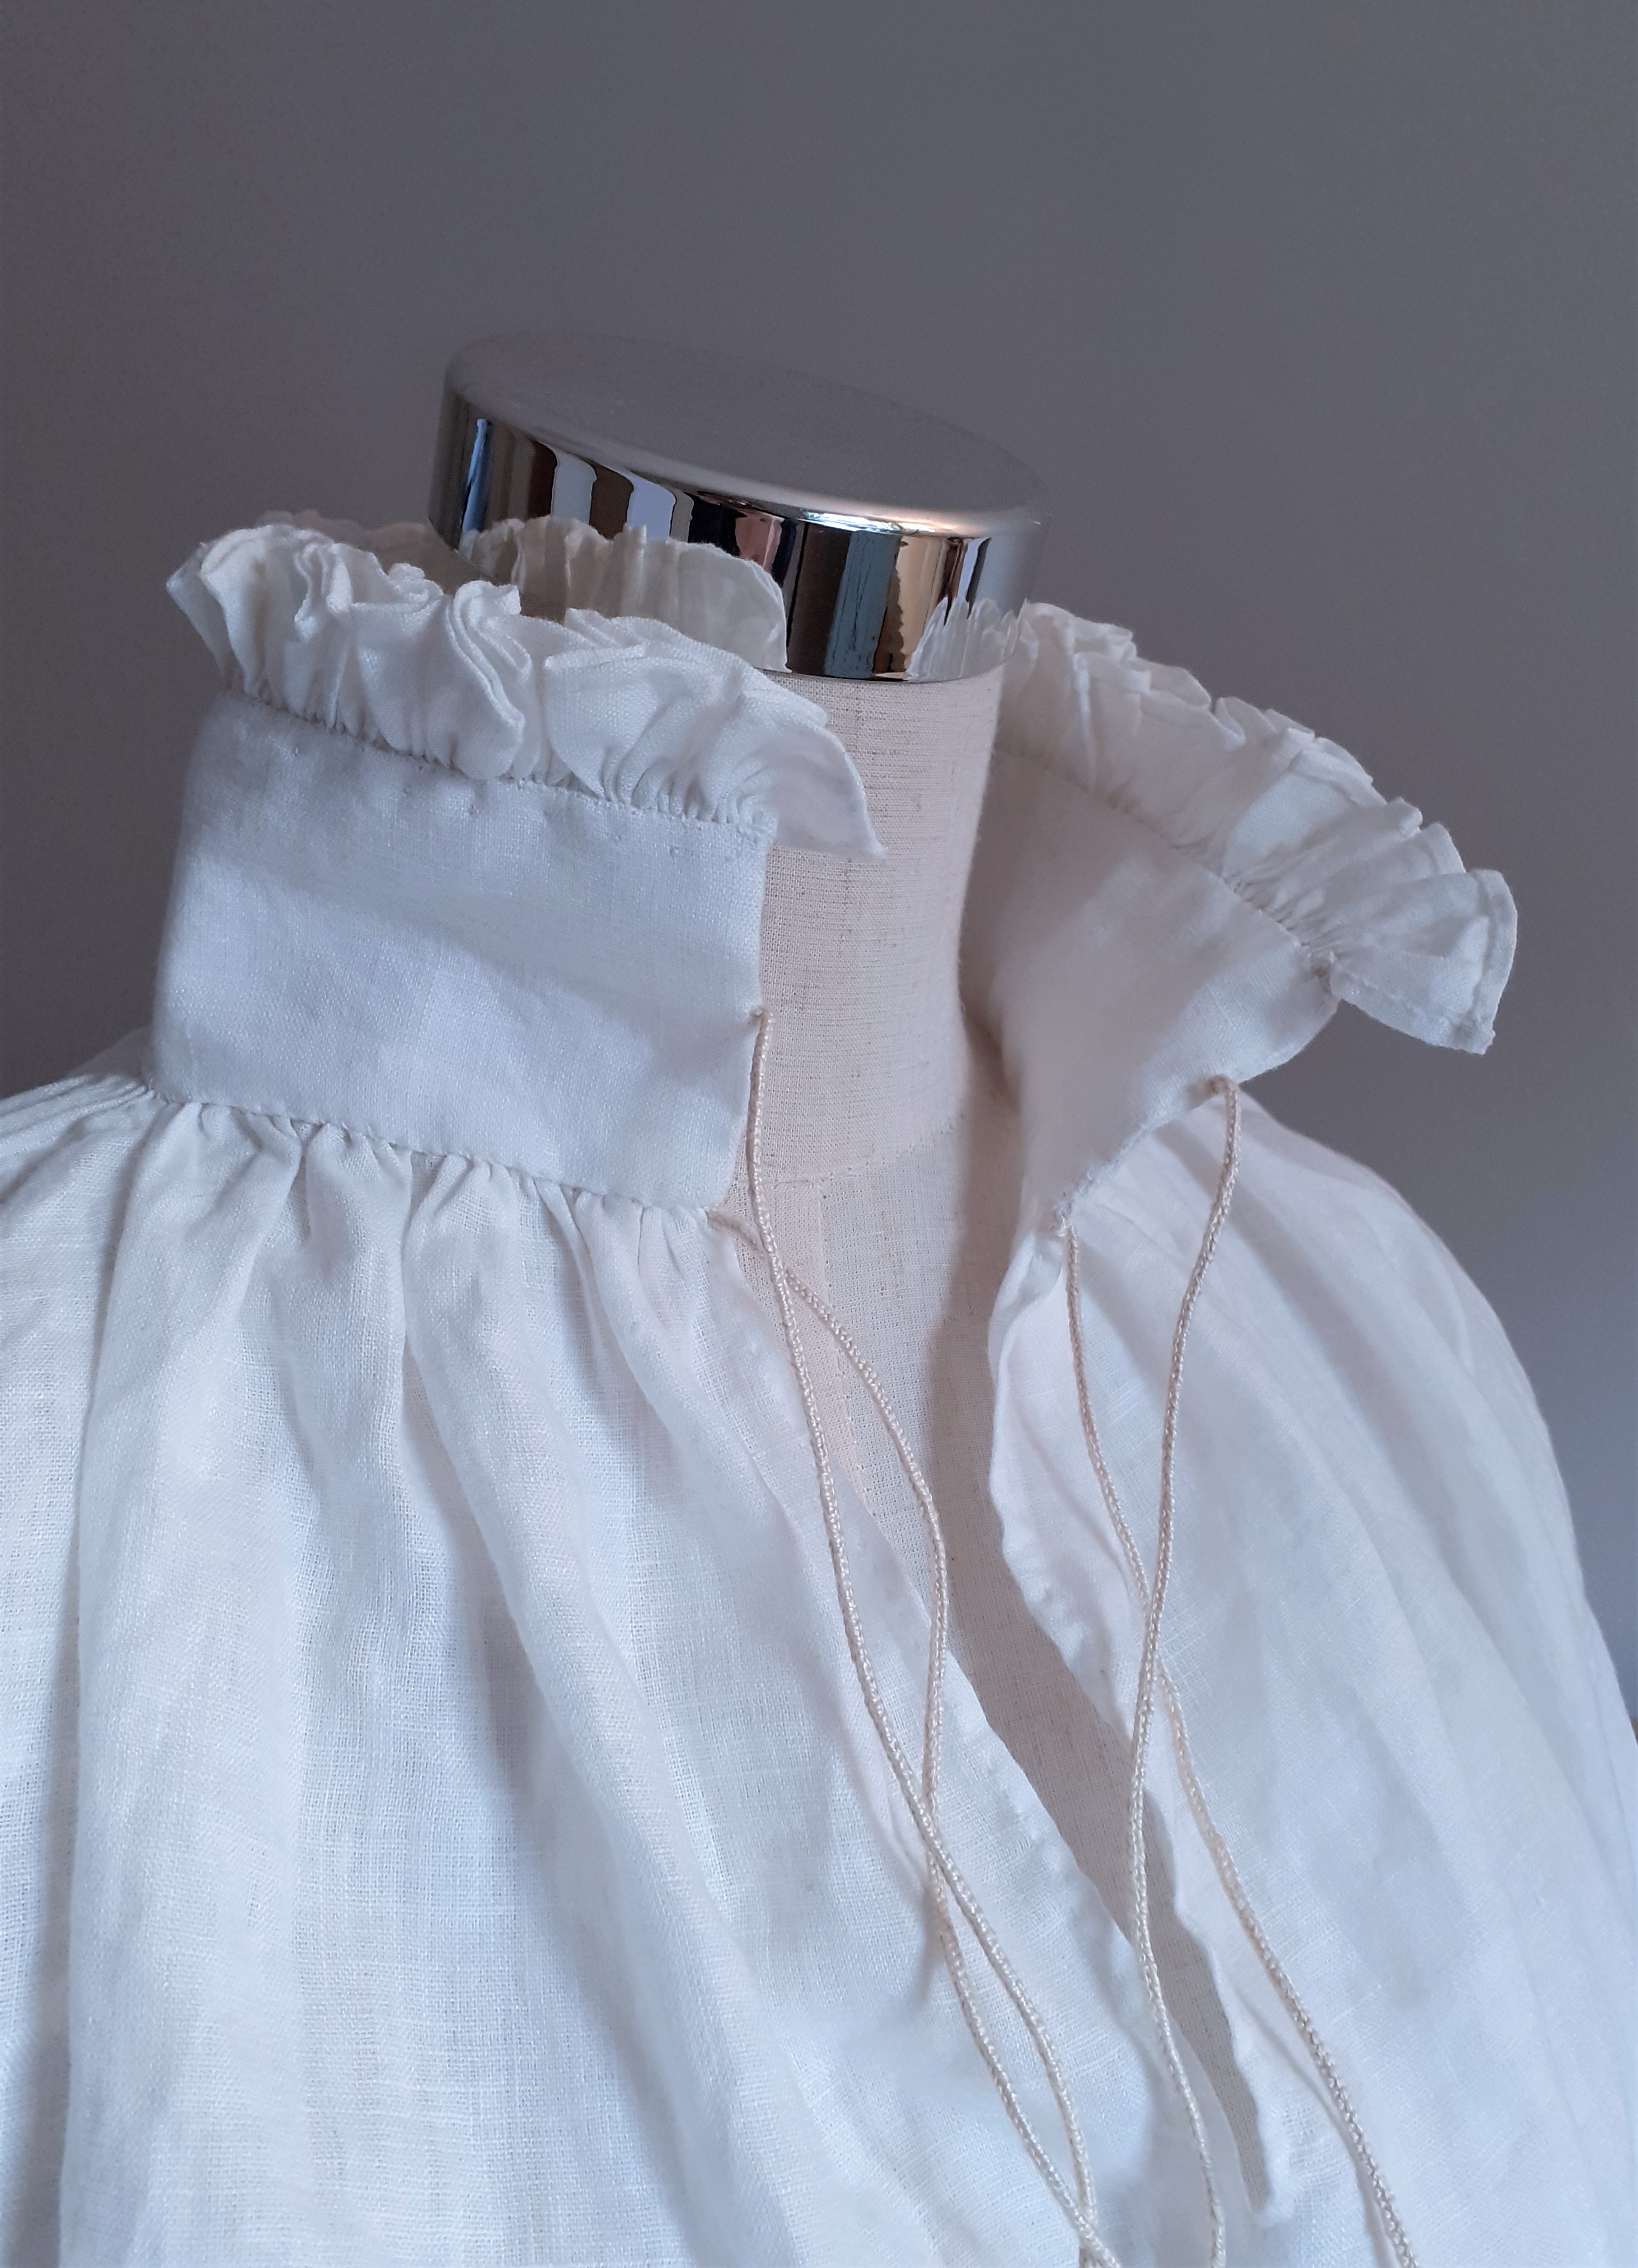
A hand-sewn 16th century shirt inspired by the Sture shirt (without decorations and embroidery). This shirt took over 40 hours to make, more than most dresses… Is it pretty? Yes. Was it worth it? Give me another year before I answer…

I have also worked on 18th century clothing, learning more about the period and the methods in use. There’s a couple of skirts, a jacket in wool and one in printed cotton, as well as a small linen cap. I am looking forward to going to new kinds of events and trying out the kit to see if it will work.

I made a new short-sleeved kirtle with a waist seam, similar to the blue Weyden-inspired dress from years ago. This dress is rather loose (I might need to take it in a bit in the side seams) and it’s made with a curved front seam. It is going to be a great working kirtle! The long-sleeved green 15th c dress also got sold, they mysteriously shrank in the wardrobe during last winter)

Apart from sewing I also dived into some video making, filmed lectures for the digital Medieval Week as well as setting up a new Youtube channel, and working with content for my Patreon page. Video editing and voice-overs still make me sweat, but my plan is to continue to improve in these new areas, creating more and better content for you readers. Patreon makes this possible since I get support to work with my content, and my hope for 2021 is that my page will continue to grow, inspire and teach handcrafting ideas to everyone interested!

It feels like it is early yet to plan for this year, but of course, I am hoping for a market season of some kind, and I have so much new content for sewing workshops and material for a new viking lecture as well. As for the blog, there is a long list with tutorials to make, as much as I have time for. All concluded, it really feels like 2021 will be a Great Year!


4 Comments

The Herjolfnes dress

Last year I made a woolen dress, based on the cut, sewing technics and seams from the finds from Herjolfnes, Greenland. I really didn’t plan it, I just had this sudden burst of creativity and had to make a plain, undyed working dress… The fabric is from Medeltidsmode, and it is an undyed natural wool that was just lovely to work with, the seams went very well, and the drape of the shirt is really good to. It is based on two different models, but with my measures- so it is a historical reconstruction with a practical use in mind.

Cutting out the pieces

And sewing them together with running stitches in wool thread

Sewing gores from the right side of the dress, with a whip stitch

The hems are made by a single fold, whip stitched and then sewed with another seam according to the finds. To finish of the hems two times was a bit tiring, but the result went very well, with especially the neckline and wrist coming out nice and stable for wear.

All inside seams are felled and whip stitched down, to make them more durable and the inside smooth and pretty.

There are several gores in the dress, both in the shirt and in the sides, that goes up to the arm holes. This gives the dress lots of hem line, as well as a nice drape. If you would like to make a dress more modern flattering, you could begin the width in the side seams by the waist. My dress is lose almost under the bust, which makes for a warm dress, that is easy to get in and out of, and probably good for medieval pregnancy if you are interested in trying that out…

The dress is so comfy, and despite a rather smooth fit over arms and shoulders it is easy to move in it.

On these photos I have rolled up my sleeves a bit and you can see the linen shift, a good way of keeping your sleeves dry when doing dishes.

Definitly one of my favourite dresses right now, it being so simple and yet pretty!


1 Comment

Fur lined gollar- step by step

Fur can be tricky, so here’s some help on the way if you are going to fur line your garment (like this late 15- early 16th century gollar). This method may be used with a good fake fur too!

I am guessing that you historically either treated the fur like a garment of your own (sew the fur together to a garment, then attach it to the outer fabric) or as a fabric lining (cut out the pieces of fur and stitch it to the seam allowances of the outer fabric once this is sewed together). A mix of these two might also be the case, due to the different challenges you face when fur lining a garment without it getting bulky.

If you only want a strip of fur on your garment, I find it easiest to cut out the fur pieces, and treat them like fabric lining; cut them straight and clean, join small bits if necessary before sewing them to the outer fabric. In contemporary art the fully fur lined garments seem to be the most common one, but some artwork you could interpret as only having trims in fur. Fur was both fashionable and warm and used in many garments, and I have a fully lined gollar. This one becomes too warm during summer, and also take a lot of space in the bag when packing, so I thought this new one would be a good alternative; fashionable, with the fur to warm me against the wind, but lighter in both warmth and packing space.

I started with my wool gollar; I cut out the main piece and the collar and sewed them together with running stitches. A common thread for the period is uncoloured linen thread, so I used that and waxed it to make it more durable while sewing backstitches. After the pieces were joined together, I pressed down the seam and cut down the seam allowance on one side, and felled the seam allowance with whipstitching. This makes the seam more smooth and adds durability to the garment.

I tried to lay the gollar out flat, for you to get a good look. Note that it is not a full circle, you want it to lay flat against your back and shoulders in a tight fit. The fit on the gollar you’ll have to try out on yourself; so make one out of scrap fabric if this is your first one!

I measured the collar and the front where I wanted the fur to be, and cut out strips of fur to match them. I then sewed them into place with linen thread and a small, regular needle. A thinner needle makes it easier to sew in fur, and pinning the fur into place makes sure it doesn’t stretch or slides. If you find it hard to use pins, try with fabric clamps/sewing clamps instead.

At the corners, I just sew the fur to the fabric and leave the leftover fur for later. Note that I treat the fur like fabric; sewing the furry side to the right side of the fabric.

When the fur is sewn onto the fabric, I cut away the leftover and trim the edges down.

At the corners I trim away enough fur so when I fold the fur inside the garment it will not get bulky but fit together edge to edge.

At the bottom edge, I want the fur to follow the curved front of the gollar, so I mark this with a pen and then cut it away.

After trimming down the fur, I fold it to the inside of the gollar, and pin it in place. Make sure it lays flat when wearing the garment; fur can be tricky and does not adjust the way fabric does. When you are happy with the fit, sew the fur in place with whip stitches, or attach it to a lining. In the corners the two pieces of fur should barely meet, the hair will hide the seam, so just sew them together loosely.

I chose to have a lining inside my gollar in a thin woollen fabric, to add warmth and make it easier to sew the fur down with no visible stitching.(a fully lined gollar can be seen in art.) For the lining, I cut out another gollar, without a collar (because the fur strip will cover the inside of my collar) and without the parts that would be covered with fur. When fastening the lining in the gollar, pin it or baste in place and then sew it at the same time as you attach the fur on the inside. Start with the collar, and then the front opening going down.

Sewing in fur is time-consuming and quite tiring for the fingers. Nice company or a movie is good to have!

When the fur (and lining) is attached around the gollar I stitched the lower hem with whip stitches. To make the seam smooth, I cut away some excess lining fabric, as can be seen in the photo. So; adjust the lining, cut off excess seam allowance, pin and whip stitch.

To fasten the gollar you can use dress pins, small fabric strips, ribbons or lucet braided strings, hooks and eyes or do as I did; add a fancy clasp at the throat. At the end of the sewing, I didn’t really like that the fur was so visible at the bottom, so I trimmed it down quite hard. Another option would have been to let the fur finish on the inside of the gollar, so it was not so obvious that the gollar was not fur-lined all the way around. Cheating is hard sometimes…

The clasp is a late 15th century find from Sweden, with A standing for “amore”. It added nicely, but for a commoner, a hidden fastening would do better.

A note about fur; I recommend you put some thought and money into the purchase of fur. There are still many fur-fabrics and farms that treat animals like shit, where the animals suffer greatly to become your hobby-based garment. If you buy rabbit skin for 7-9 Euro/skin you probably support these farms, even if not buying directly from them. A better option would be to buy fur from local farms where you can visit the animals, and get to leave the skin at the tanner yourself. You can also find good choices on the internet, buy second-hand or choose fake-fur from the fabric store (not the most historically accurate, but I rather go modern than using unethical furs) I had the fortune of finding a lady breeding rabbits in her garden as a part-time income, and got to buy furs from her, tanned locally by a handcrafter. These were about 30E a piece, so really reasonable in price!

Some examples of gollars being worn by 16th century common people during dances. Some of them seem to have a fur line around the hem (as being fur-lined) while others could be unlined or lined with fabric.