


In this tutorial, a gore is a triangular-shaped piece of fabric sewn into the garment. A gusset is a square piece of fabric, sewn into the armpit to add movability and space, used on shifts and shirts to take a few examples.
How do they work?
A gore inserted in your sleeve will add space and freedom of movement. Depending on the placement of the gore in the sleeve, it will add space to different effects, like moving your arm up and forward or adjusting your sleeve to larger muscles in your arms.
Why do you want to use gores in sleeves?
Gores might have several reasons to be where they are:
To save fabric while cutting out your fabric pieces.
To add movability by cutting the gore on another grain than the rest of the sleeve.
To mend a broken sleeve or seam.
To enlargen a sleeve being to narrow.
Gores might be inserted while making your garment, but also afterwards if you feel a need to adjust the fit. This guide shows you how to put in a gore in a cut slit at the front of the sleeve, but you can also add gores to the seam on an S-shaped sleeve. The principle is the same; fitting the sleeve into the armhole and then adding as much gore as you need to make the sleeve ”whole”.
An example of how this method was used during the medieval period is the Moy Bog dress, which has a similar gore. Maybe an adjustment to add space to a new wearer that had more mass over arms and shoulders?
The easiest way to make well-fitted sleeve gores is to cut out a piece of fabric, pin/baste it on the inside of the assembled garment, and sew it in place. Here is a step to step guide on how I do:

This dress has a tight fit, and I decided on a small gore in the sleeve front to add a bit more flexibility and movement.

I started with inserting the sleeve in the armhole and then cutting up a slit in the front to make the sleeve fit all around (this means you will have to make a sleeve that has a slightly smaller measure than the armhole if you make a new dress.) When I am satisfied with the inserted sleeve and slit, I press the seam allowance to the inside and start with the pattern for the gore.

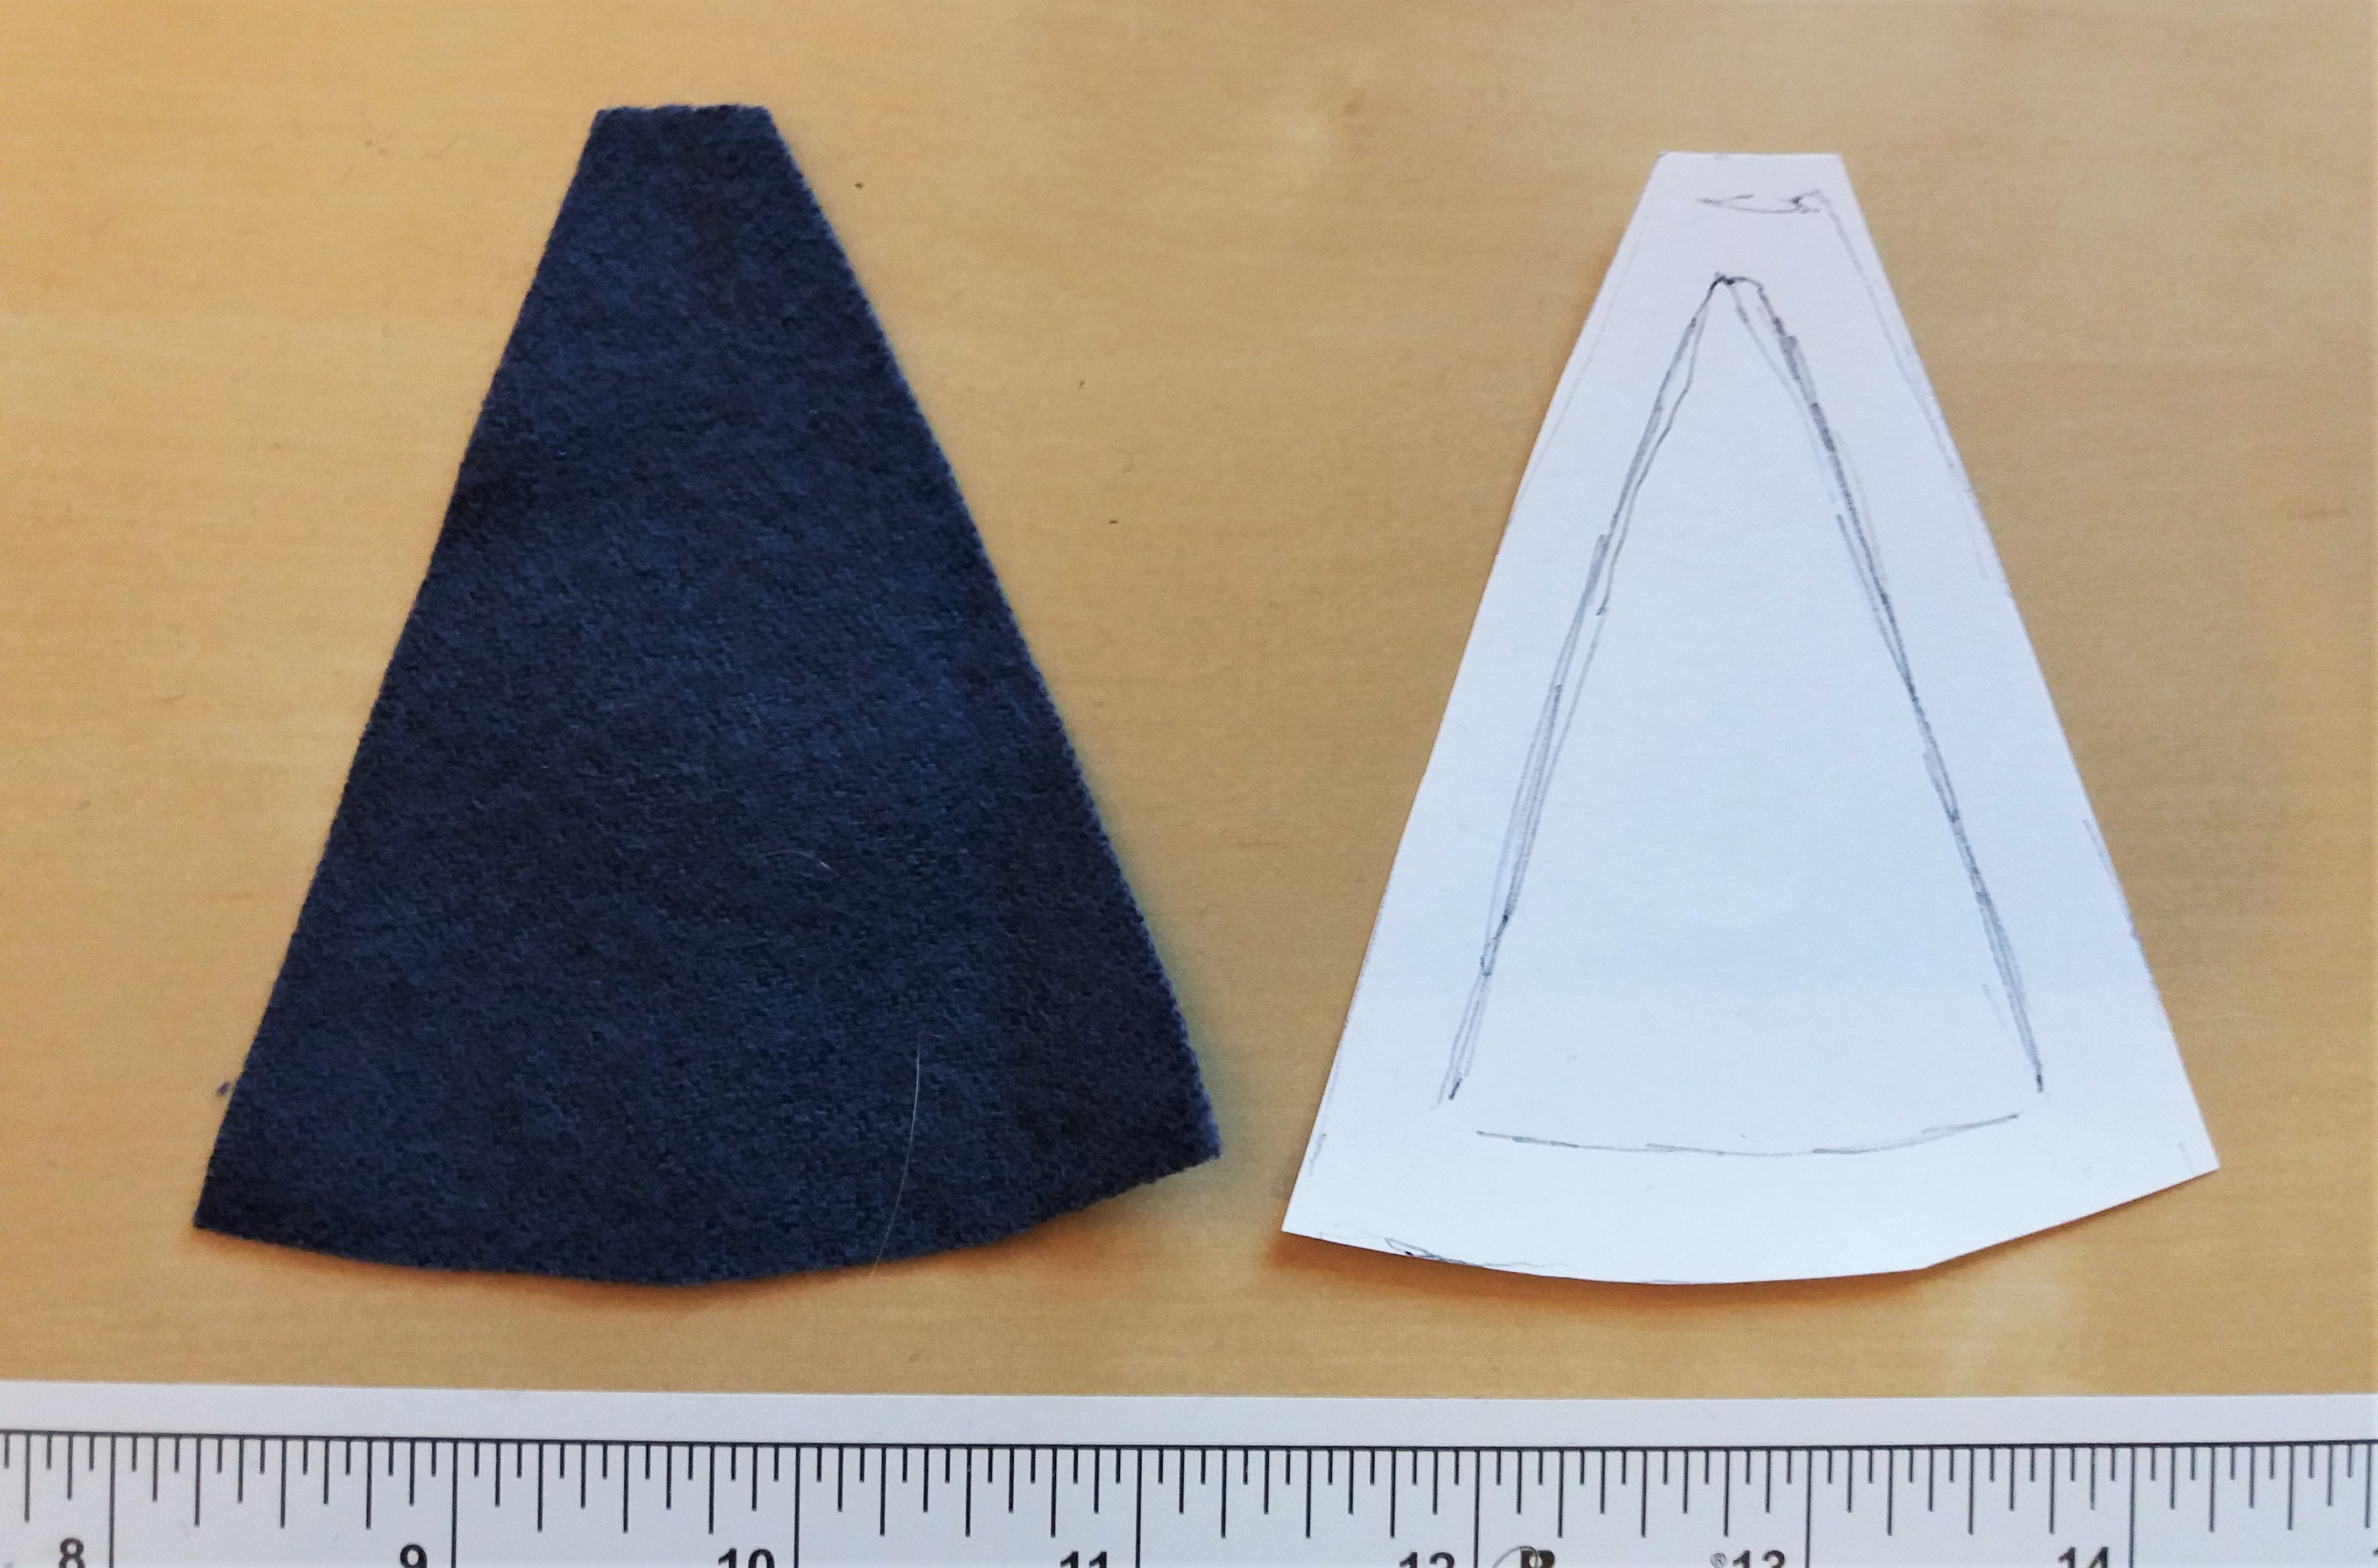
Put a piece of paper on the inside of the dress, and smooth the fabric on top of this. Draw a paper draft for the gore by tracing the ”hole” on your paper. Very easy!

Add seam allowance around the draft, and cut out.

Put the paper pattern onto fabric and draw + cut two gores, one for each sleeve. Remember to mirror the pattern and mark the gore with up/down and front/back.
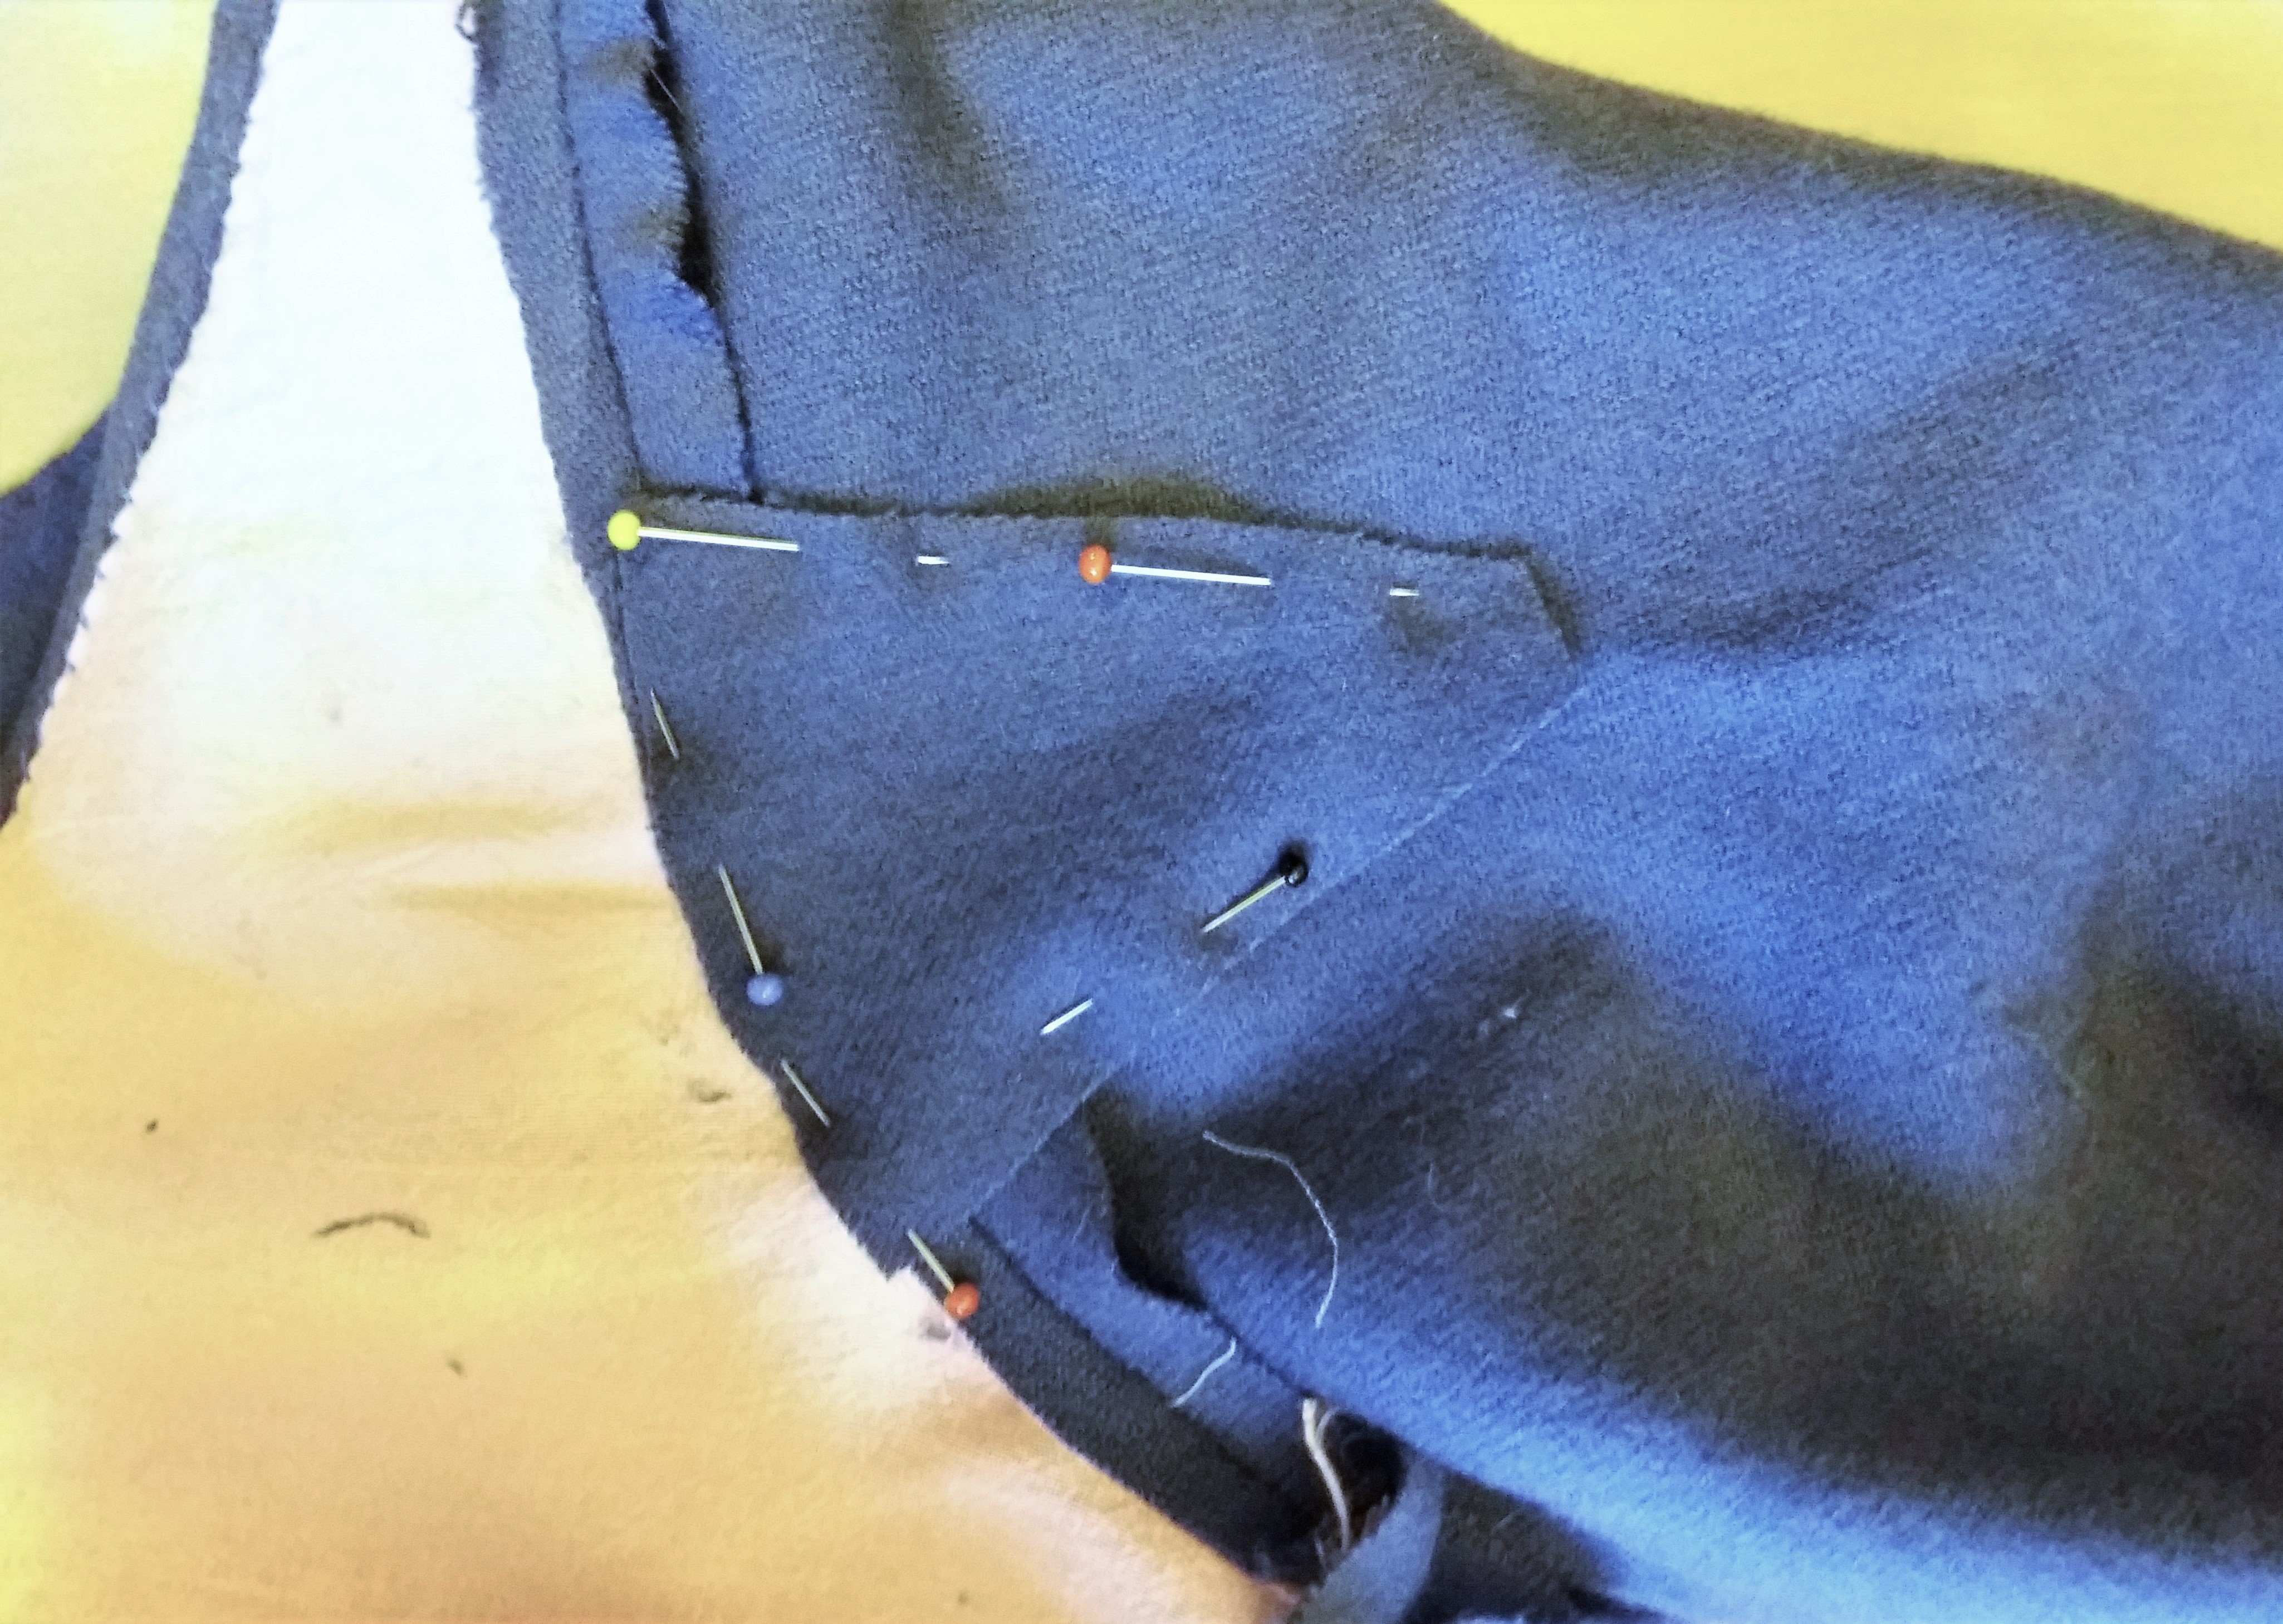
Fit the fabric gores into the sleeve slits, and pin in place (here I worked on the inside, but if you find it easier you can work from the outside of the garment).
This is what it looks like from the right side of the dress:

With pins in place, baste or sew the gore into your garment. Here I used small whip stitching, not bothering with basting. But if you are unsure or want to test the fit before sewing, basting is a great way to do that. Fastening the gore from the right side of the garment makes it easy to get a good result, since you can see the result while sewing.

When I have inserted the gore, the seam allowance is most often pressed to either side (down to the sleeve) and whip stitched down. I always press the s.a towards the bigger fabric piece. For example, sewing it down onto the sleeve and/or body piece. After that, it is all done!

The new blue gown also has a gore in the front of the sleeve, barely visible but great for movement!