


Here is a list of what you need, and some easy steps to follow to make one of your own!
What you need:
- 2-3 m *1.5 m fabric (2 m= small, 3 m=large)
- scissor
- measuring tape
- markers for fabric
- pins
- needle and thread or a sewing machine
- a friend to assist with the final adjustments on the dress
The measurements you need:
- Armpit-hemd (3) (as long as you want the dress to be) + 3 cm sewing allowance at the bottom, and 5 cm at the top if you would like to make the dress with a higher look (like my green one) when measuring from the armpit; start as high up as you can get under the arm. you will cut out space for your arm movement later.
- Width around your body (1) (the widest part of your body, often around your bust. Divide this measurement in 4 and then add 4cm to each piece (seam allowance and leisure of movement)
- Armpit-waist (2) (in this case, your waist is your slimmest part of your body, after which the dress is going to get wider)
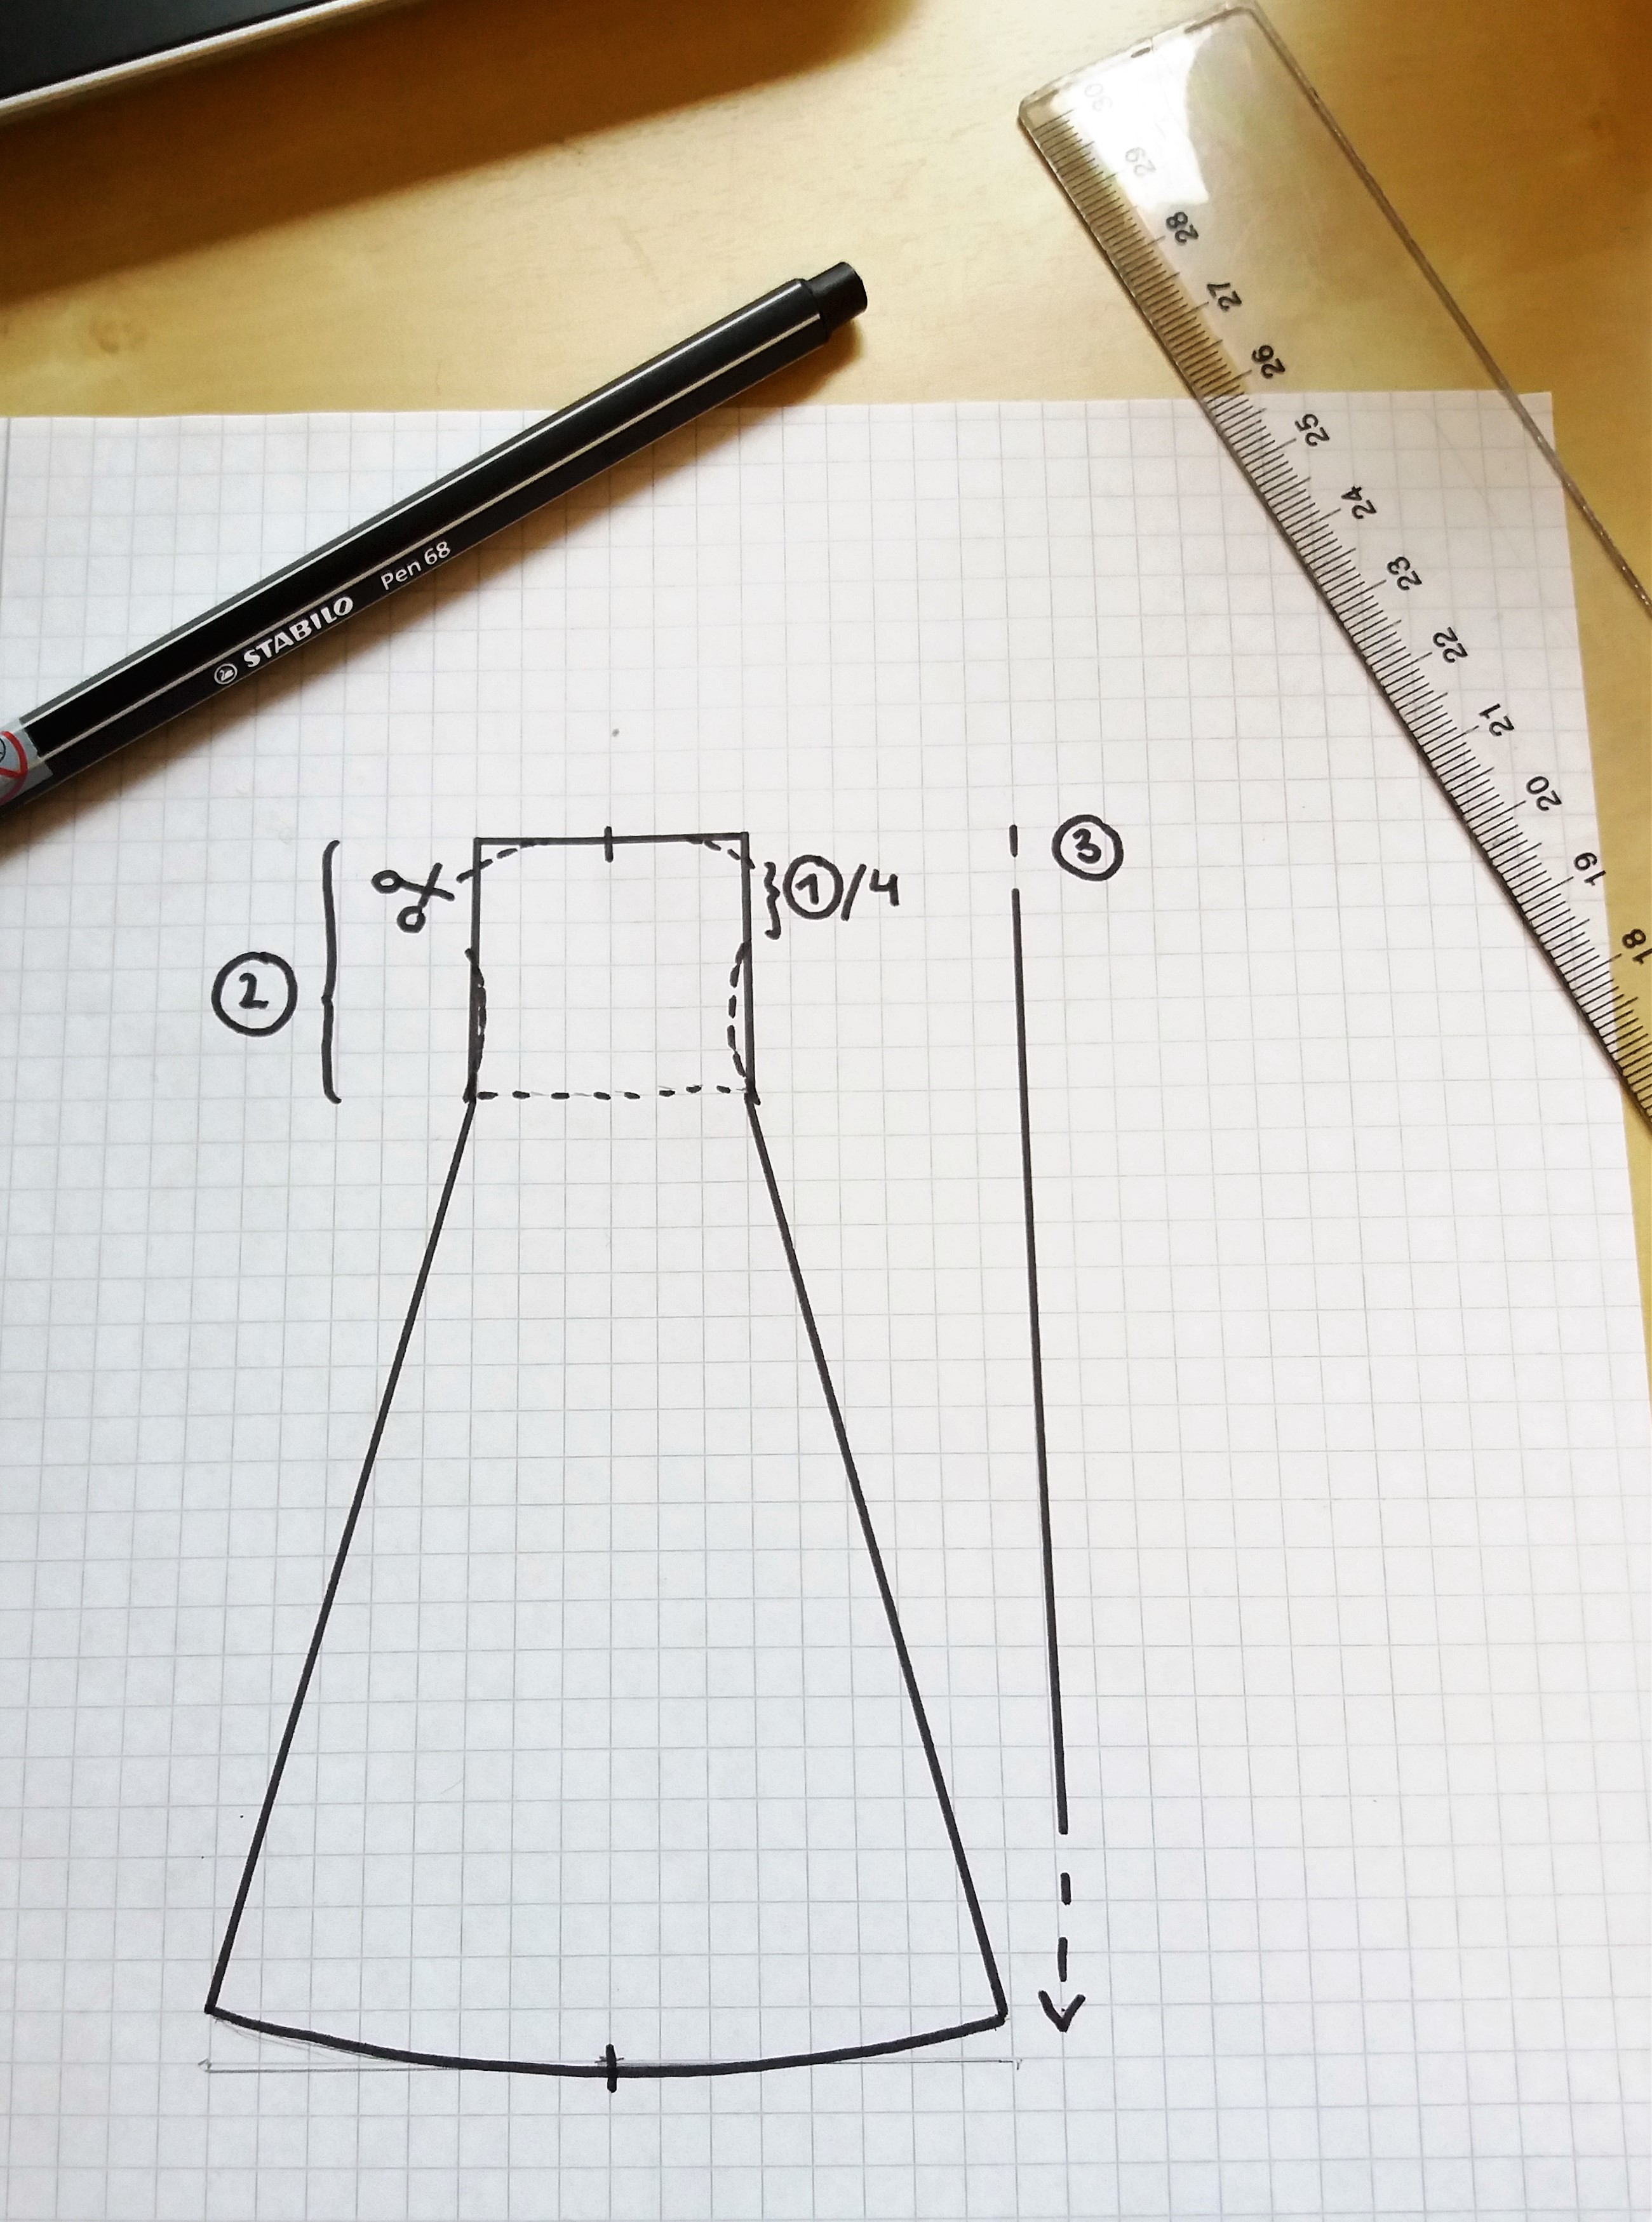
I chose to make my dress rather fitted, but a more loose style will make it possible to wear a pair of underdresses under it, which can be nice during colder weather. The 4 pieces are of the same size and shape. They start out straight and then gets wider at the waist.
The amount of fabric you need depends on your measurements, but I drafted up three different ways of putting your pattern pieces out on your fabric, depending on how much fabric you want to use.
For the draft to work you need to have a fabric that is 150 cm in width, and the dress can not be longer than that. 1F + 2F is the two side pieces, 3B + 4B is the front and back ones. The bottom-left draft shows how you can use the fabric in an effective way by doing a gore in one panel.
The upper pattern takes 250 cm of fabric and gives you a dress with a hem circumference of 80cm *4= 320 cm. You can absolutely do with less; the one at the bottom- right gives you a hem of about 270 cm, using under 200 cm of fabric. This is for a small-medium sized person. If you have a larger size, remember to add width not just to your upper area but to the skirt as well, to make the dress drape nicely and give you space to move.

After cutting the pieces from the fabric, baste them together in order to try the size and fitting. The dotted lines on the picture above indicate where you can fit the dress (waist+under the bust, under the armpit and at the small of your back). When you try out the dress, remember to have your shift underneath so it won’t get too small. If you’re using a modern bra during your viking adventures, then also wear it during fitting sessions.

When the dress is done, I usually make the straps in linen or wool fabric (linen straps are more common in finds). Make them as narrow bands (folded double) and sew them on to the back of your dress at the same position as your bra straps would be, this will make them fit comfortably on your shoulders. In the front, you may sew them down to the dress if you haven’t got tortoise brooches yet, otherwise use these to fasten the straps to the dress. I prefer to do a loop at the end of the strap, and then another one at the front of the dress; these you can clearly see in finds from the viking age, and it also makes it easier to use the brooches without damaging your fabric.

If you feel that you would like to add something; decorations are a nice way to spice up your apron dress. A tablet woven band, a small piece of silk fabric or a silver thread posament are all find-based decorations from the viking age. Good luck with your sewing!
17/09/2017 at 15:10
Som vanligt tydliga instruktioner och jättefint slutresultat! Har bara en liten fråga (som kanske egentligen är mer allmän): Är det svårt att få på den sen? De ser nämligen alltid så figurnära och tajta ut?
17/09/2017 at 19:27
Ja, de kräver ju en del ålande och att man har armarna lyfta ovanför huvudet när man drar på sig dem. Men de ska inte vara så tajta att det blir åla-sig-in-i fodral, det är skärningen, att du syr in klänningen lite när du har sytt ihop den, och val av tyg som bildar den där formade looken =)
19/06/2018 at 06:25
I love the blue diamond twill underdress you made. Where did you find the fabric?
25/06/2018 at 10:08
Oh, the apron dress? I don’t remember for sure, but I think Elna has something similar in her shop; https://www.historical-fabrics.com/product-page/diamond-twill-blue-white
25/06/2018 at 19:23
Thanks very much!
18/10/2019 at 18:33
Stupid question: How does the dress fasten? If it’s nicely fitted it would be hard to get on and off.
18/10/2019 at 20:19
It is not as thight as you might think, but the curves gives you a feeling of a good fit. I simply pull it over my head, squiggling out of it =)
01/10/2022 at 18:14
Your work is beautiful and absolutely impeccable. Thank you for sharing.
01/10/2022 at 20:22
thank you for your kind words =)
09/05/2023 at 22:50
Hey,
I really like your instructions <3 Thanks for sharing!
Hope my little skills are enough to do this apron dress.
And here's my quite strange question:
Do you have any recommendations for modifications for a better, nicer fit for me? I am "blessed" with kind of weird body part combination: my butt is quite big, lordosis, some belly fat, close to no tallie and the bust is somehow small compared to the "extended features" further down. So, if I have a "straight fit" dress, the butt normally lifts the skirt's hem in the back, while there's nothing to fill a dress in the upper lumbal region. On the front the bust is not big enough to build a "balcony" over the belly to somehow hide its size. And I really don't like clothes that are cuddly-close to my lovehandles showing every detail.
If it's "loose fit" for the belly there's usually too much textile around the bust.
See? I'm a special creature ;-P
10/05/2023 at 13:14
Hi, and thank you for your post =) First; regarding body features- nothing is more or less correct. It is just that in this era of fast fashion, everything is tailored to hang from the shoulders of a thin model, because that is the easiest way to sew and construct clothing without having the measurements of a real body. We are so used to this now, that we do not realise clothing is supposed to adjust to the body, and not the other way around.
When I adjust the apron dress to a body that needs more width at the hip section, I either add gores in the sides, or make the dress wider at the hem. Measure yourself and compare to the pieces drafted on a piece of paper, and check the measure by the hip section. If you want a more snug fit at the top, you can adjust this in the end by taking in the seams as needed. I would also choose a medium heavy fabric with a visible weave to create some sturdiness but above all a nice heavy drape. 300-400 gram in a 2 or 3 shafted diagonal twill, not fulled, if you can find =)
11/05/2023 at 07:10
I’m a little curious- according to your cutting layout (unless I’m reading it wrong), the dress pieces are not cut on the straight of the fabric. Does the dress stretch as you wear it, or does the wool you’re using not behave that way?
07/06/2023 at 16:02
Seams (cuts) made on the diagonal may stretch a little- you can sew your dress and then leave it hanging for a week or so to let it stretch out before cutting the edge and hemming it =) the amount of stretching will depend on the fabric and material.
31/05/2023 at 02:44
This may be the dumbest question in the world but how did you measure to get the rounded bottom on your pattern?
07/06/2023 at 16:00
You can adjust the bottom hem in two ways; measuring the side seams and cutting of the extras in comparision to the length of the garment at the middle front, or just trying on the dress when assembled and then adjust the hem (with the help of someone) so it is even against the ground =)